VUE+Express+MongoDB前後端分離實現一個便簽墻
計劃來實現一個便簽墻系列,這個東西做簡單也簡單,往復雜瞭做功能也很多,記錄一下從零到有的開發過程吧,希望最後能把這個項目做得很完善。
首先是前後端分離架構,前端用vue,後臺我們就用express,數據庫用mongodb吧。
在腦袋裡過一下,最最開始,要完成一個怎樣的雛形呢?先把用戶登錄管理放在一邊,當然是便簽的增刪改查+顯示啊!
那麼,我們就來實現“初號機”,一張張便簽的顯示,增加,修改,刪除。
1、怎麼說也得先把樣式畫出來
先別管接口,先把純前端的問題解決先,我們先來一個像模像樣的“黑板”,對瞭,這裡推薦一個網站https://www.transparenttextures.com/,可以生成你喜歡的壁紙素材,於是就有瞭:

好瞭,我們要在這塊黑板上“貼上”我們的便簽瞭,這一塊就是css的東西瞭,這個就看大傢的美術設計功底瞭,我隨意瞭:

那麼重要的一點是,在這塊背景板上,便簽就應該是可以隨意貼在你想要的位置,所以對於便簽,用戶應該可以拖拽並記錄位置。
所以將便簽div采取position: absolute,然後用top: y px和left: x px來實現定位。
於是我們考慮單個便簽對象包含的屬性有:
x: 便簽距容器左側距離, left的值
y: 便簽距容器上邊界距離, top得值
txt: 便簽的內容
title: 標題
color: {
bg: “”, // 背景色
pin: “” // 回形針顏色
}
接下來我們就來實現便簽的拖動:
(1) 在便簽的div上綁定鼠標點擊函數:
@mousedown=”mousedown($event)”
(2) 實現拖動:
mousedown: function(event) {
      let _this = this;
      if (!this.isEdit) {
        this.startX = event.x;
        this.startY = event.y;
        this.note.moving = true;
        document.onmousemove = event => {
          if (!_this.note.moving) return false;

          let dx = event.x - _this.startX;
          let dy = event.y - _this.startY;

          if (
            _this.note.x + dx <= 0 ||
            _this.note.x + dx >= _this.width - 250 ||
            _this.note.y + dy <= 60
          ) {
            return false;
          }

          _this.note.x1 = _this.note.x + dx;
          _this.note.y1 = _this.note.y + dy;
        };
        document.onmouseup = () => {
          if (!this.isEdit) {
            this.note.moving = false;
            this.note.x = this.note.x1;
            this.note.y = this.note.y1;
            this.saveNote();
            document.onmousemove = null;
            document.onmouseup = null;
          }
        };
      }
    }
初始記錄x和y的副本為x1,y1。用startX和startY記錄下最開始鼠標按下的位置,然後在拖動過程中和原始值計算偏移量,賦值給x1和y1進行定位,在鼠標抬起時更新x,y為最終值。
這裡有個關鍵點就是,如果用@mousemove,會導致在鼠標拖動過快的情況下,便簽不能及時跟隨鼠標,鼠標就會移出div,造成拖動失效。
所以這裡隻把mousedown綁定在目標上,而把mousemove和mouseup綁定在document上,這樣就不會擔心鼠標移快後出瞭便簽導致便簽卡住瞭。
2、對於便簽的內容,該怎麼編輯
這裡設計一個按鈕,鼠標hover上去後,顯示按鈕;點擊編輯按鈕,讓便簽內容變成可編輯的狀態,當內容區域blur的時候自動保存。


由於div便簽沒有blur事件,所以在編輯狀態下,將內容區域變為textarea:
 <div
      class="note-content"
      v-if="!isEdit"
      v-html="content"
      :ref="'note' + index"
    ></div>
    <el-input
      v-else
      class="note-content my-textarea"
      type="textarea"
      placeholder="請輸入內容"
      :autosize="{ minRows: 10 }"
      v-model="content"
      :ref="'note' + index"
      @blur="handleChange"
    ></el-input>
很明顯,這裡的內容得用innerHTML結果保存,因為我們要保存換行回車空格這些樣式,使顯示保持一致,所以在獲取編輯的字符串我們要用正則進行替換:
this.content = this.content
.replace(/\r\n/g, “<br/>”)
.replace(/\n/g, “<br/>”)
.replace(/\s/g, “ ”);
變成編輯狀態時,我們要把形式再轉換一下給textarea:
this.content = this.content
.replace(/ /g, ” “)
.replace(/<br\/>/g, “\r\n”);

3、下面不就是調接口的時候瞭
express框架這裡就不再贅述瞭,我們用mongoose連接mongodb數據庫,創建controller文件夾,增加note.js來實現數據庫操作:
// controller/note.js
const Notes = require("../model/notes");
var mongoose = require('mongoose');
module.exports = {
  updateNote(obj) {
    if (!obj.params._id) {
      obj.params._id = new mongoose.mongo.ObjectID();
    }
    return Notes.findByIdAndUpdate(
      obj.params && obj.params._id,
      {
        $set: obj.body
      },
      {
        upsert: true,
        new: true,
        setDefaultsOnInsert: true
      }
    )
      .then(function (newobj) {
        return Promise.resolve({
          status: 200,
          messgae: "OK"
        });
      })
      .catch((err) => {
        return Promise.reject(err);
      });
  },
  getNotes() {
    return new Promise(function (resolve, reject) {
      Notes.find()
        .then(function (newobj) {
          resolve(newobj);
        })
        .catch((err) => {
          reject(err);
        });
    });
  },
  deleteNoteById(_id) {
    return Notes.findByIdAndDelete(_id)
      .then(function (newobj) {
        return Promise.resolve({
          status: 200,
          messgae: "OK"
        });
      })
      .catch((err) => {
        return Promise.reject(err);
      });
  }
};
這裡先簡單寫寫,還可以進一步封裝好返回結果。
創建model文件夾,增加note.js存放Schema:
// model/note.js
var mongoose = require("mongoose");
var Schema = mongoose.Schema;

// 聲明一個數據集 對象
var noteSchema = new Schema({
  txt: {
    type: String,
    required: false
  },
  x: {
    type: Number
  },
  y: {
    type: Number
  },
  color: {
    type: Object
  },
  title:{
    type: String,
    default: "未命名"
  },
  createTime: {
    type: Date,
    default: Date.now
  }
});
mongoose.set("useCreateIndex", true);
mongoose.set('useFindAndModify', false);
// 將數據模型暴露出去
module.exports = mongoose.model("Notes", noteSchema, "notes");
所以,在拖動結束時、便簽blur時都要自動保存。
於是數據庫裡就會保存我們的便簽瞭:

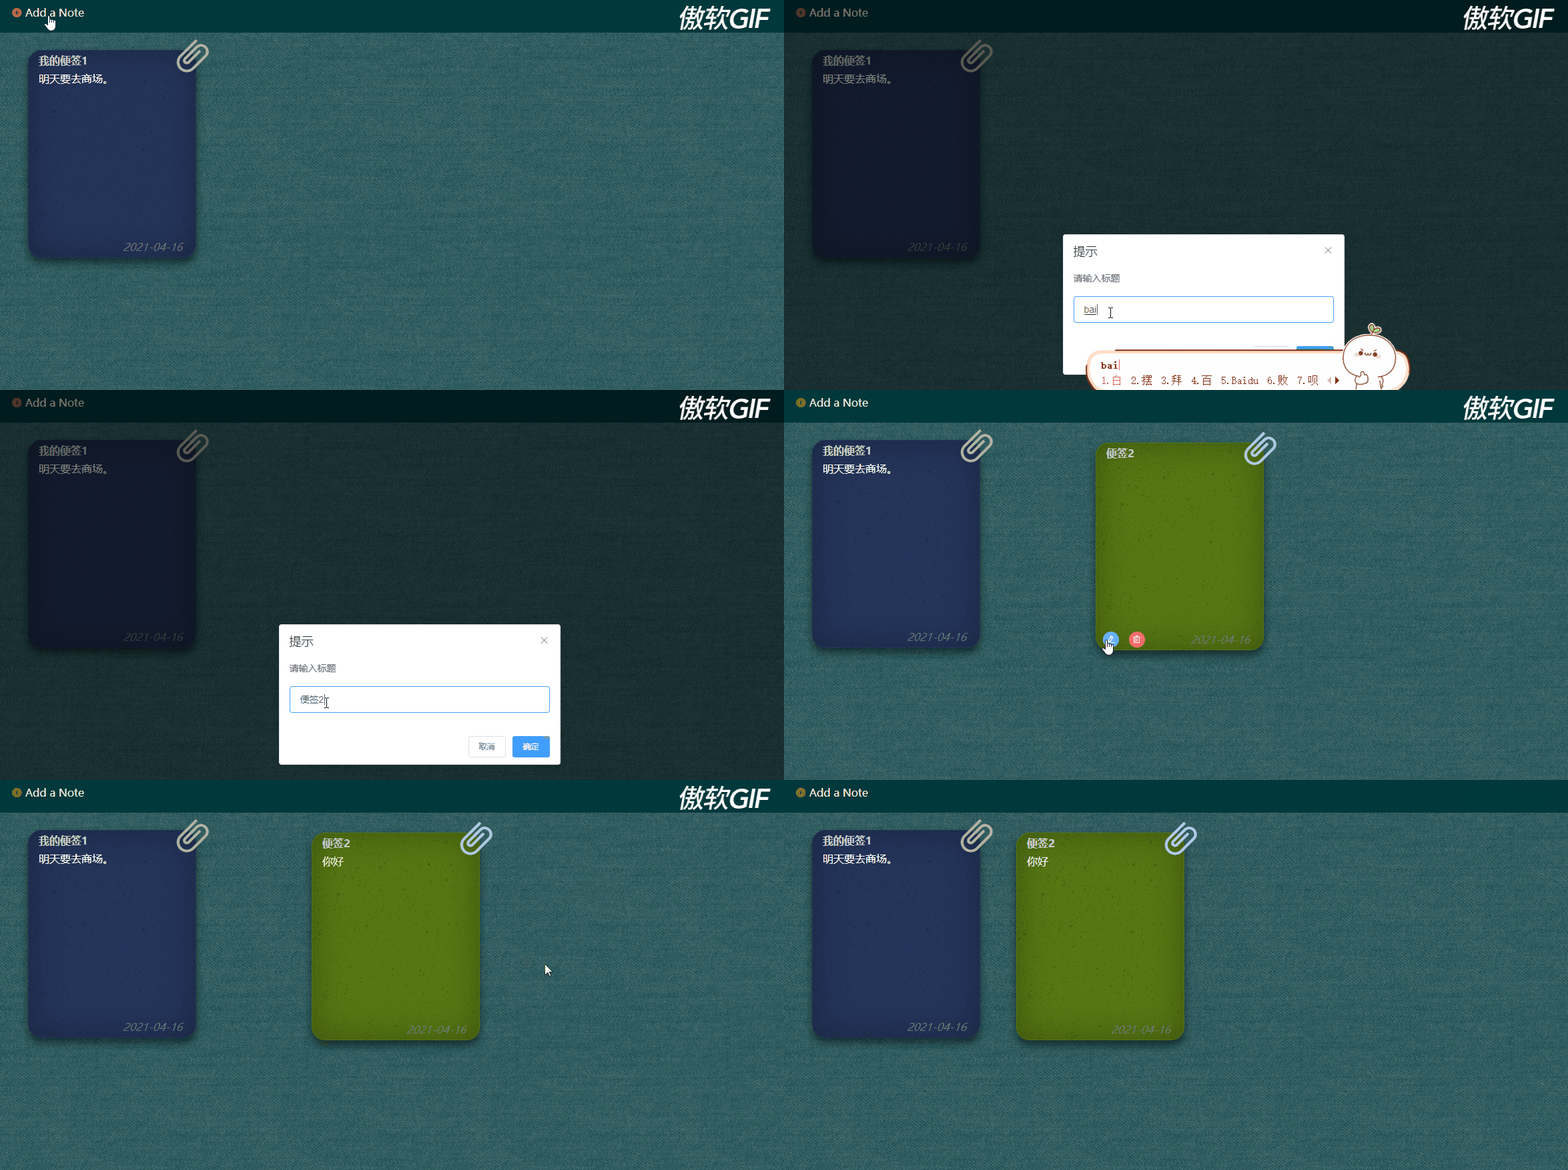
於是一個初步的雛形完成瞭,我們創建便簽,拖動,編輯,刪除,這些都是實時保存的,刷新頁面後便簽的位置都是能保留的。
下面看看效果:

接下來,還有好多任務清單沒做呢,隨便一想,功能上能完善的就很多,例如:用戶管理、時間分類、多條件查詢、便簽內容支持富文本、便簽支持自定義樣式、備忘提醒功能等等。
再接再厲,任重道遠~~~~
大傢也可關註一下Cavans小遊戲系列:
《VUE實現一個Flappy Bird~~~》
《VUE+Canvas 實現桌面彈球消磚塊小遊戲》
《VUE+Canvas實現雷霆戰機打字類小遊戲》
到此這篇關於VUE+Express+MongoDB前後端分離實現一個便簽墻的文章就介紹到這瞭,更多相關vue前後端分離便簽墻內容請搜索WalkonNet以前的文章或繼續瀏覽下面的相關文章希望大傢以後多多支持WalkonNet!
推薦閱讀:
- None Found