手擼一個 spring-boot-starter的全過程
我們使用 Spring Boot,基本上都是沉醉在它 Stater 的方便之中。Starter 為我們帶來瞭眾多的自動化配置,有瞭這些自動化配置,我們可以不費吹灰之力就能搭建一個生產級開發環境,有的小夥伴會覺得這個 Starter 好神奇呀!其實 Starter 也都是 Spring + SpringMVC 中的基礎知識點實現的,接下來帶大傢自己來擼一個 Starter ,慢慢揭開 Starter 的神秘面紗!
核心知識
其實 Starter 的核心就是條件註解 @Conditional ,當 classpath 下存在某一個 Class 時,某個配置才會生效。
定義自己的 Starter
所謂的 Starter ,其實就是一個普通的 Maven 項目,因此我們自定義 Starter ,需要首先創建一個普通的 Maven 項目,創建完成後,添加 Starter 的自動化配置類即可,如下:
<dependency>
 <groupId>org.springframework.boot</groupId>
 <artifactId>spring-boot-autoconfigure</artifactId>
 <version>2.1.8.RELEASE</version>
</dependency>
配置完成後,我們首先創建一個 HelloProperties 類,用來接受 application.properties 中註入的值,如下:
@ConfigurationProperties(prefix = "mystarter")
public class HelloProperties {

 private String name = DEFAULT_NAME;
 private String msg = DEFAULT_MSG;

 private static final String DEFAULT_NAME = "Antonio";
 private static final String DEFAULT_MSG = "Java 工程師";


 public String getName() {
  return name;
 }
 public void setName(String name) {
  this.name = name;
 }
 public String getMsg() {
  return msg;
 }
 public void setMsg(String msg) {
  this.msg = msg;
 }
}
這個配置類很好理解,將 application.properties 中配置的屬性值直接註入到這個實例中, @ConfigurationProperties 類型安全的屬性註入,即將 application.properties 文件中前綴為 mystarter 的屬性註入到這個類對應的屬性上, 最後使用時候,application.properties 中的配置文件,大概如下:
mystarter.name=zhangsan
mystarter.msg=java
配置完成 HelloProperties 後,接下來我們來定義一個 HelloService ,然後定義一個簡單的 say 方法, HelloService 的定義如下:
public class HelloService {

 private String msg;
 private String name;

 public String sayHello() {
  return name + " say " + msg + " !";
 }
 public String getMsg() {
  return msg;
 }
 public void setMsg(String msg) {
  this.msg = msg;
 }
 public String getName() {
  return name;
 }
 public void setName(String name) {
  this.name = name;
 }
}
這個很簡單,沒啥好說的。接下來就是我們的重軸戲,自動配置類的定義,用瞭很多別人定義的自定義類之後,我們也來自己定義一個自定義類。先來看代碼吧,一會松哥再慢慢解釋:
@Configuration
@EnableConfigurationProperties(HelloProperties.class)
@ConditionalOnClass(HelloService.class)
public class HelloServiceAutoConfiguration {

 @Autowired
 HelloProperties helloProperties;

 @Bean
 HelloService helloService() {

  HelloService helloService = new HelloService();
  helloService.setName(helloProperties.getName());
  helloService.setMsg(helloProperties.getMsg());
  return helloService;
 }
}
關於這一段自動配置,解釋如下:
- 首先
@Configuration註解表明這是一個配置類。 @EnableConfigurationProperties註解是使我們之前配置的@ConfigurationProperties生效,讓配置的屬性成功的進入 Bean 中。@ConditionalOnClass表示當項目當前 classpath 下存在 HelloService 時,後面的配置才生效。- 自動配置類中首先註入 HelloProperties ,這個實例中含有我們在
application.properties中配置的相關數據。 - 提供一個 HelloService 的實例,將
HelloProperties中的值註入進去。
做完這一步之後,我們的自動化配置類就算是完成瞭,接下來還需要一個 spring.factories 文件,那麼這個文件是幹嘛的呢?大傢知道我們的 Spring Boot 項目的啟動類都有一個 @SpringBootApplication 註解,這個註解的定義如下:
@SpringBootConfiguration
@EnableAutoConfiguration
@ComponentScan(excludeFilters = {
		@Filter(type = FilterType.CUSTOM, classes = TypeExcludeFilter.class),
		@Filter(type = FilterType.CUSTOM,
				classes = AutoConfigurationExcludeFilter.class) })
public @interface SpringBootApplication {
}
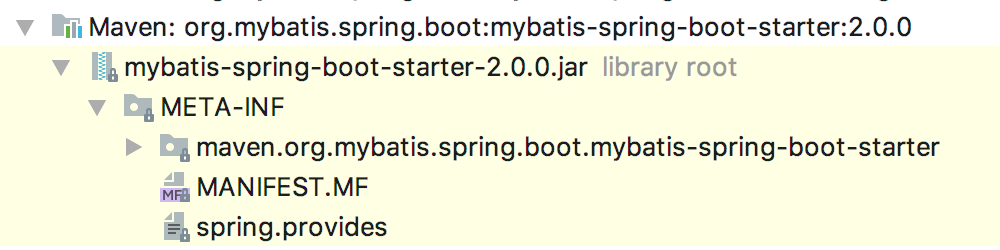
大傢看到這是一個組合註解,其中的一個組合項就是 @EnableAutoConfiguration,這個註解是幹嘛的呢?@EnableAutoConfiguration 表示啟用 Spring 應用程序上下文的自動配置,該註解會自動導入一個名為 AutoConfigurationImportSelector 的類,而這個類會去讀取一個名為 spring.factories 的文件, spring.factories 中則定義需要加載的自動化配置類,我們打開任意一個框架的 Starter ,都能看到它有一個 spring.factories 文件,例如 MyBatis 的 Starter 如下:
那麼我們自定義 Starter 當然也需要這樣一個文件,我們首先在 Maven 項目的 resources 目錄下創建一個名為 META-INF 的文件夾,然後在文件夾中創建一個名為 spring.factories 的文件,文件內容如下:
org.springframework.boot.autoconfigure.EnableAutoConfiguration=com.antonio.mystarter.HelloServiceAutoConfiguration
在這裡指定我們的自動化配置類的路徑即可。如此之後我們的自動化配置類就算完成瞭。
本地安裝
如果在公司裡,大夥可能需要將剛剛寫好的自動化配置類打包,然後上傳到 Maven 私服上,供其他同事下載使用,我這裡就簡單一些,我就不上傳私服瞭,我將這個自動化配置類安裝到本地倉庫,然後在其他項目中使用即可。安裝方式很簡單,在 IntelliJ IDEA 中,點擊右邊的 Maven Project ,然後選擇 Lifecycle 中的 install ,雙擊即可,如下:

雙擊完成後,這個 Starter 就安裝到我們本地倉庫瞭,當然小夥伴也可以使用 Maven 命令去安裝。
使用 Starter
接下來,我們來新建一個普通的 Spring Boot 工程,這個 Spring Boot 創建成功之後,加入我們自定義 Starter 的依賴,如下:
<dependency>
 <groupId>com.antonio</groupId>
 <artifactId>mystarter</artifactId>
 <version>1.0-SNAPSHOT</version>
</dependency>
此時我們引入瞭上面自定義的 Starter ,也即我們項目中現在有一個默認的 HelloService 實例可以使用,而且關於這個實例的數據,我們還可以在 application.properties 中進行配置,如下:
mystarter.name=lisi
mystarter.msg=java
配置完成後,方便起見,我這裡直接在單元測試方法中註入 HelloSerivce 實例來使用,代碼如下:
@RunWith(SpringRunner.class)
@SpringBootTest
public class UsemystarterApplicationTests {

 @Autowired
 HelloService helloService;

 @Test
 public void contextLoads() {
  System.out.println(helloService.sayHello());
 }
}
執行單元測試方法即可。
到此這篇關於手擼一個 spring-boot-starter的文章就介紹到這瞭,更多相關spring-boot-starter內容請搜索WalkonNet以前的文章或繼續瀏覽下面的相關文章希望大傢以後多多支持WalkonNet!
推薦閱讀:
- springboot自定義starter啟動器的具體使用實踐
- SpringBoot如何自定義starter啟動器的實現思路
- springboot自定義starter方法及註解實例
- 淺談SpringBoot如何自定義Starters
- SpringCloud-Spring Boot Starter使用測試及問題小結