OpenCV-Python實現輪廓的特征值
前言
輪廓自身的一些屬性特征及輪廓所包圍對象的特征對於描述圖像具有重要意義。本篇博文將介紹幾個輪廓自身的屬性特征及輪廓包圍對象的特征。
寬高比
在輪廓中,我們可以通過寬高比來描述輪廓,例如矩形的輪廓寬高比為:
寬高比=寬度/高度
下面,我們來計算矩形輪廓的寬高比,代碼如下:
import cv2

img = cv2.imread("26_1.jpg")
cv2.imshow("img", img)

# 轉換為灰度圖像
gray = cv2.cvtColor(img, cv2.COLOR_BGR2GRAY)

ret, binary = cv2.threshold(gray, 127, 255, cv2.THRESH_BINARY)
contours, hierarchy = cv2.findContours(binary, cv2.RETR_LIST, cv2.CHAIN_APPROX_SIMPLE)

x, y, w, h = cv2.boundingRect(contours[0])
cv2.rectangle(img, (x, y), (x + w, y + h), (0, 0, 255), 3)
cv2.imshow("img1", img)

aspectRatio=float(w)/h
print(aspectRatio)

cv2.waitKey()
cv2.destroyAllWindows()
運行之後,我們可以得到輪廓的寬高比約為3:

Extend
我們還可以使用輪廓面積與矩形邊界面積之比Extend來描述圖像及其輪廓特征,數學計算公式圖下:
Extend=輪廓面積/矩形邊界面積
下面,我們來計算Extend,代碼如下:
import cv2

img = cv2.imread("26_1.jpg")
cv2.imshow("img", img)

# 轉換為灰度圖像
gray = cv2.cvtColor(img, cv2.COLOR_BGR2GRAY)

ret, binary = cv2.threshold(gray, 127, 255, cv2.THRESH_BINARY)
contours, hierarchy = cv2.findContours(binary, cv2.RETR_LIST, cv2.CHAIN_APPROX_SIMPLE)

x, y, w, h = cv2.boundingRect(contours[0])
rectArea=w*h#矩形邊界面積
cntArea=cv2.contourArea(contours[0])#輪廓面積
extend=float(cntArea)/rectArea
print(extend)
本例中,輪廓面積與矩形邊界面積的比值Extend大約為0.8:

Solidity
我們還可以使用輪廓面積與凸包面積之比Solidity來衡量圖像,輪廓以及凸包的特征。其數學計算公式為:
Slidity=輪廓面積/凸包面積
下面,我們來計算Slidity,代碼如下:
import cv2

img = cv2.imread("26_1.jpg")
cv2.imshow("img", img)

# 轉換為灰度圖像
gray = cv2.cvtColor(img, cv2.COLOR_BGR2GRAY)

ret, binary = cv2.threshold(gray, 127, 255, cv2.THRESH_BINARY)
contours, hierarchy = cv2.findContours(binary, cv2.RETR_LIST, cv2.CHAIN_APPROX_SIMPLE)

x, y, w, h = cv2.boundingRect(contours[0])
cntArea=cv2.contourArea(contours[0])#輪廓面積
hull=cv2.convexHull(contours[0])
hullArea=cv2.contourArea(hull)#凸包面積
solidity=float(cntArea)/hullArea
print(solidity)
運行之後,本例輪廓面積與凸包面積的比值solidity約為1:

等效直徑
在OpenCV中,我們還可以使用等效直徑來衡量輪廓的特征值,該值是與輪廓面積相等的圓形的直徑。其數學計算公式為:

下面,我們來計算與輪廓面積相等的圓形直徑,代碼如下:
import cv2
import numpy as np

img = cv2.imread("26_1.jpg")
cv2.imshow("img", img)

# 轉換為灰度圖像
gray = cv2.cvtColor(img, cv2.COLOR_BGR2GRAY)

ret, binary = cv2.threshold(gray, 127, 255, cv2.THRESH_BINARY)
contours, hierarchy = cv2.findContours(binary, cv2.RETR_LIST, cv2.CHAIN_APPROX_SIMPLE)

x, y, w, h = cv2.boundingRect(contours[0])
cntArea=cv2.contourArea(contours[0])#輪廓面積
equiDiameter=np.sqrt(4*cntArea/np.pi)
print(equiDiameter)
cv2.circle(img,(100,100),int(equiDiameter/2),(0,255,0),3)
cv2.imshow("img1",img)
cv2.waitKey()
cv2.destroyAllWindows()
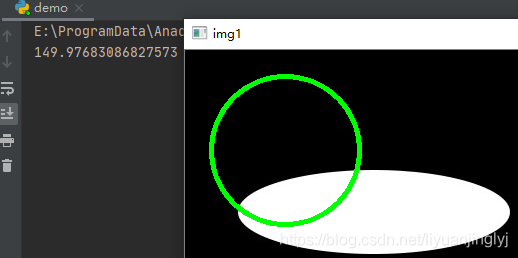
運行之後,我們得到其等效直徑約為145:
方向
在OpenCV中,函數cv2.fitEllipse()可以用來構建最優擬合橢圓,還可以在返回值內分別返回橢圓的中心點,軸長,旋轉角度信息。使用這種形式,能夠直觀地獲取橢圓的方向等信息。
函數cv2.fitEllipse()返回值為:
(x,y):橢圓的中心點
(MA,ma):橢圓水平方向軸與垂直方向軸的長度
angle:橢圓的旋轉角度
import cv2
img = cv2.imread("26_1.jpg")
cv2.imshow("img", img)
# 轉換為灰度圖像
gray = cv2.cvtColor(img, cv2.COLOR_BGR2GRAY)
ret, binary = cv2.threshold(gray, 127, 255, cv2.THRESH_BINARY)
contours, hierarchy = cv2.findContours(binary, cv2.RETR_LIST, cv2.CHAIN_APPROX_SIMPLE)
ellipsis=cv2.fitEllipse(contours[0])
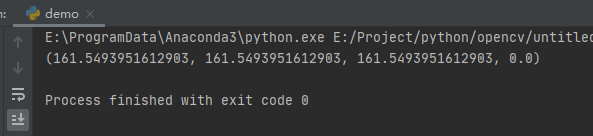
(x, y), (MA, ma), angle = cv2.fitEllipse(contours[0])
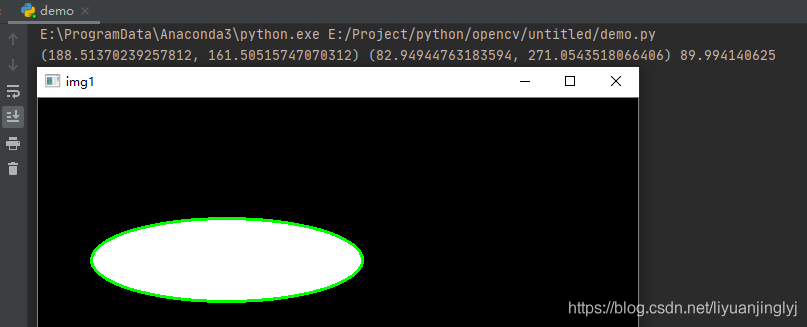
print((x, y), (MA, ma), angle)
cv2.ellipse(img, ellipsis, (0, 255, 0), 2)
cv2.imshow("img1", img)
cv2.waitKey()
cv2.destroyAllWindows()
本來就是橢圓圖,下面擬合後正好也是橢圓:
掩摸和像素點
有時候,我們還像獲取某對象的掩摸圖像及其對應的點。在OpenCV中,它還提供瞭cv2.findNonZero()函數用於獲取一個圖像內的輪廓點位置,其完整定義如下:
def findNonZero(src, idx=None):
src:要查找非零元素的圖像
idx:返回值,表示非0元素的索引位置。具體格式為(行號,列號)
下面,我們實測該函數,代碼如下:
import cv2
import numpy as np

img = cv2.imread("26_1.jpg")

cv2.imshow("img", img)

# 轉換為灰度圖像
gray = cv2.cvtColor(img, cv2.COLOR_BGR2GRAY)

ret, binary = cv2.threshold(gray, 127, 255, cv2.THRESH_BINARY)
contours, hierarchy = cv2.findContours(binary, cv2.RETR_LIST, cv2.CHAIN_APPROX_SIMPLE)

mask=np.zeros(gray.shape,np.uint8)
cv2.drawContours(mask,[contours[0]],0,255,2)
pixelpoints=cv2.findNonZero(mask)
print(pixelpoints)

cv2.imshow("img1", mask)
cv2.waitKey()
cv2.destroyAllWindows()
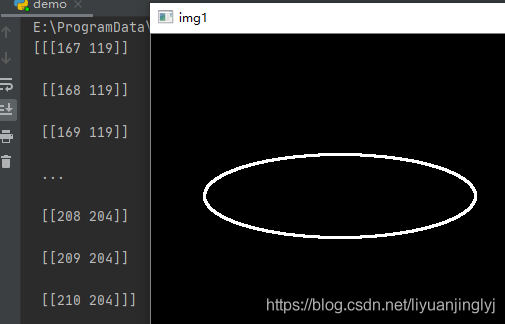
運行之後,我們會得到輪廓點位置:
最大值,最小值以及它們的位置
在OpenCV中,它提供cv2.minMaxLoc()函數獲取指定對象內最大值,最小值以及位置等信息,其完整定義如下:
def minMaxLoc(src, mask=None):
src:單通道圖像
mask:掩摸,通過使用掩摸圖像,得到掩膜指定區域內的最值信息
該函數返回4個值:最小值,最大值,最小值位置,最大值位置。
下面,我們來獲取這些值,代碼如下:
import cv2
import numpy as np

img = cv2.imread("26_1.jpg")

cv2.imshow("img", img)

# 轉換為灰度圖像
gray = cv2.cvtColor(img, cv2.COLOR_BGR2GRAY)

ret, binary = cv2.threshold(gray, 127, 255, cv2.THRESH_BINARY)
contours, hierarchy = cv2.findContours(binary, cv2.RETR_LIST, cv2.CHAIN_APPROX_SIMPLE)

mask = np.zeros(gray.shape, np.uint8)
cv2.drawContours(mask, [contours[0]], 0, 255, 2)

min, max, min_loc, max_loc = cv2.minMaxLoc(gray, mask)
print(min, max, min_loc, max_loc)
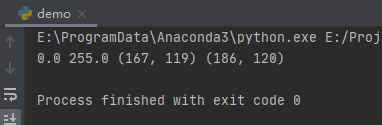
運行之後,控制臺輸出4個值:
平均顏色及平均灰度
在OpenCV中,它給我們提供cv2.mean()函數計算一個對象的平均顏色與平均灰度。其完整定義如下:
def mean(src, mask=None):
參數與上面兩個小節一樣,這裡不在贅述。下面,我們來使用這個函數,代碼如下:
import cv2
import numpy as np

img = cv2.imread("26_1.jpg")


cv2.imshow("img", img)

# 轉換為灰度圖像
gray = cv2.cvtColor(img, cv2.COLOR_BGR2GRAY)

ret, binary = cv2.threshold(gray, 127, 255, cv2.THRESH_BINARY)
contours, hierarchy = cv2.findContours(binary, cv2.RETR_LIST, cv2.CHAIN_APPROX_SIMPLE)

mask=np.zeros(gray.shape,np.uint8)
cv2.drawContours(mask,[contours[0]],0,255,2)

mean=cv2.mean(img,mask)
運行之後,輸出4個值:RGB以及A通道的均值:
極點
有時候,我們希望獲取某個對象內的極點,比如最左,最右,最上,最下等。在OpenCV中,它給我們提供瞭以下方法進行獲取:
left=tuple(cnt[cnt[:,:,0].argmin()][0])
right=tuple(cnt[cnt[:,:,0].argmax()][0])
top=tuple(cnt[cnt[:,:,1].argmin()][0])
bottom=tuple(cnt[cnt[:,:,1].argmax()][0])
下面,我們來通過這些方法獲取,代碼如下:
import cv2
import numpy as np
img = cv2.imread("26_1.jpg")
cv2.imshow("img", img)
# 轉換為灰度圖像
gray = cv2.cvtColor(img, cv2.COLOR_BGR2GRAY)
ret, binary = cv2.threshold(gray, 127, 255, cv2.THRESH_BINARY)
contours, hierarchy = cv2.findContours(binary, cv2.RETR_LIST, cv2.CHAIN_APPROX_SIMPLE)
mask = np.zeros(img.shape, np.uint8)
cnt = contours[0]
left = tuple(cnt[cnt[:, :, 0].argmin()][0])
right = tuple(cnt[cnt[:, :, 0].argmax()][0])
top = tuple(cnt[cnt[:, :, 1].argmin()][0])
bottom = tuple(cnt[cnt[:, :, 1].argmax()][0])
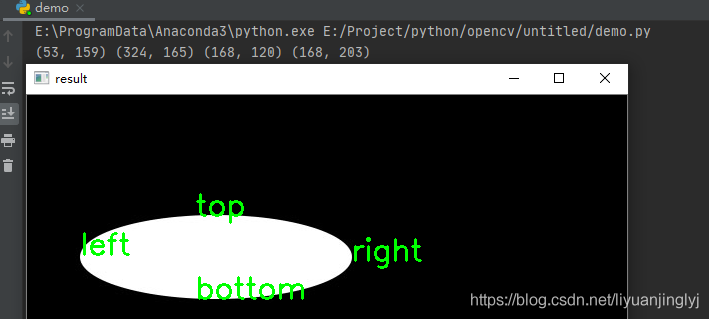
print(left, right, top, bottom)
font = cv2.FONT_HERSHEY_SIMPLEX
cv2.putText(img, "left", left, font, 1, (0, 255, 0), 2)
cv2.putText(img, "right", right, font, 1, (0, 255, 0), 2)
cv2.putText(img, "top", top, font, 1, (0, 255, 0), 2)
cv2.putText(img, "bottom", bottom, font, 1, (0, 255, 0), 2)
cv2.imshow("result",img)
cv2.waitKey()
cv2.destroyAllWindows()
運行之後,值與效果如下:
到此這篇關於OpenCV-Python實現輪廓的特征值的文章就介紹到這瞭,更多相關OpenCV 輪廓的特征值內容請搜索WalkonNet以前的文章或繼續瀏覽下面的相關文章希望大傢以後多多支持WalkonNet!
推薦閱讀:
- OpenCV-Python實現輪廓擬合
- Python OpenCV 基於圖像邊緣提取的輪廓發現函數
- OpenCV圖像輪廓的繪制方法
- python OpenCV圖像金字塔
- python opencv 畫外接矩形框的完整代碼