手把手教你用SpringBoot將文件打包成zip存放或導出
環境準備
其實也沒什麼準備,準備好Springboot就行,還有幾張圖片:

將文件打包成Zip存放
代碼
Controller代碼:
@RequestMapping("/zip")
@RestController
public class ZipController {

    /**
     * 將文件打包成zip並存放在特定位置
     */
    @PostMapping("package")
    public void packageFileToZip() throws IOException {
        // 為瞭方便我直接將文件地址寫好瞭,各位可以根據自己的情況修改
        String[] filePath = new String[]{"E:\\ykds\\1068128498917799516.jpg", "E:\\ykds\\1068128498917917980.jpg", "E:\\ykds\\1068128498917807874.jpg"};
        // 將需要打包的文件都放在一個集合中
        List<File> fileList = new ArrayList<>();
        for (String s : filePath) {
            File file = new File(s);
            fileList.add(file);
        }
        // 先在D盤創建一個壓縮包
        File zipFile = new File("D:\\package.zip");
        if(!zipFile.exists())
            zipFile.createNewFile();
        // 將package.zip的File對象傳到toZip對象中
        ZipUtils.toZip(fileList, zipFile);
    }
}
ZipUTils工具類代碼
public class ZipUtils {

    /**
     * 把文件集合打成zip壓縮包
     * @param srcFiles 壓縮文件集合
     * @param zipFile  zip文件名
     * @throws RuntimeException 異常
     */
    public static void toZip(List<File> srcFiles, File zipFile) throws IOException {
        if(zipFile == null){
            return;
        }
        if(!zipFile.getName().endsWith(".zip")){
            return;
        }
        ZipOutputStream zos = null;
        FileOutputStream out = new FileOutputStream(zipFile);
        try {
            zos = new ZipOutputStream(out);
            for (File srcFile : srcFiles) {
                byte[] buf = new byte[BUFFER_SIZE];
                zos.putNextEntry(new ZipEntry(srcFile.getName()));
                int len;
                // 讀取文件並寫入到zip中
                FileInputStream in = new FileInputStream(srcFile);
                while ((len = in.read(buf)) != -1) {
                    zos.write(buf, 0, len);
                    zos.flush();
                }
                in.close();
            }

        } catch (Exception e) {
            e.printStackTrace();
        }finally {
            if (zos != null) {
                zos.close();
            }
        }
    }
}
測試
代碼打好瞭,接下來測試下,打開熟悉的postman:

調用接口後就會在D盤中新建一個package.zip的壓縮包:

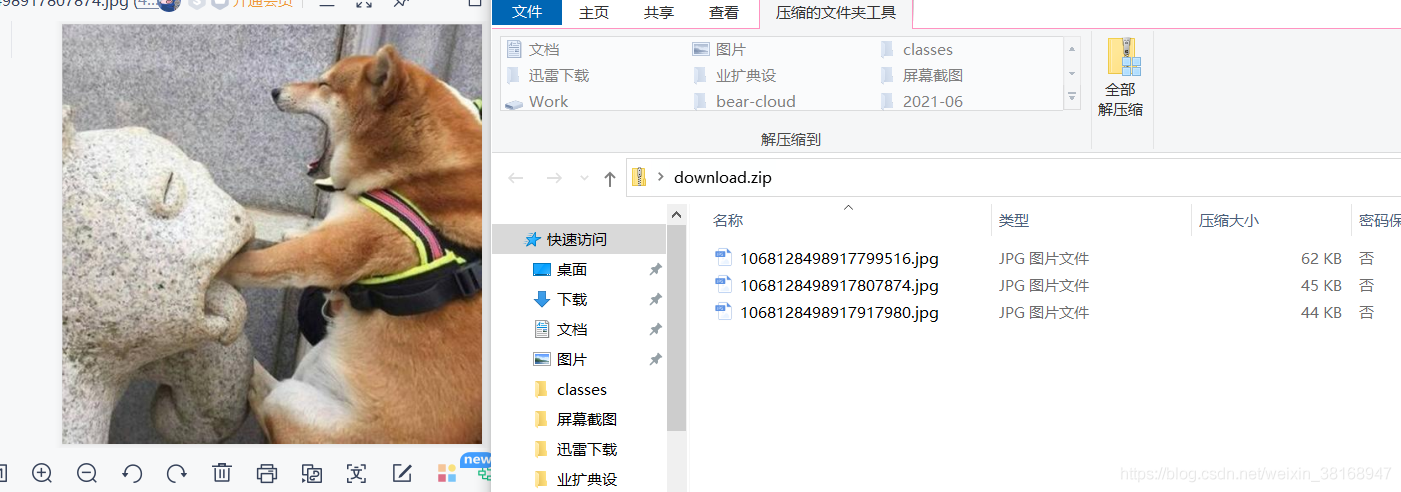
可以看到,我打包的文件都在這裡,再看看能不能正常顯示:

very good!
將文件打包成zip並導出
上面的方法隻是將壓縮包保存在本地,如果需要導出的話代碼有點不一樣。
代碼
Controller代碼:
/**
     * 將文件打包成zip並下載
     */
    @PostMapping("download")
    public void download(HttpServletResponse response) throws IOException {
        // 這裡還是和上面一樣
        String[] filePath = new String[]{"E:\\ykds\\1068128498917799516.jpg", "E:\\ykds\\1068128498917917980.jpg", "E:\\ykds\\1068128498917807874.jpg"};
        List<File> fileList = new ArrayList<>();
        for (String s : filePath) {
            File file = new File(s);
            fileList.add(file);
        }
        response.setHeader("content-type", "application/octet-stream");
        response.setContentType("application/octet-stream");
        response.setHeader(HttpHeaders.CONTENT_DISPOSITION, "attachment; filename=download.zip");
        ZipUtils.downloadZip(response.getOutputStream(), fileList);
    }
ZipUtils工具類代碼
public static void downloadZip(OutputStream outputStream, List<File> fileList){
        BufferedInputStream bufferedInputStream = null;
        ZipOutputStream zipOutputStream = null;
        try {
            zipOutputStream = new ZipOutputStream(outputStream);
            for (File file : fileList) {
                ZipEntry zipEntry = new ZipEntry(file.getName());
                zipOutputStream.putNextEntry(zipEntry);
                byte[] buf = new byte[BUFFER_SIZE];
                int len;
                FileInputStream in = new FileInputStream(file);
                while ((len = in.read(buf)) != -1) {
                    zipOutputStream.write(buf, 0, len);
                    zipOutputStream.flush();
                }
            }
            zipOutputStream.flush();
            zipOutputStream.close();

        } catch (IOException e) {
            e.printStackTrace();
        } finally {
            // 關閉流
            try {
                if (bufferedInputStream != null) {
                    bufferedInputStream.close();
                }
                if (zipOutputStream != null ) {
                    zipOutputStream.close();
                }
                if (outputStream != null) {
                    outputStream.close();
                }
            } catch (IOException e) {
                e.printStackTrace();
            }
        }

    }
測試
還是用postman:


下載完成後打開看看
到此這篇關於手把手教你用SpringBoot將文件打包成zip存放或導出的文章就介紹到這瞭,更多相關SpringBoot將文件打包成zip內容請搜索WalkonNet以前的文章或繼續瀏覽下面的相關文章希望大傢以後多多支持WalkonNet!
推薦閱讀:
- Java中I/O輸入輸出的深入講解
- Java如何實現壓縮文件與解壓縮zip文件
- Java實現把文件壓縮成zip文件的示例代碼
- Java實現創建Zip壓縮包並寫入文件
- java中壓縮文件並下載的實例詳解