SpringBoot添加License的多種方式
第一種方案
生成License
工具已經封裝好,小夥伴們可以直接下載使用:https://gitee.com/lm970585581/spring-boot2-license
下載後打開cloud-license-serve項目直接啟動即可。
然後調用項目的獲取信息接口:http://localhost:9081/license/getServerInfos?osName=windows
會得到類似如下結果,分別代表ip地址、mac地址、cpu序號、主板序號。
{
    "ipAddress": [
        "192.168.80.1",
        "192.168.220.1"
    ],
    "macAddress": [
        "01-51-56-C0-00-01",
        "00-52-56-C0-00-08",
        "BC-54-2D-DF-69-FC"
    ],
    "cpuSerial": "BFECFBFF000806EC",
    "mainBoardSerial": "L1HF16301D5"
}
使用JDK自帶的 keytool 工具生成公私鑰證書庫:
假如我們設置公鑰庫密碼為:public_password1234,私鑰庫密碼為:private_password1234,則生成命令如下:
#生成命令
keytool -genkeypair -keysize 1024 -validity 3650 -alias "privateKey" -keystore "privateKeys.keystore" -storepass "public_password1234" -keypass "private_password1234" -dname "CN=localhost, OU=localhost, O=localhost, L=SH, ST=SH, C=CN"

#導出命令
keytool -exportcert -alias "privateKey" -keystore "privateKeys.keystore" -storepass "public_password1234" -file "certfile.cer"

#導入命令
keytool -import -alias "publicCert" -file "certfile.cer" -keystore "publicCerts.keystore" -storepass "public_password1234"
上述命令執行完成之後,會在當前路徑下生成三個文件,分別是:privateKeys.keystore、publicCerts.keystore、certfile.cer。其中文件certfile.cer不再需要可以刪除,文件privateKeys.keystore用於當前的 ServerDemo 項目給客戶生成license文件,而文件publicCerts.keystore則隨應用代碼部署到客戶服務器,用戶解密license文件並校驗其許可信息。
最後我們再生成license,調用接口地址為:http://localhost:9081/license/generateLicense
調用的參數是一個json參數,格式如下:
{
    "subject": "license_demo",
    "privateAlias": "privateKey",
    "keyPass": "private_password1234",
    "storePass": "public_password1234",
    "licensePath": "C:/Users/zifangsky/Desktop/license_demo/license.lic",
    "privateKeysStorePath": "C:/Users/zifangsky/Desktop/license_demo/privateKeys.keystore",
    "issuedTime": "2018-07-10 00:00:01",
    "expiryTime": "2019-12-31 23:59:59",
    "consumerType": "User",
    "consumerAmount": 1,
    "description": "這是證書描述信息",
    "licenseCheckModel": {
        "ipAddress": ["192.168.245.1", "10.0.5.22"],
        "macAddress": ["00-50-56-C0-00-01", "50-7B-9D-F9-18-41"],
        "cpuSerial": "BFEBFBFF000406E3",
        "mainBoardSerial": "L1HF65E00X9"
    }
}
如果請求成功,那麼最後會在 licensePath 參數設置的路徑生成一個 license.lic 的文件,這個文件就是給客戶部署代碼的服務器許可文件。
使用License
如果小夥伴們按照上文的步驟一步一步的跟著實現,我們已經獲得瞭license.lic,接下來就是把license使用到我們自己的項目中瞭。
cloud-license-client就是引入項目的一個例子,打開可以直接使用。
引入自己的項目隻需將以下文件導入
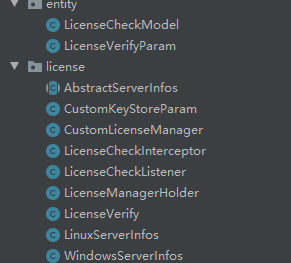
並配置好攔截器LicenseCheckInterceptor就可以使用瞭。配置方法在InterceptorConfig類中,可以參考。
這裡需要註意的是使用license需要兩個文件:license.lic,publicCerts.keystore
演示項目配置的路徑是絕對路徑,一般我們會配置相對路徑,把兩個文件放到項目下,配置位置在LicenseCheckListener類中
修改如下部分改為相對路徑讀取就可以瞭
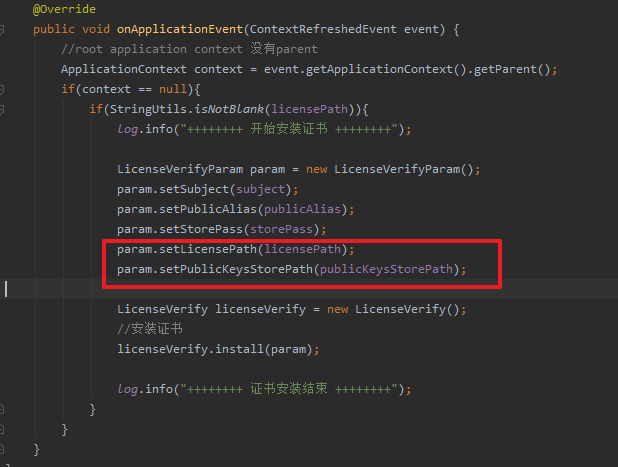
這裡就不演示如何修改瞭,因為修改起來很容易。
還需要註意一點:
對於LicenseCheckModel,LicenseCreatorParam兩個類,引入到自己的客戶端後一定要保證包名與生成license時的包名一致,不然會導致序列化失敗的問題。
直接集成的方案
引入Maven依賴
<dependency>
  <groupId>org.smartboot.license</groupId>
  <artifactId>license-client</artifactId>
  <version>1.0.3</version>
</dependency>
載入License。如若License已過期,則會觸發異常。
public class LicenseTest {
  public static void main(String[] args) throws Exception {
      File file=new File("license.txt");
      License license = new License();
      LicenseEntity licenseEntity=license.loadLicense(file);
      System.out.println(new String(licenseEntity.getData()));
  }
}
獲取licenseEntity並以此配置啟動軟件。
還原license
- 進入bin目錄執行以下命令,例如:./license_revert.sh source.txt。
- 執行成功後會在當前目錄下生成License文件license_revert.txt。
簡單方便,幾行代碼放在啟動方法裡校驗,也可以加註在攔截器裡。
一個簡單方便的授權方式,隻需以上幾步就可集成到boot項目中去啦!
說瞭這麼多,在演示下代碼吧
生成機器碼
我們首先要做的就是對軟件部署的環境的唯一性進行限制,這裡使用的是macadderss,當然你也可以換成cpu序列編號,並無太大影響,先上代碼
private static String getMac() {
        try {
            Enumeration<NetworkInterface> el = NetworkInterface
                    .getNetworkInterfaces();
            while (el.hasMoreElements()) {
                byte[] mac = el.nextElement().getHardwareAddress();
                if (mac == null)
                    continue;
                String hexstr = bytesToHexString(mac);
                return getSplitString(hexstr, "-", 2).toUpperCase();
            }
        } catch (Exception exception) {
            exception.printStackTrace();
        }
        return null;
    }

public static String getMachineCode() throws Exception{
        Set<String> result = new HashSet<>();
        String mac = getMac();
        result.add(mac);
        Properties props = System.getProperties();
        String javaVersion = props.getProperty("java.version");
        result.add(javaVersion);
        String javaVMVersion = props.getProperty("java.vm.version");
        result.add(javaVMVersion);
        String osVersion = props.getProperty("os.version");
        result.add(osVersion);
        String code = Encrpt.GetMD5Code(result.toString());
        return getSplitString(code, "-", 4);

    }
這裡進行的操作是取出機器碼,與java版本,jvm,操作系統參數進行混合,並進行MD5操作
進行lic文件的生成
授權證書主要包含三個要素,機器碼,是否永久有效標識,證書時效,我們會將這些數據寫入文本中並進行加密處理,看下生成證書的代碼
public static void getLicense(String isNoTimeLimit, String licenseLimit, String machineCode, String licensePath, String priavateKeyPath) throws Exception{
        String[] liccontent = {
                "LICENSEID=yanpeng19940119@gmail.com",
                "LICENSENAME=YBLOG使用證書",
                MessageFormat.format("LICENSETYPE={0}",isNoTimeLimit),
                MessageFormat.format("EXPIREDAY={0}",licenseLimit), //日期采用yyyy-MM-dd日期格式
                MessageFormat.format("MACHINECODE={0}",machineCode),
                ""
        };

        //將lic內容進行混合簽名並寫入內容
        StringBuilder sign = new StringBuilder();
        for(String item:liccontent){
            sign.append(item+"yblog");
        }
        liccontent[5] = MessageFormat.format("LICENSESIGN={0}",Encrpt.GetMD5Code(sign.toString()));
        FileUtil.createFileAndWriteLines(licensePath,liccontent);
        //將寫入的內容整體加密替換
        String filecontent =FileUtil.readFileToString(licensePath);
        String encrptfilecontent = Encrpt.EncriptWRSA_Pri(filecontent,priavateKeyPath);
        File file = new File(licensePath);
        file.delete();
        FileUtil.createFile(licensePath,encrptfilecontent);
最後在驗證lic,我們會在系統中註冊一個攔截器,未通過系統授權認證會自動跳轉到lic文件上傳界面,springboot接收文件與常規java有一些不同,使用的MultipartFile對象,會獲取到上傳文件的數組,進行操作。
我們就可以通過系統內置的公鑰對lic文件的機器碼,授權時間進行驗證,確定是否能正常訪問系統。
總結
好瞭,到這裡本文的分享就結束瞭,本文分享的其實是License的使用說明,並沒有帶大傢閱讀源碼去看原理,感興趣的小夥伴可以自行閱讀一下項目源碼,也很容易看懂哦。
以上就是SpringBoot生成License的多種實現方式的詳細內容,更多關於SpringBoot生成License的資料請關註WalkonNet其它相關文章!
推薦閱讀:
- SpringBoot生成License的實現示例
- Java制作證書的工具keytool用法詳解
- Java 使用keytool創建CA證書的操作
- 關於Keytool配置 Tomcat的HTTPS雙向認證的問題
- 獲取Android簽名MD5的方式實例詳解