Python實現對照片中的人臉進行顏值預測
一、所需工具
**Python版本:**3.5.4(64bit)
二、相關模塊
- opencv_python模塊
- sklearn模塊
- numpy模塊
- dlib模塊
- 一些Python自帶的模塊。
三、環境搭建
(1)安裝相應版本的Python並添加到環境變量中;
(2)pip安裝相關模塊中提到的模塊。
例如:

若pip安裝報錯,請自行到:
http://www.lfd.uci.edu/~gohlke/pythonlibs/
下載pip安裝報錯模塊的whl文件,並使用:
pip install whl文件路徑+whl文件名安裝。
例如:
(已在相關文件中提供瞭編譯好的用於dlib庫安裝的whl文件——>因為這個庫最不好裝)

參考文獻鏈接
【1】xxxPh.D.的博客
【2】華南理工大學某實驗室
http://www.hcii-lab.net/data/SCUT-FBP/EN/introduce.html
四、主要思路
(1)模型訓練
用瞭PCA算法對特征進行瞭壓縮降維;
然後用隨機森林訓練模型。
數據源於網絡,據說數據“發源地”就是華南理工大學某實驗室,因此我在參考文獻上才加上瞭這個實驗室的鏈接。
(2)提取人臉關鍵點
主要使用瞭dlib庫。
使用官方提供的模型構建特征提取器。
(3)特征生成
完全參考瞭xxxPh.D.的博客。
(4)顏值預測
利用之前的數據和模型進行顏值預測。
使用方式
有特殊疾病者請慎重嘗試預測自己的顏值,本人不對顏值預測的結果和帶來的所有負面影響負責!!!
言歸正傳。
環境搭建完成後,解壓相關文件中的Face_Value.rar文件,cmd窗口切換到解壓後的*.py文件所在目錄。
例如:

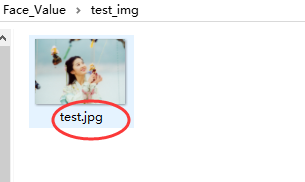
打開test_img文件夾,將需要預測顏值的照片放入並重命名為test.jpg。
例如:
若嫌麻煩或者有其他需求,請自行修改:
getLandmarks.py文件中第13行。
最後依次運行:
train_model.py(想直接用我模型的請忽略此步)
# 模型訓練腳本
import numpy as np
from sklearn import decomposition
from sklearn.ensemble import RandomForestRegressor
from sklearn.externals import joblib


# 特征和對應的分數路徑
features_path = './data/features_ALL.txt'
ratings_path = './data/ratings.txt'

# 載入數據
# 共500組數據
# 其中前480組數據作為訓練集,後20組數據作為測試集
features = np.loadtxt(features_path, delimiter=',')
features_train = features[0: -20]
features_test = features[-20: ]
ratings = np.loadtxt(ratings_path, delimiter=',')
ratings_train = ratings[0: -20]
ratings_test = ratings[-20: ]

# 訓練模型
# 這裡用PCA算法對特征進行瞭壓縮和降維。
# 降維之後特征變成瞭20維,也就是說特征一共有500行,每行是一個人的特征向量,每個特征向量有20個元素。
# 用隨機森林訓練模型
pca = decomposition.PCA(n_components=20)
pca.fit(features_train)
features_train = pca.transform(features_train)
features_test = pca.transform(features_test)
regr = RandomForestRegressor(n_estimators=50, max_depth=None, min_samples_split=10, random_state=0)
regr = regr.fit(features_train, ratings_train)
joblib.dump(regr, './model/face_rating.pkl', compress=1)

# 訓練完之後提示訓練結束
print('Generate Model Successfully!')
getLandmarks.py
# 人臉關鍵點提取腳本
import cv2
import dlib
import numpy


# 模型路徑
PREDICTOR_PATH = './model/shape_predictor_68_face_landmarks.dat'
# 使用dlib自帶的frontal_face_detector作為人臉提取器
detector = dlib.get_frontal_face_detector()
# 使用官方提供的模型構建特征提取器
predictor = dlib.shape_predictor(PREDICTOR_PATH)
face_img = cv2.imread("test_img/test.jpg")
# 使用detector進行人臉檢測,rects為返回的結果
rects = detector(face_img, 1)
# 如果檢測到人臉
if len(rects) >= 1:
	print("{} faces detected".format(len(rects)))
else:
	print('No faces detected')
	exit()
with open('./results/landmarks.txt', 'w') as f:
	f.truncate()
	for faces in range(len(rects)):
		# 使用predictor進行人臉關鍵點識別
		landmarks = numpy.matrix([[p.x, p.y] for p in predictor(face_img, rects[faces]).parts()])
		face_img = face_img.copy()
		# 使用enumerate函數遍歷序列中的元素以及它們的下標
		for idx, point in enumerate(landmarks):
			pos = (point[0, 0], point[0, 1])
			f.write(str(point[0, 0]))
			f.write(',')
			f.write(str(point[0, 1]))
			f.write(',')
		f.write('\n')
	f.close()
# 成功後提示
print('Get landmarks successfully')
getFeatures.py
# 特征生成腳本
# 具體原理請參見參考論文
import math
import numpy
import itertools


def facialRatio(points):
	x1 = points[0]
	y1 = points[1]
	x2 = points[2]
	y2 = points[3]
	x3 = points[4]
	y3 = points[5]
	x4 = points[6]
	y4 = points[7]
	dist1 = math.sqrt((x1-x2)**2 + (y1-y2)**2)
	dist2 = math.sqrt((x3-x4)**2 + (y3-y4)**2)
	ratio = dist1/dist2
	return ratio


def generateFeatures(pointIndices1, pointIndices2, pointIndices3, pointIndices4, allLandmarkCoordinates):
	size = allLandmarkCoordinates.shape
	if len(size) > 1:
		allFeatures = numpy.zeros((size[0], len(pointIndices1)))
		for x in range(0, size[0]):
			landmarkCoordinates = allLandmarkCoordinates[x, :]
			ratios = []
			for i in range(0, len(pointIndices1)):
				x1 = landmarkCoordinates[2*(pointIndices1[i]-1)]
				y1 = landmarkCoordinates[2*pointIndices1[i] - 1]
				x2 = landmarkCoordinates[2*(pointIndices2[i]-1)]
				y2 = landmarkCoordinates[2*pointIndices2[i] - 1]
				x3 = landmarkCoordinates[2*(pointIndices3[i]-1)]
				y3 = landmarkCoordinates[2*pointIndices3[i] - 1]
				x4 = landmarkCoordinates[2*(pointIndices4[i]-1)]
				y4 = landmarkCoordinates[2*pointIndices4[i] - 1]
				points = [x1, y1, x2, y2, x3, y3, x4, y4]
				ratios.append(facialRatio(points))
			allFeatures[x, :] = numpy.asarray(ratios)
	else:
		allFeatures = numpy.zeros((1, len(pointIndices1)))
		landmarkCoordinates = allLandmarkCoordinates
		ratios = []
		for i in range(0, len(pointIndices1)):
			x1 = landmarkCoordinates[2*(pointIndices1[i]-1)]
			y1 = landmarkCoordinates[2*pointIndices1[i] - 1]
			x2 = landmarkCoordinates[2*(pointIndices2[i]-1)]
			y2 = landmarkCoordinates[2*pointIndices2[i] - 1]
			x3 = landmarkCoordinates[2*(pointIndices3[i]-1)]
			y3 = landmarkCoordinates[2*pointIndices3[i] - 1]
			x4 = landmarkCoordinates[2*(pointIndices4[i]-1)]
			y4 = landmarkCoordinates[2*pointIndices4[i] - 1]
			points = [x1, y1, x2, y2, x3, y3, x4, y4]
			ratios.append(facialRatio(points))
		allFeatures[0, :] = numpy.asarray(ratios)
	return allFeatures


def generateAllFeatures(allLandmarkCoordinates):
	a = [18, 22, 23, 27, 37, 40, 43, 46, 28, 32, 34, 36, 5, 9, 13, 49, 55, 52, 58]
	combinations = itertools.combinations(a, 4)
	i = 0
	pointIndices1 = []
	pointIndices2 = []
	pointIndices3 = []
	pointIndices4 = []
	for combination in combinations:
		pointIndices1.append(combination[0])
		pointIndices2.append(combination[1])
		pointIndices3.append(combination[2])
		pointIndices4.append(combination[3])
		i = i+1
		pointIndices1.append(combination[0])
		pointIndices2.append(combination[2])
		pointIndices3.append(combination[1])
		pointIndices4.append(combination[3])
		i = i+1
		pointIndices1.append(combination[0])
		pointIndices2.append(combination[3])
		pointIndices3.append(combination[1])
		pointIndices4.append(combination[2])
		i = i+1
	return generateFeatures(pointIndices1, pointIndices2, pointIndices3, pointIndices4, allLandmarkCoordinates)


landmarks = numpy.loadtxt("./results/landmarks.txt", delimiter=',', usecols=range(136))
featuresALL = generateAllFeatures(landmarks)
numpy.savetxt("./results/my_features.txt", featuresALL, delimiter=',', fmt = '%.04f')
print("Generate Feature Successfully!")
Predict.py
# 顏值預測腳本
from sklearn.externals import joblib
import numpy as np
from sklearn import decomposition


pre_model = joblib.load('./model/face_rating.pkl')
features = np.loadtxt('./data/features_ALL.txt', delimiter=',')
my_features = np.loadtxt('./results/my_features.txt', delimiter=',')
pca = decomposition.PCA(n_components=20)
pca.fit(features)
predictions = []
if len(my_features.shape) > 1:
	for i in range(len(my_features)):
		feature = my_features[i, :]
		feature_transfer = pca.transform(feature.reshape(1, -1))
		predictions.append(pre_model.predict(feature_transfer))
	print('照片中的人顏值得分依次為(滿分為5分):')
	k = 1
	for pre in predictions:
		print('第%d個人:' % k, end='')
		print(str(pre)+'分')
		k += 1
else:
	feature = my_features
	feature_transfer = pca.transform(feature.reshape(1, -1))
	predictions.append(pre_model.predict(feature_transfer))
	print('照片中的人顏值得分為(滿分為5分):')
	k = 1
	for pre in predictions:
		print(str(pre)+'分')
		k += 1
到此這篇關於Python實現對照片中的人臉進行顏值預測的文章就介紹到這瞭,更多相關Python對人臉進行顏值預測內容請搜索WalkonNet以前的文章或繼續瀏覽下面的相關文章希望大傢以後多多支持WalkonNet!
推薦閱讀:
- 樹莓派上利用python+opencv+dlib實現嘴唇檢測的實現
- 超詳細註釋之OpenCV dlib實現人臉采集
- Python 幾行代碼即可實現人臉識別
- 基於Python OpenCV和 dlib實現眨眼檢測
- 基於Opencv制作的美顏相機帶你領略美顏特效的效果