Spring MVC文件配置以及參數傳遞示例詳解
web.xml文件配置
創建好一個SpringMVC項目後,需要在需要在WB-INF文件夾下配置web.xml文件
<?xml version="1.0" encoding="UTF-8"?>
<web-app xmlns="http://xmlns.jcp.org/xml/ns/javaee"
     xmlns:xsi="http://www.w3.org/2001/XMLSchema-instance"
     xsi:schemaLocation="http://xmlns.jcp.org/xml/ns/javaee http://xmlns.jcp.org/xml/ns/javaee/web-app_3_1.xsd"
     version="3.1">

  <display-name>SpringMVCdemo</display-name>
  <welcome-file-list>
    <welcome-file>index.jsp</welcome-file>
  </welcome-file-list>

  <!--加載springMVC的配置文件-->
  <context-param>
    <param-name>contextConfigLocation</param-name>
    <param-value>classpath*:springMVC.xml</param-value>
  </context-param>

  <listener>
    <listener-class>org.springframework.web.context.ContextLoaderListener</listener-class>
  </listener>

  <servlet>
    <servlet-name>dispatcher</servlet-name>
    <!--中央核心控制器-->
    <servlet-class>org.springframework.web.servlet.DispatcherServlet</servlet-class>
    <load-on-startup>1</load-on-startup>
  </servlet>
  <servlet-mapping>
    <servlet-name>dispatcher</servlet-name>
    <!--請求-->
    <url-pattern>*.do</url-pattern>
  </servlet-mapping>

  <!--過濾器,編碼格式-->
  <filter>
    <filter-name>characterEncodingFilter</filter-name>
    <filter-class>org.springframework.web.filter.CharacterEncodingFilter</filter-class>
    <init-param>
      <param-name>encoding</param-name>
      <param-value>UTF-8</param-value>
    </init-param>
  </filter>
  <filter-mapping>
    <filter-name>characterEncodingFilter</filter-name>
    <url-pattern>/*</url-pattern>
  </filter-mapping>
</web-app>
springMVC.xml文件配置
在src文件夾下創建springMVC.xml文件
<?xml version="1.0" encoding="UTF-8"?>
<beans xmlns="http://www.springframework.org/schema/beans"
    xmlns:xsi="http://www.w3.org/2001/XMLSchema-instance"
    xmlns:aop="http://www.springframework.org/schema/aop"
    xmlns:context="http://www.springframework.org/schema/context"
    xmlns:tx="http://www.springframework.org/schema/tx"
    xmlns:mvc="http://www.springframework.org/schema/mvc"
    xsi:schemaLocation="http://www.springframework.org/schema/beans
    http://www.springframework.org/schema/beans/spring-beans.xsd
    http://www.springframework.org/schema/aop
    http://www.springframework.org/schema/aop/spring-aop.xsd
    http://www.springframework.org/schema/tx
    http://www.springframework.org/schema/tx/spring-tx.xsd
    http://www.springframework.org/schema/context
    http://www.springframework.org/schema/context/spring-context.xsd
    http://www.springframework.org/schema/mvc
    http://www.springframework.org/schema/mvc/spring-mvc.xsd">

  <!--自動掃描上下文包-->
  <context:component-scan base-package="cn.zhc.*"></context:component-scan>

  <!--自動開啟MVC模式註解-->
  <mvc:annotation-driven></mvc:annotation-driven>
  <!--將請求映射到標註@RequestMapping註解的控制器和處理方法上-->
  <mvc:default-servlet-handler></mvc:default-servlet-handler>

  <!--視圖解析器-->
  <bean id="internalResourceViewResolver" class="org.springframework.web.servlet.view.InternalResourceViewResolver">
    <!--前綴後綴-->
    <property name="prefix" value="/"></property>
    <property name="suffix" value=".jsp"></property>
  </bean>
</beans>
第一個SpringMVC實例
index.jsp
<%@ page contentType="text/html;charset=UTF-8" language="java" %>
<html>
 <head>
  <title>$Title$</title>
 </head>
 <body>
 哈哈哈哈哈
 </body>
</html>
測試類:
package cn.zhc.test;

import org.springframework.stereotype.Controller;
import org.springframework.web.bind.annotation.RequestMapping;

@Controller
public class Test {
  @RequestMapping("/hello.do")
  public String hello(){
    System.out.println("hhhhhhhhhhhh");
    return "index";
  }
}
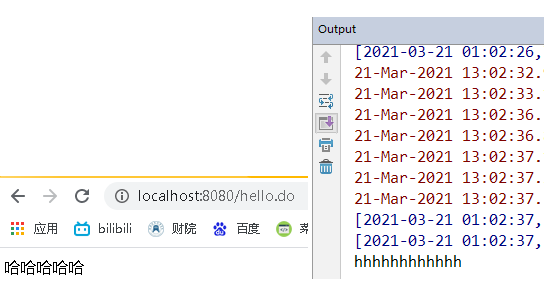
在項目運行後,在前端頁面路徑後輸入/hello.do,控制臺會輸出hhhhhhhhhhhh
參數傳遞
view到controller 四種方式
	@RequestMapping("/hello.do")
  public String hello(String name){
    //路徑後加?name=  不加會傳null
    System.out.println(name);
    return "index";
  }

  //Controller方法方法中參數前加@RequestParam進行直接入參

  @RequestMapping("/hello.do")
  public String hello(@RequestParam String name){
    //不傳參會請求錯誤400
    System.out.println(name);
    return "index";
  }

  @RequestMapping("/hello.do")
  public String hello(@RequestParam(value = "name" ,required = false) String name){
    //required是否需要傳參
    System.out.println(name);
    return "index";
  }

  @RequestMapping(value = "/hello.do",method = RequestMethod.GET,params = "name")
  public String hello(String name){
    //不傳參會請求錯誤400
    System.out.println(name);
    return "index";
  }
controller到view 三種方式
	@RequestMapping("/hello.do")
  public ModelAndView hello(){
    ModelAndView mv = new ModelAndView();
    mv.addObject("name","zhu");//添加模型數據
    mv.setViewName("index");//設置視圖名稱
    return mv;
  }

  @RequestMapping("/hello.do")
  public String hello(Model model){
    model.addAttribute("name","huai");
    model.addAttribute("chang");
    //在model中若不指定key,則使用默認對象的類型作為key
    return "index";
  }

  @RequestMapping("/hello.do")
  public String hello(Map<String,Object> map){
    map.put("name","lisa");
    return "index";
  }
總結
到此這篇關於Spring MVC文件配置以及參數傳遞的文章就介紹到這瞭,更多相關SpringMVC文件配置參數傳遞內容請搜索WalkonNet以前的文章或繼續瀏覽下面的相關文章希望大傢以後多多支持WalkonNet!
推薦閱讀:
- 關於springmvc報錯404的問題
- SpringMVC註解的入門實例詳解
- SpringMVC RESTFul實戰案例訪問首頁
- SpringMVC攔截器詳解
- Spring項目中使用Junit單元測試並配置數據源的操作