Vue實現Dialog封裝
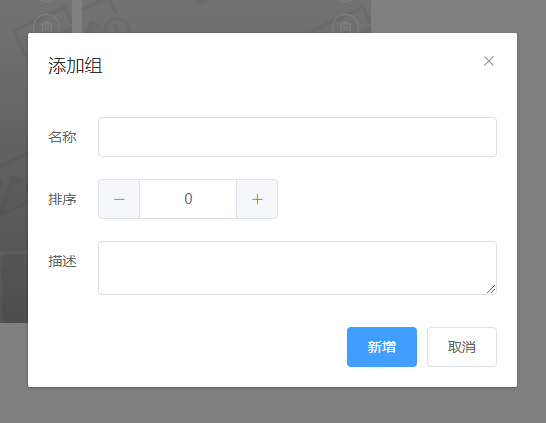
在寫業務的時候很常見的一個場景就是需要在不同的頁面調用同一個表單,常用的交互就是把表單以彈窗的形式展示,但是在每個頁面又重復的引入表單組件有時候又很麻煩

解決方案有兩個:
- 在根組件裡面引入動態組件,在業務裡面通過this.$root.openDialog(name, props)去控制動態組件的展示形式
- 封裝成插件的形式去調用,比如this.$dialog(‘EditDialog.vue’, props)
當然瞭,業務 Dialog 組件要有一套規范,props 接收一個 onOk、onCancel 回調,data 裡面定義一個 visible 屬性
<template>
  <el-dialog :title="title" :visible.sync="visible" append-to-body>
    <!-- 業務代碼 -->
  </el-dialog>
</template>

<script>
export default {
  props: ['onOk', '其他業務需要的屬性'],
  data() {
    return {
      visible: false
    }
  }
}
</script>
Vue2 寫法
在 Vue2 裡面我個人感覺寫成插件是比較好用的,實現如下,使用混入做瞭一些操作,和業務進行解耦
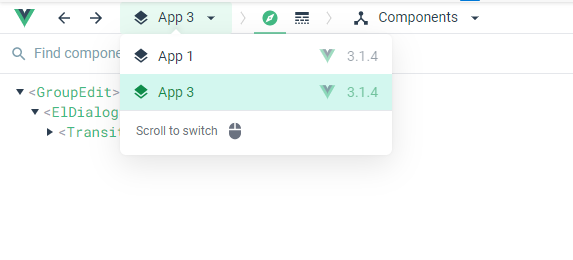
有點不太好的地方是組件是動態插入的,Vue devtools 要刷新下才能看到組件
const mixin = {
  mounted() {
    document.body.appendChild(this.$el)
    this.visible = true
  },
  watch: {
    visible(value) {
      // 動畫結束後銷毀實例
      if (value === false) {
        setTimeout(() => {
          this.$destroy()
          if (this.$el && this.$el.parentNode) {
            this.$el.parentNode.removeChild(this.$el)
          }
        }, 400)
      }
    }
  }
}

export default {
  install(Vue, options) {
    Vue.prototype.$dialog = (name, props) => {
      // 相對於該插件的位置,靜態編譯期間會檢查的
      import('../components/dialogs/' + name)
        .then(module => {
          const component = module.default
          const mixins = component.mixins || []
          mixins.push(mixin) // 實現自動打開,動態瞭混入生命周期函數和銷毀操作
          component.mixins = mixins
          return Vue.extend(component)
        })
        .then(Dialog => {
          const dialog = new Dialog({
            propsData: props || {}
          })
          dialog.$mount()
        })
    }
  }
}
調用方式如下,註意 onOk 回調的 this 指向,使用箭頭函數直接就避免瞭 😎
this.$dialog('GroupEdit.vue', {
  type: 'edit',
  group: {},
  onOk: () => {
    this.freshList()
  }
})
Vue3 插件版寫法
很糟糕的是,由於 Vue3 的升級Vue.extend沒有瞭,$mount也沒有瞭,組件隻能在應用裡面去渲染
每個應用之間的數據是隔離的,所以插件什麼的都要重新引入。同時如果要交互交互的話也比較麻煩,引入同一個 vuex 實例應該可以,但是沒怎試
為瞭低耦合隻能去新建一個應用去掛載渲染

import { createApp, defineComponent } from 'vue'
import ElementPlus from 'element-plus'

const mixin = {
  mounted() {
    document.body.appendChild(this.$el)
    this.visible = true
  },
  watch: {
    visible(value) {
      // 動畫結束後銷毀實例
      if (value === false) {
        setTimeout(() => {
          this.$.appContext.app.unmount()
        }, 400)
      }
    }
  }
}

export default {
  install(app) {
    app.config.globalProperties.$dialog = (name, props) => {
      import('../components/dialogs/' + name)
        .then(module => {
          const component = module.default
          let mixins = component.mixins || []
          mixins.push(mixin)
          component.mixins = mixins

          return defineComponent(component)
        })
        .then(Dialog => {
          const app = createApp(Dialog, props || {})
          app.use(ElementPlus)
          app.mount(document.createElement('div'))
        })
    }
  }
}
Vue3 動態組件寫法
在 Vue3 裡面,插件版的寫法同樣達到瞭要求,但是完全是一個新引應用瞭,如果在業務裡訪問this.$root,vuex,router還是有點麻煩的
所以 Vue3 裡面還是動態組件的寫法比較好
在根組件引入動態 component,定義一些控制變量
<template>
  <router-view></router-view>
  <component :is="currentDialog" v-bind="currentDialogProps" />
</template>

<script>
export default {
  data() {
    return {
      currentDialog: null,
      currentDialogProps: null
    }
  }
}
</script>
調用的的話this.$root.$dialog(),看起來太難看,其實還是可以手動模擬插件的效果的
const app = createApp(App)
const vm = app.mount('#app')

initDialog(app, vm)

function initDialog(app, vm) {
  const mixin = {
    mounted() {
      this.visible = true
    },
    watch: {
      visible(value) {
        // 動畫結束後銷毀實例
        if (value === false) {
          setTimeout(() => {
            this.$root.currentDialog = null
            this.$root.currentDialogProps = {}
          }, 400)
        }
      }
    }
  }

  app.config.globalProperties.$dialog = (name, props) => {
    import('./components/dialogs/' + name).then(module => {
      const component = module.default
      let mixins = component.mixins || []
      mixins.push(mixin)
      component.mixins = mixins
      // 不需要 defineComponent(component)
      vm.currentDialog = markRaw(component)
      vm.currentDialogProps = markRaw(props || {})
    })
  }
}
一些比較 hack 的寫法
vue3 組件實例獲取應用實例
vm.$.appContext.app == app
vue3 應用實例獲取組件實例,註意_instance 僅在 dev 環境能訪問到
app._instance.proxy == vm
app._instance.root.proxy == vm
app._instance.ctx.$root == vm
騷操作還是有的,但是最好不要用
const app = createApp(App)
const vm = app.mount('#app')

if (process.env.NODE_ENV === 'production') {
  app._instance = {
    proxy: vm,
    root: {
      proxy: vm
    },
    ctx: {
      $root: vm
    }
  }
}
到此這篇關於Vue實現Dialog封裝的文章就介紹到這瞭,更多相關Vue Dialog封裝內容請搜索WalkonNet以前的文章或繼續瀏覽下面的相關文章希望大傢以後多多支持WalkonNet!
推薦閱讀:
- vue混入mixin流程與優缺點詳解
- Vue2 Dialog彈窗函數式調用實踐示例
- Vue中Mixin&extends的詳細使用教程
- Vue extend使用示例深入分析
- vue3 mixin 混入使用方法