Spring-AOP @AspectJ進階之如何綁定代理對象
概述
使用this()或target()可綁定被代理對象實例,在通過類實例名綁定對象時,還依然具有原來連接點匹配的功能,隻不過類名是通過增強方法中同名入參的類型間接決定罷瞭。
這裡我們通過this()來瞭解對象綁定的用法:
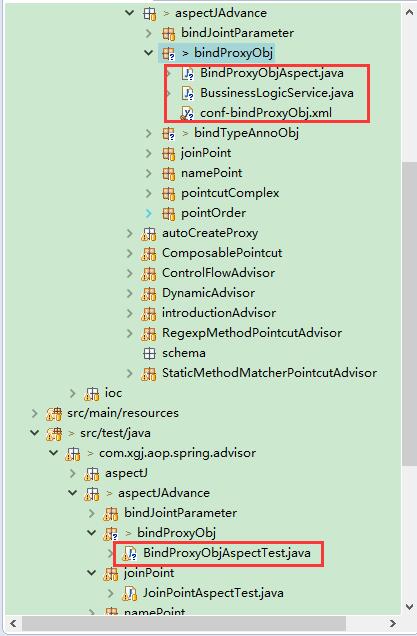
實例
代碼已托管到Github—> https://github.com/yangshangwei/SpringMaster

業務類
package com.xgj.aop.spring.advisor.aspectJAdvance.bindProxyObj;
import org.springframework.stereotype.Component;
/**
 *
 *
 * @ClassName: BussinessLogicService
 *
 * @Description: @Component標註的bean
 *
 * @author: Mr.Yang
 *
 * @date: 2017年9月12日 下午12:11:28
 */
@Component
public class BussinessLogicService {
	public void doLogic() {
		System.out.println("BussinessLogicService doLogic executed ");
	}
}
切面
package com.xgj.aop.spring.advisor.aspectJAdvance.bindProxyObj;
import org.aspectj.lang.annotation.Aspect;
import org.aspectj.lang.annotation.Before;
/**
 *
 *
 * @ClassName: BindProxyObjAspect
 *
 * @Description: 綁定代理對象
 *               使用this()或target()可綁定被代理對象實例,在通過類實例名綁定對象時,還依然具有原來連接點匹配的功能,
 *               隻不過類名是通過增強方法中同名入參的類型間接決定罷瞭
 *
 * @author: Mr.Yang
 *
 * @date: 2017年9月12日 下午12:04:44
 */
@Aspect
public class BindProxyObjAspect {
	// (1)處通過②處查找出waiter對應的類型為BussinessLogicService,因而切點表達式
	// 為this(bussinessLogicService),當增強方法織入目標連接點時,增強方法通過bussinessLogicService
	// 入參可以引用到代理對象的實例。
	@Before("this(bussinessLogicService)")
	public void bindProxyObj(BussinessLogicService bussinessLogicService) { // (2)
		System.out.println("----bindProxyObj()----");
		System.out.println(bussinessLogicService.getClass().getName());
		System.out.println("----bindProxyObj()----");
	}
}
①處的切點表達式首先按類變量名查找②處增強方法的入參列表,進而獲取類變量名對應的類為
com.xgj.aop.spring.advisor.aspectJAdvance.bindProxyObj.BussinessLogicService
這樣就知道瞭切點的定義為
this(com.xgj.aop.spring.advisor.aspectJAdvance.bindProxyObj.BussinessLogicService)
即所有代理對象為BussinessLogicService類的所有方法匹配該切點。
②處的增強方法通過bussinessLogicService入參綁定目標對象。
可見BussinessLogicService的所有方法匹配①處的切點
配置文件
<?xml version="1.0" encoding="UTF-8"?>
<beans xmlns="http://www.springframework.org/schema/beans"
	xmlns:aop="http://www.springframework.org/schema/aop"
	xmlns:xsi="http://www.w3.org/2001/XMLSchema-instance"
	xmlns:context="http://www.springframework.org/schema/context"
	xsi:schemaLocation="http://www.springframework.org/schema/beans
		http://www.springframework.org/schema/beans/spring-beans.xsd
		http://www.springframework.org/schema/aop
		http://www.springframework.org/schema/aop/spring-aop.xsd
		http://www.springframework.org/schema/context
       	http://www.springframework.org/schema/context/spring-context.xsd">
<!-- (1)聲明Context命名空間以及Schema文件   (2)掃描類包以及應用註解定義的bean -->
<context:component-scan base-package="com.xgj.aop.spring.advisor.aspectJAdvance.bindProxyObj"/>
<!-- 基於@AspectJ切面的驅動器 -->
<aop:aspectj-autoproxy proxy-target-class="true"/>

<!-- 使用瞭@AspectJ註解的切面類 -->
<bean class="com.xgj.aop.spring.advisor.aspectJAdvance.bindProxyObj.BindProxyObjAspect"/>
</beans>
測試類
package com.xgj.aop.spring.advisor.aspectJAdvance.bindProxyObj;
import org.junit.Test;
import org.springframework.context.ApplicationContext;
import org.springframework.context.support.ClassPathXmlApplicationContext;
public class BindProxyObjAspectTest {
 @Test
 public void test() {
  ApplicationContext ctx = new ClassPathXmlApplicationContext(
    "classpath:com/xgj/aop/spring/advisor/aspectJAdvance/bindProxyObj/conf-bindProxyObj.xml");
  BussinessLogicService bussinessLogicService = ctx.getBean(
    "bussinessLogicService", BussinessLogicService.class);
  bussinessLogicService.doLogic();
 }
}
運行結果
2017-09-12 13:54:41,463 INFO [main] (AbstractApplicationContext.java:583) – Refreshing org.springframework.context.support.ClassPathXmlApplicationContext@292898f5: startup date [Tue Sep 12 13:54:41 BOT 2017]; root of context hierarchy
2017-09-12 13:54:41,557 INFO [main] (XmlBeanDefinitionReader.java:317) – Loading XML bean definitions from class path resource [com/xgj/aop/spring/advisor/aspectJAdvance/bindProxyObj/conf-bindProxyObj.xml]
—-bindProxyObj()—-
com.xgj.aop.spring.advisor.aspectJAdvance.bindProxyObj.BussinessLogicService$$EnhancerBySpringCGLIB$$472f5f0d
—-bindProxyObj()—-
BussinessLogicService doLogic executed
按相似的方法使用target()進行綁定。
以上為個人經驗,希望能給大傢一個參考,也希望大傢多多支持WalkonNet。
推薦閱讀:
- Spring-AOP @AspectJ切點函數之@annotation()用法
- Spring-AOP自動創建代理之BeanNameAutoProxyCreator實例
- Spring中的AOP操作你瞭解嗎
- Spring項目中使用Junit單元測試並配置數據源的操作
- 一篇文章帶你瞭解Spring AOP 的註解