vue實現div高度可拖拽
本文實例為大傢分享瞭vue實現div高度可拖拽的具體代碼,供大傢參考,具體內容如下
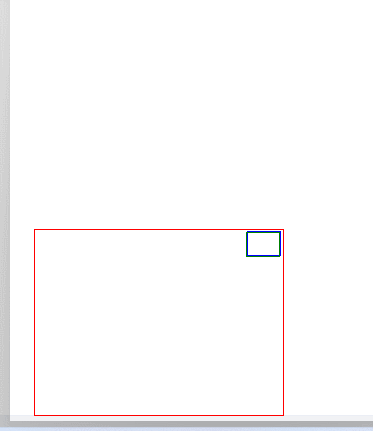
這裡有一個現成的demo,可以實現頁面div的拖拽功能,但是和我想要的效果不是很一樣,所以說後邊有根據我的實際需求又重新修改瞭一下,先看一下現在的demo效果。
<template>
  <div id="eagleMapContainer" style="border: 1px solid red;overflow-y: auto;" title="">
    <div id="tz" @mousedown="dragEagle" style="border: 1px solid blue;">
      <div title="拖動調整大小" id="move_tz" style="border: 1px solid green;"></div>
    </div>
  </div>
</template>

<script>
  export default {
    name: "eagleMap",
    data() {
      return {}
    },
    methods: {
      dragEagle: function (e) {
        var targetDiv = document.getElementById('eagleMapContainer');
        //得到點擊時該地圖容器的寬高:
        var targetDivHeight = targetDiv.offsetHeight;
        var startX = e.clientX;
        var startY = e.clientY;
        var _this = this;
        document.onmousemove = function (e) {
          e.preventDefault();
          //得到鼠標拖動的寬高距離:取絕對值
          var distX = Math.abs(e.clientX - startX);
          var distY = Math.abs(e.clientY - startY);
          //往上方拖動:
          if (e.clientY < startY) {
            targetDiv.style.height = targetDivHeight + distY + 'px';
          }
          //往下方拖動:
          if (e.clientX < startX && e.clientY > startY) {
            targetDiv.style.height = (targetDivHeight - distY) + 'px';
          }
          if (parseInt(targetDiv.style.height) >= 300) {
            targetDiv.style.height = 300 + 'px';
          }
          if (parseInt(targetDiv.style.height) <= 150) {
            targetDiv.style.height = 150 + 'px';
          }
        }
        document.onmouseup = function () {
          document.onmousemove = null;
        }
      }
    },
  };
</script>

<style scoped>
  #eagleMapContainer {
    position: absolute;
    left: 13%;
    bottom: 10px;
    z-index: 200;
    overflow: hidden;
    visibility: visible;
    width: 200px;
    height: 200px;
  }

  #tz {
    position: absolute;
    right: 1px;
    top: 1px;
    width: 27px;
    height: 20px;
    cursor: ne-resize;
    z-index: 200001;
    background-image: url("");

  }

  #tz:hover {
    background-color: #666;
  }

  #move_tz {
    position: absolute;
    right: 0px;
    top: 0px;
    width: 27px;
    height: 20px;
    cursor: ne-resize;
    z-index: 100;
    background-image: url("");
    background-position: 0px 0px;
  }
</style>
但是這個效果和我想要的不是很一樣,所以得稍微改造瞭一下。
我想要效果是: 我有一個div,裡面包含瞭很多小方塊列表,因為超出設置瞭超出滾動,所以是在有滾動條的div上添加實現高度變化的拖拽。

接下來就是改造一下上邊的demo,簡單點,直接上代碼:
在上邊需要拖拽的div下面添加一個div,就是點到這個div開始實現拖拽功能。
<!-- 拖拉拽的小框 -->
    <div id="tz" @mousedown="dragEagle">
      <div title="拖動調整大小" id="move_tz"></div>
    </div>
需要根據拖拽實現高度變化的div設置一個id,假設為 “fuDiv”,然後編寫方法。
// 拖拉
      dragEagle(e) {
        var targetDiv = document.getElementById('fuDiv');
        //得到點擊時該地圖容器的寬高:
        var targetDivHeight = targetDiv.offsetHeight;
        var startX = e.clientX;
        var startY = e.clientY;
        var _this = this;
        document.onmousemove = function (e) {
          e.preventDefault();
          //得到鼠標拖動的寬高距離:取絕對值
          var distY = Math.abs(e.clientY - startY);

          //往上方拖動:
          if (e.clientY < startY) {
            targetDiv.style.height = targetDivHeight - distY + 'px';
          }
          //往下方拖動:
          if (e.clientX < startX && e.clientY > startY) {
            targetDiv.style.height = (targetDivHeight + distY) + 'px';
          }
          if (parseInt(targetDiv.style.height) >= 320) {
            targetDiv.style.height = 320 + 'px';
          }
          if (parseInt(targetDiv.style.height) <= 160) {
            targetDiv.style.height = 160 + 'px';
          }
        }
        document.onmouseup = function () {
          document.onmousemove = null;
        }
      },
然後給他們設置一下css樣式,其實這個地方就隨意瞭,根據自己喜好來。
  #tz {
    width: 100%;
    height: 5px;
    cursor: s-resize;
    z-index: 200001;
  }

  #move_tz {
    width: 100%;
    height: 5px;
    cursor: s-resize;
    z-index: 100;
    background-image: url("");
    background-position: 0px 0px;
  }
最後效果:

效果不是特別的好,還有很多地方是值得優化以下的,暫時不寫瞭。
以上就是本文的全部內容,希望對大傢的學習有所幫助,也希望大傢多多支持WalkonNet。
推薦閱讀:
- JavaScript實現淘寶網圖片的局部放大功能
- JavaScript實現鼠標拖拽效果
- JavaScript實現鼠標拖拽調整div大小
- vue實現放大縮小拖拽功能
- JavaScript實現div的鼠標拖拽效果