C#實現簡易灰度圖和酷炫HeatMap熱力圖winform(附DEMO)
一、效果展示
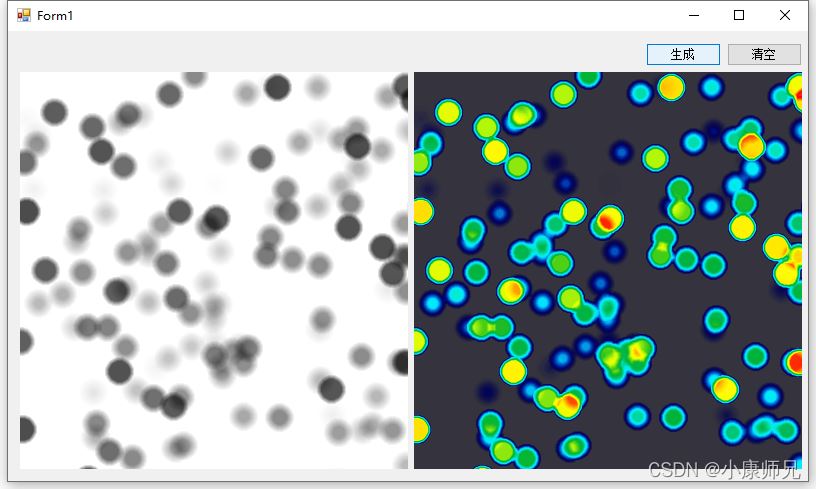
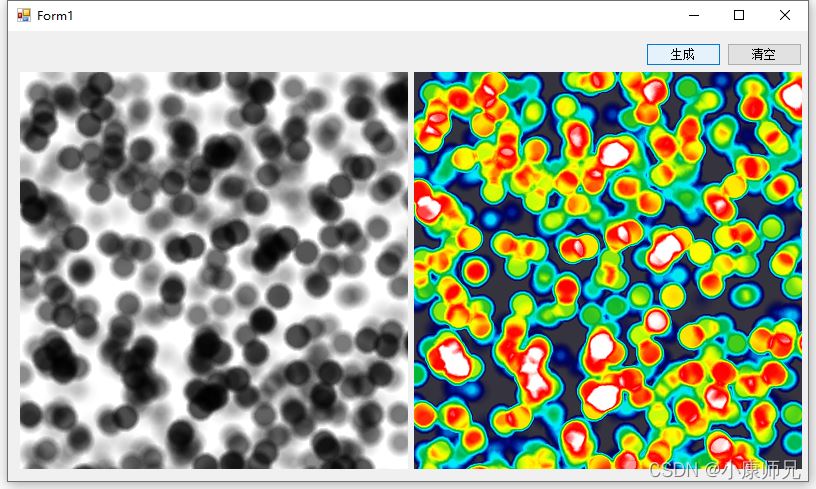
二、隨機生成熱力點
熱力點類
    class HeatPoint
    {
        public int X;
        public int Y;
        public byte Intensity;
        public HeatPoint(int iX, int iY, byte bIntensity)
        {
            X = iX;
            Y = iY;
            Intensity = bIntensity;
        }
    }
隨機生成熱力點
privatevoid generateBtn_Click(object sender, EventArgs e)
{
    Random rRand = new Random();
    for (int i = 0; i < 500; i++)
    {
        int iX = rRand.Next(0, 800);
        int iY = rRand.Next(0, 800);
        byte iIntense = (byte)rRand.Next(0, 180);
        heatPoints.Add(new HeatPoint(iX, iY, iIntense));
    }
    UpdateView();
}
三、灰度圖生成解析
private Bitmap CreateIntensityMask(Bitmap bitmap, List<HeatPoint> aHeatPoints)
{
    Graphics graphics = Graphics.FromImage(bitmap);
    graphics.Clear(System.Drawing.Color.White);
    foreach (HeatPoint point in aHeatPoints)
    {
        if (point.Intensity * 30 / 180 == 0)
            continue;
        DrawHeatPoint(graphics, point, point.Intensity * 30 / 180);
        //DrawHeatPoint(graphics, point, 15);
    }
    return bitmap;
}

//此方法用於在繪圖表面上繪制實際的徑向漸變“點”。這可能是整個項目中最重要的方法,因為它可以處理不同大小和密度的繪圖點。
private void DrawHeatPoint(Graphics graphics, HeatPoint HeatPoint, int radius)
{
    List<System.Drawing.Point> pointsList = new List<System.Drawing.Point>();
    for (double degrees = 0; degrees <= 360; degrees += 10)
    {
        // 在定義半徑的圓的圓周上繪制新點
        // 使用點坐標、半徑和角度
        // 計算這個迭代點在圓上的位置
        System.Drawing.Point point = new System.Drawing.Point();
        point.X = Convert.ToInt32(HeatPoint.X + radius * Math.Cos((Math.PI / 180) * degrees));
        point.Y = Convert.ToInt32(HeatPoint.Y + radius * Math.Sin((Math.PI / 180) * degrees));
        pointsList.Add(point);
    }


    // 創建新的顏色混合來告訴 PathGradientBrush 使用什麼顏色以及放置它們的位置
    ColorBlend colorBlend = new ColorBlend(3);

    // 計算比例以將字節強度范圍從 0-255 縮放到 0-1
    float fRatio = 1F / Byte.MaxValue;
    // 預計算字節最大值的一半
    byte bHalf = Byte.MaxValue / 2;
    // 將其中心值的強度從低高翻轉到高低
    int iIntensity = (byte)(HeatPoint.Intensity - ((HeatPoint.Intensity - bHalf) * 2));
    // 存儲縮放和翻轉的強度值以用於梯度中心位置
    float fIntensity = iIntensity * fRatio;
    // 定義漸變顏色的位置,使用intesity將中間顏色調整為
    colorBlend.Positions = new float[3] { 0, fIntensity, 1 };
    colorBlend.Colors = new System.Drawing.Color[3]
    {
        System.Drawing.Color.FromArgb(0, System.Drawing.Color.White),
        System.Drawing.Color.FromArgb(HeatPoint.Intensity, System.Drawing.Color.Black),
        System.Drawing.Color.FromArgb(HeatPoint.Intensity, System.Drawing.Color.Black)
    };

    // 創建新的 PathGradientBrush 以使用圓周點創建徑向漸變
    PathGradientBrush brush = new PathGradientBrush(pointsList.ToArray());
    // 將顏色混合傳遞給 PathGradientBrush 以指示它如何生成漸變
    brush.InterpolationColors = colorBlend;
    graphics.FillPolygon(brush, pointsList.ToArray());
}
四、熱力圖生成解析
public static Bitmap Colorize(Bitmap Mask, byte Alpha)
{
    Bitmap Output = new Bitmap(Mask.Width, Mask.Height, System.Drawing.Imaging.PixelFormat.Format32bppArgb);
    Graphics Surface = Graphics.FromImage(Output);
    Surface.Clear(System.Drawing.Color.Transparent);

    // 構建一組顏色映射以將我們的灰度蒙版重新映射為全色
    // 接受一個 alpha 字節來指定輸出圖像的透明度
    ColorMap[] Colors = CreatePaletteIndex(Alpha);

    // 創建新的圖像屬性類來處理顏色重新映射
    // 註入我們的顏色映射數組來指示圖像屬性類如何進行著色
    ImageAttributes Remapper = new ImageAttributes();
    Remapper.SetRemapTable(Colors);

    // 使用新的顏色映射方案將我們的蒙版繪制到我們的內存位圖工作表面上
    Surface.DrawImage(Mask, new System.Drawing.Rectangle(0, 0, Mask.Width, Mask.Height), 0, 0, Mask.Width, Mask.Height, GraphicsUnit.Pixel, Remapper);
    return Output;
}

private static ColorMap[] CreatePaletteIndex(byte Alpha)
{
    ColorMap[] OutputMap = new ColorMap[256];

    Assembly myAssembly = Assembly.GetExecutingAssembly();
    Stream myStream = myAssembly.GetManifestResourceStream("熱力圖Demo.Image.gradient-palette.jpg");
    Bitmap Palette = new Bitmap(myStream);
    for (int X = 0; X <= 255; X++)
    {
        OutputMap[X] = new ColorMap();
        OutputMap[X].OldColor = System.Drawing.Color.FromArgb(X, X, X);
        OutputMap[X].NewColor = System.Drawing.Color.FromArgb(Alpha, Palette.GetPixel(X, 0));
    }
    return OutputMap;
}
五、源碼下載
熱力圖Demo.zip
到此這篇關於C#實現簡易灰度圖和酷炫HeatMap熱力圖winform(附DEMO)的文章就介紹到這瞭,更多相關C# 灰度圖和熱力圖內容請搜索WalkonNet以前的文章或繼續瀏覽下面的相關文章希望大傢以後多多支持WalkonNet!
推薦閱讀:
- C# .Net實現灰度圖和HeatMap熱力圖winform(進階)
- c# Bitmap轉bitmapImage高效方法
- C#繪制中國象棋棋盤
- C# Bitmap圖像處理(含增強對比度的三種方法)
- C#實現截圖幫助類