ssm整合shiro使用詳解
這裡有詳細的ssm整合shiro步驟,需要先搭建ssm框架,教程在
https://www.jb51.net/article/195130.htm
整合shiro:
1.在pom.xml中引入依賴
<!--  shiro -->
    <!-- https://mvnrepository.com/artifact/org.apache.shiro/shiro-core -->
    <dependency>
      <groupId>org.apache.shiro</groupId>
      <artifactId>shiro-core</artifactId>
      <version>1.6.0</version>
    </dependency>

    <!-- https://mvnrepository.com/artifact/org.apache.shiro/shiro-web -->
    <dependency>
      <groupId>org.apache.shiro</groupId>
      <artifactId>shiro-web</artifactId>
      <version>1.6.0</version>
    </dependency>
    <!-- https://mvnrepository.com/artifact/org.apache.shiro/shiro-spring -->
    <dependency>
      <groupId>org.apache.shiro</groupId>
      <artifactId>shiro-spring</artifactId>
      <version>1.6.0</version>
    </dependency>

    <!-- https://mvnrepository.com/artifact/org.apache.shiro/shiro-ehcache -->
    <dependency>
      <groupId>org.apache.shiro</groupId>
      <artifactId>shiro-ehcache</artifactId>
      <version>1.6.0</version>
    </dependency>
2.新建並配置緩存ehcache.xml
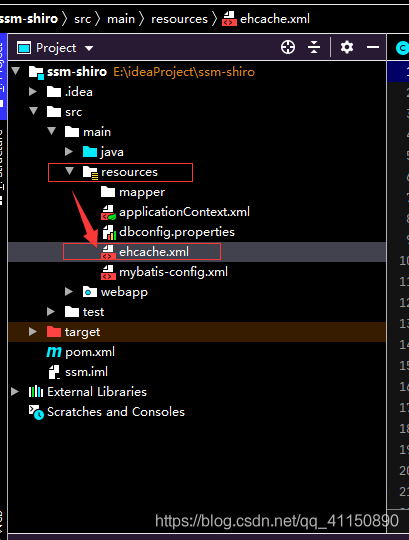
<ehcache>

    <!-- Sets the path to the directory where cache .data files are created.

         If the path is a Java System Property it is replaced by
         its value in the running VM.

         The following properties are translated:
         user.home - User's home directory
         user.dir - User's current working directory
         java.io.tmpdir - Default temp file path -->
    <diskStore path="java.io.tmpdir"/>

    <cache name="authorizationCache"
           eternal="false"
           timeToIdleSeconds="3600"
           timeToLiveSeconds="0"
           overflowToDisk="false"
           statistics="true">
    </cache>

    <cache name="authenticationCache"
           eternal="false"
           timeToIdleSeconds="3600"
           timeToLiveSeconds="0"
           overflowToDisk="false"
           statistics="true">
    </cache>

    <cache name="shiro-activeSessionCache"
           eternal="false"
           timeToIdleSeconds="3600"
           timeToLiveSeconds="0"
           overflowToDisk="false"
           statistics="true">
    </cache>

    <!--Default Cache configuration. These will applied to caches programmatically created through
        the CacheManager.

        The following attributes are required for defaultCache:

        maxInMemory       - Sets the maximum number of objects that will be created in memory
        eternal           - Sets whether elements are eternal. If eternal,  timeouts are ignored and the element
                            is never expired.
        timeToIdleSeconds - Sets the time to idle for an element before it expires. Is only used
                            if the element is not eternal. Idle time is now - last accessed time
        timeToLiveSeconds - Sets the time to live for an element before it expires. Is only used
                            if the element is not eternal. TTL is now - creation time
        overflowToDisk    - Sets whether elements can overflow to disk when the in-memory cache
                            has reached the maxInMemory limit.

        -->
    <defaultCache
        maxElementsInMemory="10000"
        eternal="false"
        timeToIdleSeconds="120"
        timeToLiveSeconds="120"
        overflowToDisk="true"
        />

    <!--Predefined caches.  Add your cache configuration settings here.
        If you do not have a configuration for your cache a WARNING will be issued when the
        CacheManager starts

        The following attributes are required for defaultCache:

        name              - Sets the name of the cache. This is used to identify the cache. It must be unique.
        maxInMemory       - Sets the maximum number of objects that will be created in memory
        eternal           - Sets whether elements are eternal. If eternal,  timeouts are ignored and the element
                            is never expired.
        timeToIdleSeconds - Sets the time to idle for an element before it expires. Is only used
                            if the element is not eternal. Idle time is now - last accessed time
        timeToLiveSeconds - Sets the time to live for an element before it expires. Is only used
                            if the element is not eternal. TTL is now - creation time
        overflowToDisk    - Sets whether elements can overflow to disk when the in-memory cache
                            has reached the maxInMemory limit.

        -->

    <!-- Sample cache named sampleCache1
        This cache contains a maximum in memory of 10000 elements, and will expire
        an element if it is idle for more than 5 minutes and lives for more than
        10 minutes.

        If there are more than 10000 elements it will overflow to the
        disk cache, which in this configuration will go to wherever java.io.tmp is
        defined on your system. On a standard Linux system this will be /tmp"
        -->
    <cache name="sampleCache1"
        maxElementsInMemory="10000"
        eternal="false"
        timeToIdleSeconds="300"
        timeToLiveSeconds="600"
        overflowToDisk="true"
        />

    <!-- Sample cache named sampleCache2
        This cache contains 1000 elements. Elements will always be held in memory.
        They are not expired. -->
    <cache name="sampleCache2"
        maxElementsInMemory="1000"
        eternal="true"
        timeToIdleSeconds="0"
        timeToLiveSeconds="0"
        overflowToDisk="false"
        />

    <!-- Place configuration for your caches following -->

</ehcache>
3.在spring配置文件applicationContext.xml配置shiro
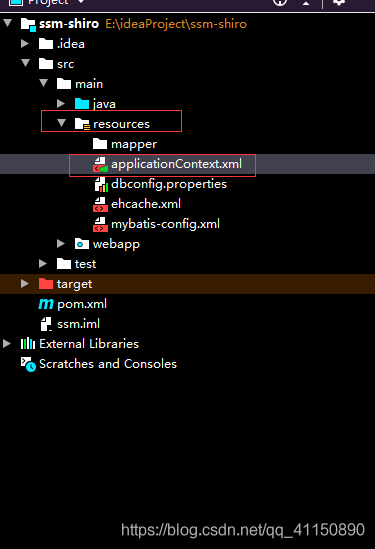
<?xml version="1.0" encoding="UTF-8"?>
<beans xmlns="http://www.springframework.org/schema/beans"
       xmlns:xsi="http://www.w3.org/2001/XMLSchema-instance"
       xmlns:context="http://www.springframework.org/schema/context"
       xmlns:aop="http://www.springframework.org/schema/aop" xmlns:tx="http://www.springframework.org/schema/tx"
       xsi:schemaLocation="http://www.springframework.org/schema/beans http://www.springframework.org/schema/beans/spring-beans.xsd http://www.springframework.org/schema/context http://www.springframework.org/schema/context/spring-context.xsd http://www.springframework.org/schema/aop http://www.springframework.org/schema/aop/spring-aop.xsd http://www.springframework.org/schema/tx http://www.springframework.org/schema/tx/spring-tx.xsd">
    <!-- spring 配置文件  主要配置和業務邏輯有關的 -->
    <context:property-placeholder location="classpath:dbconfig.properties"/>
    <!-- 數據源 -->
    <bean id="pooledDataSource" class="com.mchange.v2.c3p0.ComboPooledDataSource">
        <property name="jdbcUrl" value="${jdbc.jdbcUrl}"></property>
        <property name="driverClass" value="${jdbc.driverClass}"></property>
        <property name="user" value="${jdbc.user}"></property>
        <property name="password" value="${jdbc.password}"></property>
    </bean>


    <context:component-scan base-package="com.liuzhan">
        <!-- 不能掃描控制器 -->
    <context:exclude-filter type="annotation" expression="org.springframework.stereotype.Controller"/> </context:component-scan>


    <!-- 配置和mybatis的整合 -->
    <bean id="sqlSessionFactory" class="org.mybatis.spring.SqlSessionFactoryBean">
        <!-- 指定mybatis 全局配置文件的位置 -->
        <property name="configLocation" value="classpath:mybatis-config.xml"></property>
        <property name="dataSource" ref="pooledDataSource"></property>
        <!-- 指定mybatismapper文件的位置 -->
<!--        <property name="mapperLocations" value="classpath:mapper/*.xml"></property>-->
    </bean>


    <!-- 配置掃描器,將mybatis接口的實現加入到ioc容器中 -->
    <bean class="tk.mybatis.spring.mapper.MapperScannerConfigurer">
        <!-- 掃描所有的dao接口 -->
        <property name="basePackage" value="com.liuzhan.dao"></property>
    </bean>

    <!-- 事務控制的配置 -->

    <bean id="transactionManager" class="org.springframework.jdbc.datasource.DataSourceTransactionManager">
        <!-- 控制數據源 -->
        <property name="dataSource" ref="pooledDataSource"></property>
    </bean>

    <aop:config>
        <!-- 切入點表達式 -->
        <aop:pointcut expression="execution(* com.liuzhan.service..*(..) )" id="txPoint"/>
        <!-- 配置事務 -->
        <aop:advisor advice-ref="txAdvice" pointcut-ref="txPoint"/>
    </aop:config>
    <!-- 配置事務增強  事務如何切入 -->
    <tx:advice id="txAdvice">

        <tx:attributes>
            <!-- 所有方法都是事務方法 -->
            <tx:method name="*"/>
            <!-- 以get開頭的所有方法 -->
            <tx:method name="get*" read-only="true"/>
        </tx:attributes>
    </tx:advice>


    <!-- shiro -->

    <!-- 配置自定義Realm -->
    <bean id="myRealm" class="com.liuzhan.relams.ShiroRealm"/>
    <!-- 安全管理器 -->
    <bean id="securityManager" class="org.apache.shiro.web.mgt.DefaultWebSecurityManager">
        <property name="realm" ref="myRealm"/>
    </bean>
    <!-- Shiro過濾器 核心-->
    <bean id="shiroFilter" class="org.apache.shiro.spring.web.ShiroFilterFactoryBean">
        <!-- Shiro的核心安全接口,這個屬性是必須的 -->
        <property name="securityManager" ref="securityManager"/>
        <!-- 身份認證失敗,則跳轉到登錄頁面的配置 -->
        <property name="loginUrl" value="/login.jsp"/>

        <!-- 權限認證失敗,則跳轉到指定頁面 -->
        <property name="unauthorizedUrl" value="/noPermission.jsp"/>

        <!-- Shiro連接約束配置,即過濾鏈的定義 -->
        <property name="filterChainDefinitions">
            <value>
                <!--設置jsp文件可以匿名訪問,靜態文件,如js\html\css\img等
                -->
                <!--login/**= anon
                /css/**=anon
                /html/**=anon
                /images/**=anon
                /js/**=anon
                -->


                /noPermission.jsp=anon
                <!--anon 表示匿名訪問,不需要認證以及授權-->
                /login.jsp=anon
                <!-- 由於該請求http://localhost:8080/ssm_shiro_war_exploded/login是執行認證的請求路徑,因此不能被攔截,不然永遠無法執行認證 -->
                /login = anon
                <!-- logout 表示退出,當有/logout請求時,會執行退出,清除用戶信息及角色和權限信息-->
                /logout = logout


<!--             先登錄驗證 -->
                /**=authc

                <!-- 角色驗證方式一(單個角色),判斷該用戶是否擁有admin角色 -->
                <!--  註意,登錄驗證時不會執行該過濾規則,權限驗證會執行user過濾規則,如果沒有roles條件,默認是所有權限          -->
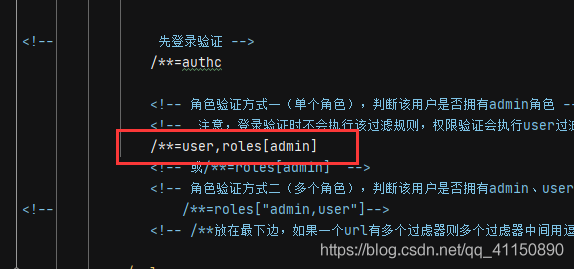
                /**=user,roles[admin]
                <!-- 或/**=roles[admin]  -->
                <!-- 角色驗證方式二(多個角色),判斷該用戶是否擁有admin、user角色 -->
<!--                /**=roles["admin,user"]-->
                <!-- /**放在最下邊,如果一個url有多個過慮器則多個過慮器中間用逗號分隔,如:/** = user,roles[admin]-->

            </value>
        </property>

    </bean>
    <!-- 保證實現瞭Shiro內部lifecycle函數的bean執行 -->
    <bean id="lifecycleBeanPostProcessor" class="org.apache.shiro.spring.LifecycleBeanPostProcessor"/>
    <!-- 開啟Shiro註解 -->
    <bean class="org.springframework.aop.framework.autoproxy.DefaultAdvisorAutoProxyCreator"
          depends-on= "lifecycleBeanPostProcessor"/>
    <bean class="org.apache.shiro.spring.security.interceptor.AuthorizationAttributeSourceAdvisor">
        <property name="securityManager" ref="securityManager"/>
    </bean>
</beans>
4.自定義realm(內部定義認證和授權的邏輯代碼)
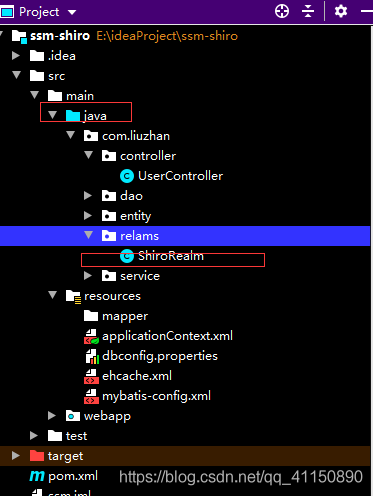
package com.liuzhan.relams;

import com.liuzhan.entity.Users;
import com.liuzhan.service.UserService;
import org.apache.shiro.authc.AuthenticationException;
import org.apache.shiro.authc.AuthenticationInfo;
import org.apache.shiro.authc.AuthenticationToken;
import org.apache.shiro.authc.SimpleAuthenticationInfo;
import org.apache.shiro.authz.AuthorizationInfo;
import org.apache.shiro.authz.SimpleAuthorizationInfo;
import org.apache.shiro.realm.AuthorizingRealm;
import org.apache.shiro.subject.PrincipalCollection;
import org.springframework.beans.factory.annotation.Autowired;

import java.util.HashSet;
import java.util.List;
import java.util.Set;

public class ShiroRealm extends AuthorizingRealm {

    @Autowired
    UserService userService;


    /**
     * 用於授權。
     * @param principalCollection
     * @return
     */
    @Override
    protected AuthorizationInfo doGetAuthorizationInfo(PrincipalCollection principalCollection) {
        System.out.println("開始授權");
        String uName = principalCollection.getPrimaryPrincipal().toString() ;
        SimpleAuthorizationInfo info = new SimpleAuthorizationInfo() ;
        List<Users> list=userService.loginCheck(uName);
        //查詢當前用戶的角色,放在roleName中
        Set<String> roleName = new HashSet<>();
        roleName.add(list.get(0).getRole());

        //查詢角色具有的權限,放在permissions中
        Set<String> permissions = new HashSet<>();
        permissions.add("manage other users");

        //把角色和權限放在授權類的對象中
        info.addRole(list.get(0).getRole());
        info.addStringPermission("manage other users");

        System.out.println("當前用戶角色:"+info.getRoles());
        return info;
    }


    //認證
    //用戶輸入用戶名和密碼後,在controller調用login(token),進行認證,這邊通過用戶名查詢密碼
    //和token中用戶名和密碼進行比對,成功認證或失敗
    @Override
    protected AuthenticationInfo doGetAuthenticationInfo(AuthenticationToken authenticationToken) throws AuthenticationException {

        System.out.println("開始登錄認證");

        //獲取用戶名,去數據庫取對應密碼
        String uName = (String) authenticationToken.getPrincipal();
        List<Users> list=userService.loginCheck(uName);

        if(list.size()>0){
            System.out.println("用戶存在");
            String uPwd=list.get(0).getuPwd();
            // 用戶名存在,去數據庫中去獲取密碼
            // 然後和token的用戶名和密碼對比
            // 第三個參數是選擇realm,當有多個自定義realm時有用
            SimpleAuthenticationInfo info=new
                    SimpleAuthenticationInfo(uName, uPwd, "ShiroRealm");
            return info;
        }
        else{
            System.out.println("用戶不存在");
            return null;
        }

    }
}
5.controller中相關代碼
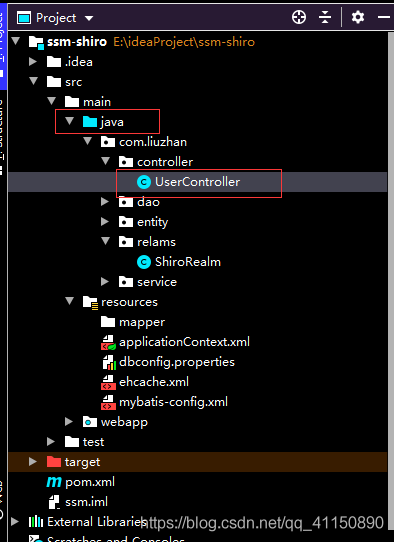
package com.liuzhan.controller;

import com.liuzhan.entity.Users;
import com.liuzhan.service.UserService;
import org.apache.shiro.SecurityUtils;
import org.apache.shiro.authc.AuthenticationException;
import org.apache.shiro.authc.UsernamePasswordToken;
import org.apache.shiro.subject.Subject;
import org.springframework.beans.factory.annotation.Autowired;
import org.springframework.stereotype.Controller;
import org.springframework.web.bind.annotation.RequestMapping;


@Controller
public class UserController {

    @Autowired
    UserService userService;

    @RequestMapping("/login")
    public String loginCheck(Users users){

        Subject subject=SecurityUtils.getSubject();
        if(!subject.isAuthenticated()) {
            UsernamePasswordToken token=new UsernamePasswordToken(users.getuName(),users.getuPwd());
            token.setRememberMe(true);
            try {
                //執行登錄,會調用認證方法,如果認證失敗,會拋出異常,執行catch
                subject.login(token);
            } catch (AuthenticationException e) {
                // TODO Auto-generated catch block
                System.out.println("登錄失敗:"+e.getMessage());
                return "login";
            }
        }
        //login(token)認證成功會執行這些語句
        System.out.println("登錄成功");

        //這裡如果直接 return "WEB-INF/jsp/index"的話,由於默認轉發,地址欄不變,還是http://localhost:8080/ssm_shiro_war_exploded/login
        //仍然執行/login = anon過濾規則,不會執行下面的權限驗證過濾規則 /**=user,roles[admin]

        //因此需要使用重定向"redirect:index",才能讓 /**=user,roles[admin]過濾規則生效
        return "redirect:index";
    }

    @RequestMapping("/index")
    public String index() {
       return "WEB-INF/jsp/index";
    }
}

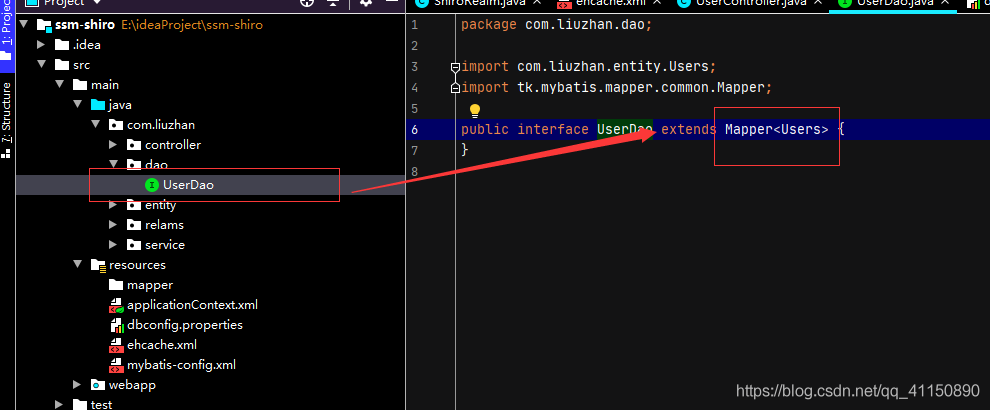
這裡到dao service entity就不再粘貼代碼瞭
6.數據庫連接配置相關
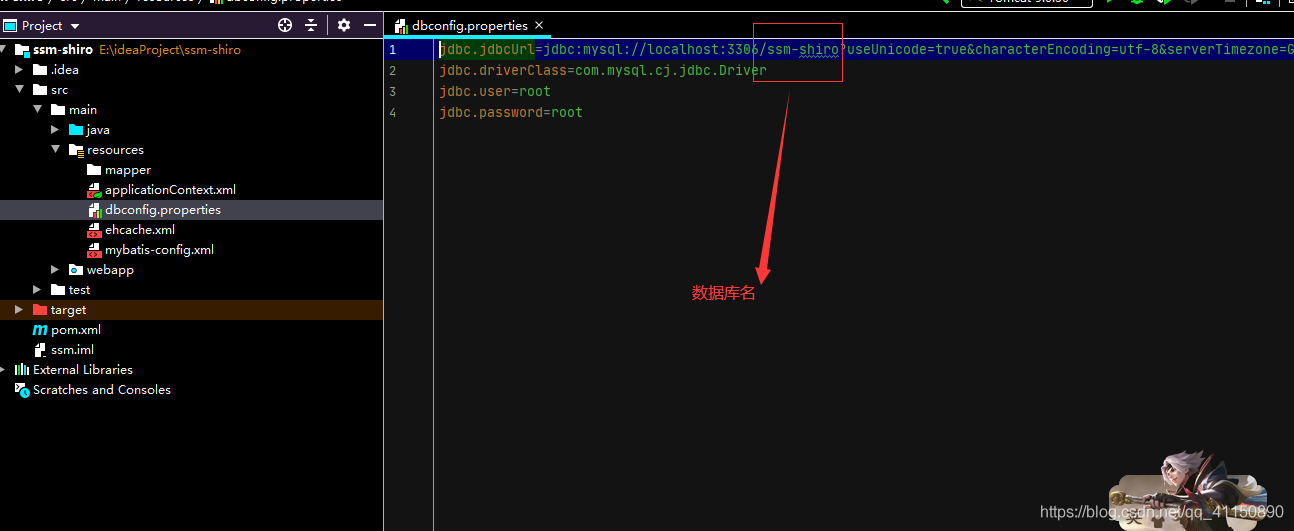
jdbc.jdbcUrl=jdbc:mysql://localhost:3306/ssm-shiro?useUnicode=true&characterEncoding=utf-8&serverTimezone=GMT%2B8
jdbc.driverClass=com.mysql.cj.jdbc.Driver
jdbc.user=root
jdbc.password=root
applicationContext.xml

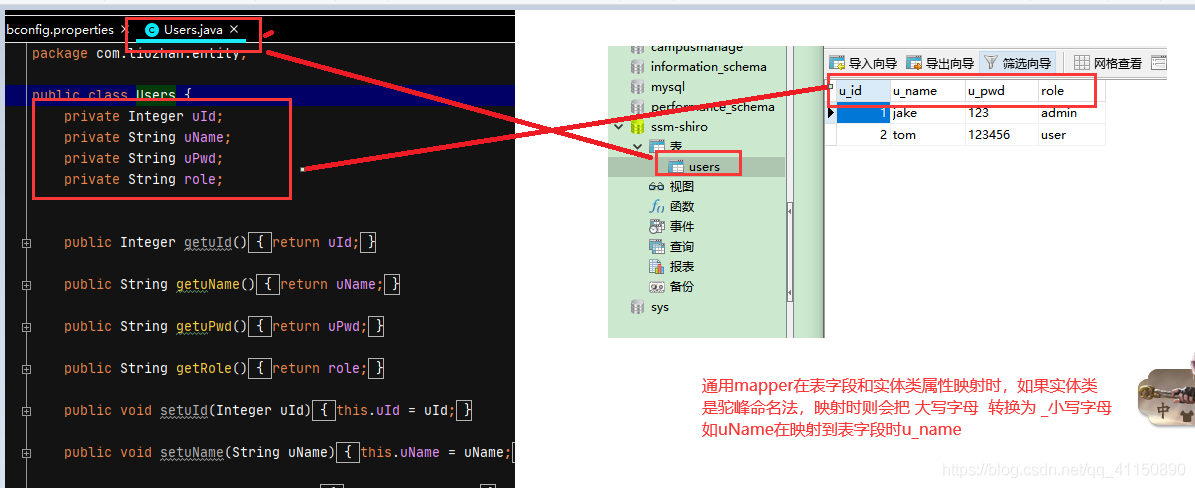
項目中用到的是通用mapper,實體類的類名和數據庫的表名對應,實體類的屬性和數據庫表的字段名對應
測試
運行項目
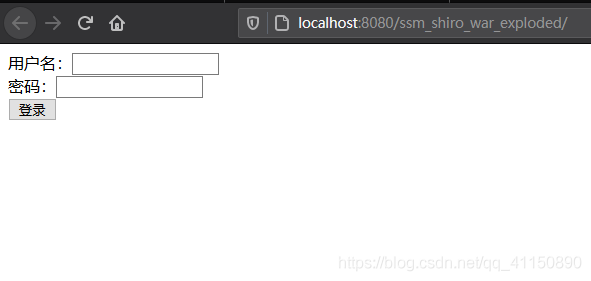
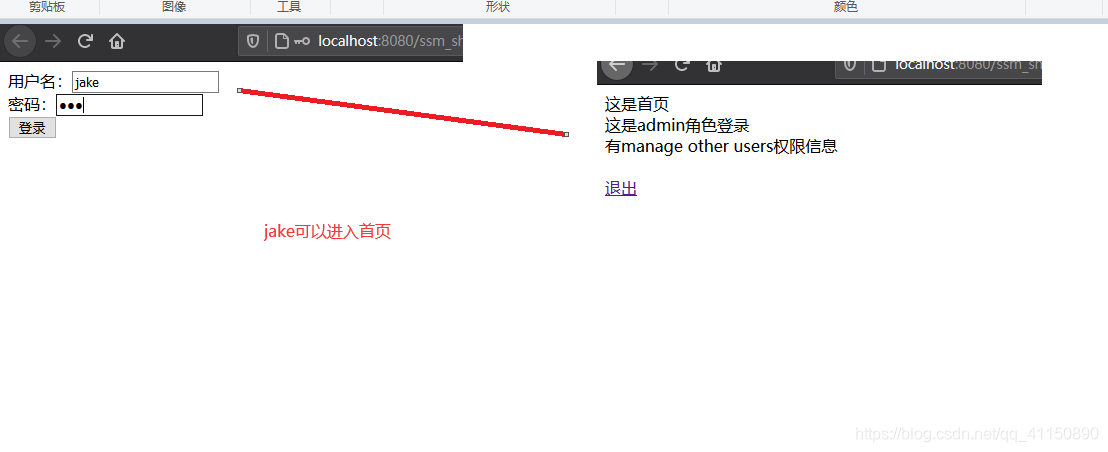
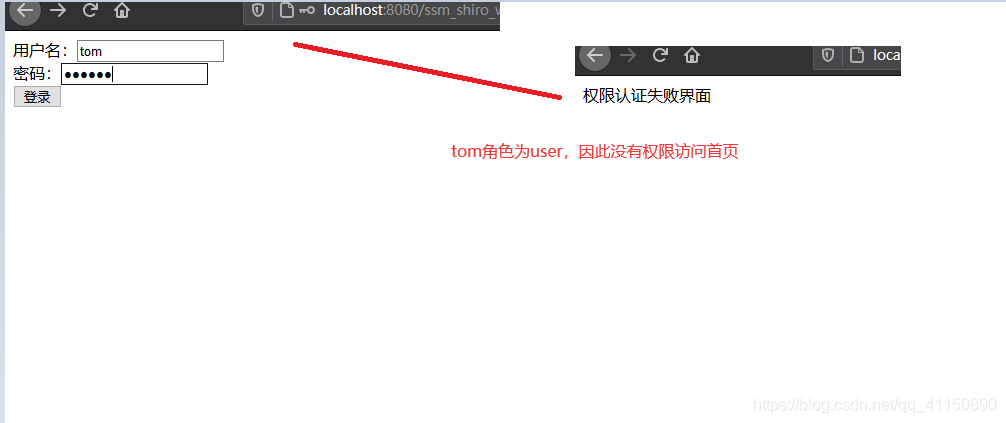
因為我shiro過濾鏈配置的是隻有角色為admin的能進首頁,角色為user不能進首頁,會被攔截(數據庫jake為admin,tom為user)
運行結果:
到此這篇關於ssm整合shiro使用詳解的文章就介紹到這瞭,更多相關ssm整合shiro內容請搜索WalkonNet以前的文章或繼續瀏覽下面的相關文章希望大傢以後多多支持WalkonNet!
推薦閱讀:
- None Found