Spring Cloud + Nacos + Seata整合過程(分佈式事務解決方案)
一、簡介
Seata 是一款開源的分佈式事務解決方案,致力於在微服務架構下提供高性能和簡單易用的分佈式事務服務。
2019 年 1 月,阿裡巴巴中間件團隊發起瞭開源項目 Fescar(Fast & EaSy Commit And Rollback),和社區一起共建開源分佈式事務解決方案。Fescar 的願景是讓分佈式事務的使用像本地事務的使用一樣,簡單和高效,並逐步解決開發者們遇到的分佈式事務方面的所有難題。
Fescar 開源後,螞蟻金服加入 Fescar 社區參與共建,並在 Fescar 0.4.0 版本中貢獻瞭 TCC 模式。
為瞭打造更中立、更開放、生態更加豐富的分佈式事務開源社區,經過社區核心成員的投票,大傢決定對 Fescar 進行品牌升級,並更名為 Seata,意為:Simple Extensible Autonomous Transaction Architecture,是一套一站式分佈式事務解決方案。

二、seata-server部署
1、官網下載

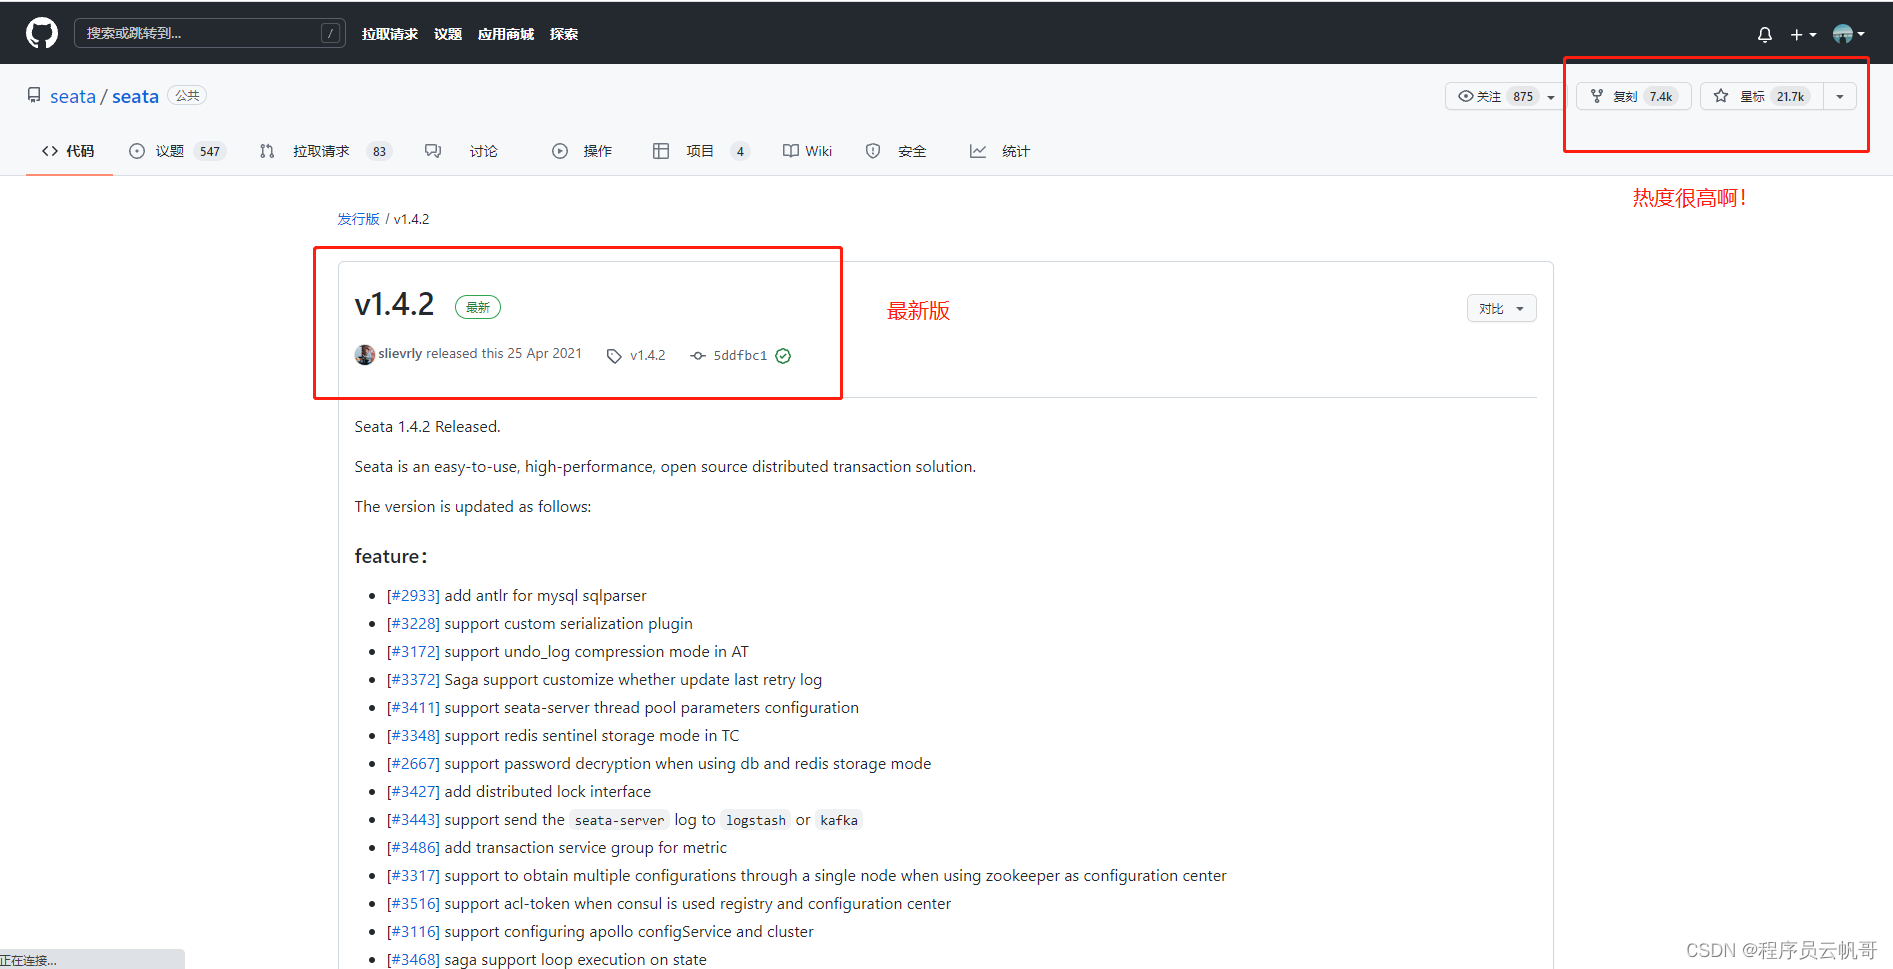
我們可以看到Seata的github star數有2萬多,說明還是熱門的!
我們下載最新版本v1.4.2 https://github.com/seata/seata/releases/download/v1.4.2/seata-server-1.4.2.zip
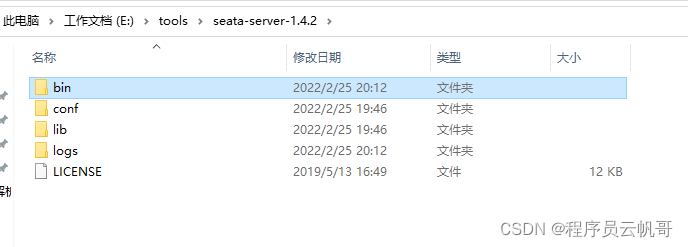
2、解壓到本地

3、修改配置文件
第一步,修改conf/registry.conf,重點修改nacos配置。
registry {
  # file 、nacos 、eureka、redis、zk、consul、etcd3、sofa
  type = "nacos"

  nacos {
    application = "seata-server"
    serverAddr = "127.0.0.1:8848"
    group = "SEATA_GROUP"
    namespace = ""
    cluster = "default"
    username = "nacos"
    password = "nacos"
  }

......

config {
  # file、nacos 、apollo、zk、consul、etcd3
  type = "nacos"

  nacos {
    serverAddr = "127.0.0.1:8848"
    namespace = ""
    group = "SEATA_GROUP"
    username = "nacos"
    password = "nacos"
    dataId = "seataServer.properties"
  }
}
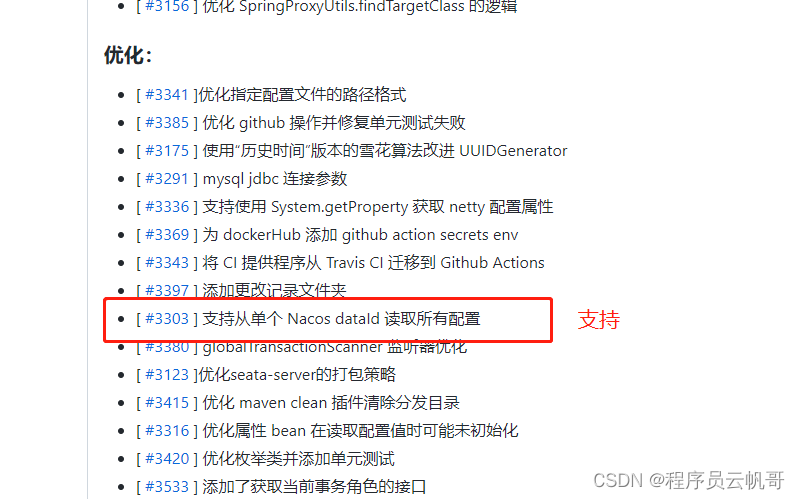
最新!現在支持配置dataId,就可以把所有配置放裡面。(其他地方的博客還在說,去下載config.txt、nacos-config.sh,然後執行跑到nacos上去,過時瞭!多關註nacos版本更新)

第二步,在Nacos上新增seataServer.properties

裡面的內容:
#For details about configuration items, see https://seata.io/zh-cn/docs/user/configurations.html
#Transport configuration, for client and server
transport.type=TCP
transport.server=NIO
transport.heartbeat=true
transport.enableTmClientBatchSendRequest=false
transport.enableRmClientBatchSendRequest=true
transport.enableTcServerBatchSendResponse=false
transport.rpcRmRequestTimeout=30000
transport.rpcTmRequestTimeout=30000
transport.rpcTcRequestTimeout=30000
transport.threadFactory.bossThreadPrefix=NettyBoss
transport.threadFactory.workerThreadPrefix=NettyServerNIOWorker
transport.threadFactory.serverExecutorThreadPrefix=NettyServerBizHandler
transport.threadFactory.shareBossWorker=false
transport.threadFactory.clientSelectorThreadPrefix=NettyClientSelector
transport.threadFactory.clientSelectorThreadSize=1
transport.threadFactory.clientWorkerThreadPrefix=NettyClientWorkerThread
transport.threadFactory.bossThreadSize=1
transport.threadFactory.workerThreadSize=default
transport.shutdown.wait=3
transport.serialization=seata
transport.compressor=none

#Transaction routing rules configuration, only for the client
service.vgroupMapping.default_tx_group=default
#If you use a registry, you can ignore it
service.default.grouplist=127.0.0.1:8091
service.enableDegrade=false
service.disableGlobalTransaction=false
#Transaction rule configuration, only for the client
client.rm.asyncCommitBufferLimit=10000
client.rm.lock.retryInterval=10
client.rm.lock.retryTimes=30
client.rm.lock.retryPolicyBranchRollbackOnConflict=true
client.rm.reportRetryCount=5
client.rm.tableMetaCheckEnable=false
client.rm.tableMetaCheckerInterval=60000
client.rm.sqlParserType=druid
client.rm.reportSuccessEnable=false
client.rm.sagaBranchRegisterEnable=false
client.rm.sagaJsonParser=fastjson
client.rm.tccActionInterceptorOrder=-2147482648
client.tm.commitRetryCount=5
client.tm.rollbackRetryCount=5
client.tm.defaultGlobalTransactionTimeout=60000
client.tm.degradeCheck=false
client.tm.degradeCheckAllowTimes=10
client.tm.degradeCheckPeriod=2000
client.tm.interceptorOrder=-2147482648
client.undo.dataValidation=true
client.undo.logSerialization=jackson
client.undo.onlyCareUpdateColumns=true
server.undo.logSaveDays=7
server.undo.logDeletePeriod=86400000
client.undo.logTable=undo_log
client.undo.compress.enable=true
client.undo.compress.type=zip
client.undo.compress.threshold=64k
#For TCC transaction mode
tcc.fence.logTableName=tcc_fence_log
tcc.fence.cleanPeriod=1h
#Log rule configuration, for client and server
log.exceptionRate=100
#Transaction storage configuration, only for the server. The file, DB, and redis configuration values are optional.
store.mode=db
store.lock.mode=file
store.session.mode=file
#Used for password encryption
store.publicKey=
#If `store.mode,store.lock.mode,store.session.mode` are not equal to `file`, you can remove the configuration block.
store.file.dir=file_store/data
store.file.maxBranchSessionSize=16384
store.file.maxGlobalSessionSize=512
store.file.fileWriteBufferCacheSize=16384
store.file.flushDiskMode=async
store.file.sessionReloadReadSize=100
#These configurations are required if the `store mode` is `db`. If `store.mode,store.lock.mode,store.session.mode` are not equal to `db`, you can remove the configuration block.
store.db.datasource=druid
store.db.dbType=mysql
store.db.driverClassName=com.mysql.cj.jdbc.Driver
store.db.url=jdbc:mysql://localhost:3306/seata?useUnicode=true&rewriteBatchedStatements=true
store.db.user=root
store.db.password=root
store.db.minConn=5
store.db.maxConn=30
store.db.globalTable=global_table
store.db.branchTable=branch_table
store.db.distributedLockTable=distributed_lock
store.db.queryLimit=100
store.db.lockTable=lock_table
store.db.maxWait=5000
#These configurations are required if the `store mode` is `redis`. If `store.mode,store.lock.mode,store.session.mode` are not equal to `redis`, you can remove the configuration block.
store.redis.mode=single
store.redis.single.host=127.0.0.1
store.redis.single.port=6379
store.redis.sentinel.masterName=
store.redis.sentinel.sentinelHosts=
store.redis.maxConn=10
store.redis.minConn=1
store.redis.maxTotal=100
store.redis.database=0
store.redis.password=
store.redis.queryLimit=100
#Transaction rule configuration, only for the server
server.recovery.committingRetryPeriod=1000
server.recovery.asynCommittingRetryPeriod=1000
server.recovery.rollbackingRetryPeriod=1000
server.recovery.timeoutRetryPeriod=1000
server.maxCommitRetryTimeout=-1
server.maxRollbackRetryTimeout=-1
server.rollbackRetryTimeoutUnlockEnable=false
server.distributedLockExpireTime=10000
server.session.branchAsyncQueueSize=5000
server.session.enableBranchAsyncRemove=true
#Metrics configuration, only for the server
metrics.enabled=false
metrics.registryType=compact
metrics.exporterList=prometheus
metrics.exporterPrometheusPort=9898
第三步,修改file.conf,修改為db模式,並連接MySQL
## transaction log store, only used in seata-server
store {
  ## store mode: file、db、redis
  mode = "db"

  ......

  ## database store property
  db {
    ## the implement of javax.sql.DataSource, such as DruidDataSource(druid)/BasicDataSource(dbcp)/HikariDataSource(hikari) etc.
    datasource = "druid"
    ## mysql/oracle/postgresql/h2/oceanbase etc.
    dbType = "mysql"
    driverClassName = "com.mysql.cj.jdbc.Driver"
    ## if using mysql to store the data, recommend add rewriteBatchedStatements=true in jdbc connection param
    url = "jdbc:mysql://localhost:3306/seata?rewriteBatchedStatements=true"
    user = "root"
    password = "root"
    minConn = 5
    maxConn = 100
    globalTable = "global_table"
    branchTable = "branch_table"
    lockTable = "lock_table"
    queryLimit = 100
    maxWait = 5000
  }
}
4、seata數據庫初始化
-- -------------------------------- The script used when storeMode is 'db' --------------------------------
-- the table to store GlobalSession data
CREATE TABLE IF NOT EXISTS `global_table`
(
    `xid`                       VARCHAR(128) NOT NULL,
    `transaction_id`            BIGINT,
    `status`                    TINYINT      NOT NULL,
    `application_id`            VARCHAR(32),
    `transaction_service_group` VARCHAR(32),
    `transaction_name`          VARCHAR(128),
    `timeout`                   INT,
    `begin_time`                BIGINT,
    `application_data`          VARCHAR(2000),
    `gmt_create`                DATETIME,
    `gmt_modified`              DATETIME,
    PRIMARY KEY (`xid`),
    KEY `idx_status_gmt_modified` (`status` , `gmt_modified`),
    KEY `idx_transaction_id` (`transaction_id`)
) ENGINE = InnoDB
  DEFAULT CHARSET = utf8;

-- the table to store BranchSession data
CREATE TABLE IF NOT EXISTS `branch_table`
    `branch_id`         BIGINT       NOT NULL,
    `xid`               VARCHAR(128) NOT NULL,
    `transaction_id`    BIGINT,
    `resource_group_id` VARCHAR(32),
    `resource_id`       VARCHAR(256),
    `branch_type`       VARCHAR(8),
    `status`            TINYINT,
    `client_id`         VARCHAR(64),
    `application_data`  VARCHAR(2000),
    `gmt_create`        DATETIME(6),
    `gmt_modified`      DATETIME(6),
    PRIMARY KEY (`branch_id`),
    KEY `idx_xid` (`xid`)
-- the table to store lock data
CREATE TABLE IF NOT EXISTS `lock_table`
    `row_key`        VARCHAR(128) NOT NULL,
    `xid`            VARCHAR(128),
    `transaction_id` BIGINT,
    `branch_id`      BIGINT       NOT NULL,
    `resource_id`    VARCHAR(256),
    `table_name`     VARCHAR(32),
    `pk`             VARCHAR(36),
    `status`         TINYINT      NOT NULL DEFAULT '0' COMMENT '0:locked ,1:rollbacking',
    `gmt_create`     DATETIME,
    `gmt_modified`   DATETIME,
    PRIMARY KEY (`row_key`),
    KEY `idx_status` (`status`),
    KEY `idx_branch_id` (`branch_id`)
CREATE TABLE IF NOT EXISTS `distributed_lock`
    `lock_key`       CHAR(20) NOT NULL,
    `lock_value`     VARCHAR(20) NOT NULL,
    `expire`         BIGINT,
    primary key (`lock_key`)
  DEFAULT CHARSET = utf8mb4;
INSERT INTO `distributed_lock` (lock_key, lock_value, expire) VALUES ('HandleAllSession', ' ', 0);
5、業務數據庫
在每個需要開啟seata事務操作的業務數據庫下都需要建立此表。
undo_log:回滾日志表。
--日志文件表--
CREATE TABLE IF NOT EXISTS `undo_log`
(
    `branch_id`     BIGINT       NOT NULL COMMENT 'branch transaction id',
    `xid`           VARCHAR(128) NOT NULL COMMENT 'global transaction id',
    `context`       VARCHAR(128) NOT NULL COMMENT 'undo_log context,such as serialization',
    `rollback_info` LONGBLOB     NOT NULL COMMENT 'rollback info',
    `log_status`    INT(11)      NOT NULL COMMENT '0:normal status,1:defense status',
    `log_created`   DATETIME(6)  NOT NULL COMMENT 'create datetime',
    `log_modified`  DATETIME(6)  NOT NULL COMMENT 'modify datetime',
    UNIQUE KEY `ux_undo_log` (`xid`, `branch_id`)
    ) ENGINE = INNODB
    AUTO_INCREMENT = 1
    DEFAULT CHARSET = utf8 COMMENT ='AT transaction mode undo table';
6、啟動seata-server
雙擊啟動bin目錄下的seata-server.bat。(linux系統的啟動seata-server.sh)

啟動成功後,端口是8091。我們也可以在nacos上看到服務註冊上來瞭。

三、微服務項目集成Seata
1、引入依賴
<dependency>
    <groupId>com.alibaba.cloud</groupId>
    <artifactId>spring-cloud-starter-alibaba-seata</artifactId>
    <version>2021.1</version>
    <exclusions>
       <!-- 排除依賴 指定版本和服務器端一致 -->
       <exclusion>
           <groupId>io.seata</groupId>
           <artifactId>seata-all</artifactId>
       </exclusion>
       <exclusion>
           <groupId>io.seata</groupId>
           <artifactId>seata-spring-boot-starter</artifactId>
       </exclusion>
   </exclusions>
</dependency>
<dependency>
    <groupId>io.seata</groupId>
    <artifactId>seata-all</artifactId>
    <version>1.4.2</version>
</dependency>
<dependency>
    <groupId>io.seata</groupId>
    <artifactId>seata-spring-boot-starter</artifactId>
    <version>1.4.2</version>
</dependency>
版本號根據自己的項目需要。
2、配置文件
# 分佈式事務配置
seata:
  enabled: true
  enable-auto-data-source-proxy: true #是否開啟數據源自動代理,默認為true
  tx-service-group: default_tx_group  #要與配置文件中的vgroupMapping一致
  registry:
    type: nacos
    nacos:
      application: seata-server
      server-addr: 127.0.0.1:8848
      group: SEATA_GROUP
  config:
    type: nacos
    nacos:
      server-addr: 127.0.0.1:8848
      group: SEATA_GROUP
      dataId: seataServer.properties
到這裡配置就結束瞭,趕緊在項目裡面用起來吧!如有遇到搭建問題,可以閱讀Seata官方文檔或者我們一起探討。
到此這篇關於Spring Cloud + Nacos + Seata整合過程(分佈式事務解決方案)的文章就介紹到這瞭,更多相關Spring Cloud + Nacos + Seata整合內容請搜索WalkonNet以前的文章或繼續瀏覽下面的相關文章希望大傢以後多多支持WalkonNet!
推薦閱讀:
- 使用springCloud+nacos集成seata1.3.0搭建過程
- Seata 環境搭建部署過程
- seata springcloud整合教程與遇到的坑
- seata docker 高可用部署的詳細介紹
- Docker+nacos+seata1.3.0安裝與使用配置教程