ASP.NET MVC使用JCrop上傳並裁剪圖片
JCrop用來裁剪圖片,本篇想體驗的是:
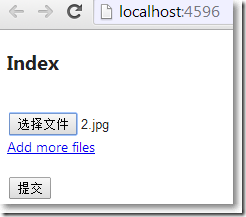
在視圖頁上傳圖片:

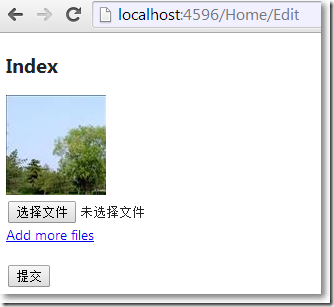
上傳成功,跳轉到另外一個編輯視圖頁,使用JCrop對該圖片裁剪,並保存圖片到指定文件夾:

裁剪成功後,在主視圖頁顯示裁剪圖片:

當然,實際項目中最有可能的做法是:在本頁上傳、裁剪並保存。
思路
- 在上傳圖片視圖頁,把圖片上傳保存到一個臨時文件夾Upload
- 在編輯裁剪視圖頁,點擊"裁剪"按鈕,把JCrop能提供的參數,比如寬度、高度、離頂部距離,離底部距離,離左右端距離等封裝成類,傳遞給控制器方法
- 控制器方法根據接收到的參數,對圖片裁剪,把圖片保存到目標文件夾ProfileImages,並刪除掉臨時文件夾Upload裡對應的圖片。
為瞭配合上傳圖片的主視圖頁,需要一個與之對應的View Model,其中包含圖片路徑的屬性。而這個圖片路徑屬性不是簡單的字段顯示編輯,當主視圖頁的View Model被傳遞到圖片編輯、裁剪視圖頁後,根據JScrop特點,肯定有針對圖片的裁剪和預覽區域,所以,我們需要針對主視圖頁View Model的路徑屬性使用UIHint特性,為該屬性定制顯示和編輯視圖。主視圖頁的View Model為:
using System.ComponentModel.DataAnnotations;

namespace MvcApplication1.Models
{
    public class ProfileViewModel
    {
        [UIHint("ProfileImage")]
        public string ImageUrl { get; set; }
    }
}
在圖片編輯、裁剪視圖頁,對應的View Model不僅有主視圖頁的View Model作為它的屬性,還有與JCrop相關的屬性,這些屬性無需顯示,隻需要以隱藏域的方式存在著,通過JCrop的事件,把JCrop參數賦值給這些隱藏域。對應的View Model為:
using System.Web.Mvc;

namespace MvcApplication1.Models
{
    public class EditorInputModel
    {
        public ProfileViewModel Profile { get; set; }
        [HiddenInput]
        public double Top { get; set; }
        [HiddenInput]
        public double Bottom { get; set; }
        [HiddenInput]
        public double Left { get; set; }
        [HiddenInput]
        public double Right { get; set; }
        [HiddenInput]
        public double Width { get; set; }
        [HiddenInput]
        public double Height { get; set; }
    }
}
在上傳圖片的主視圖頁中,需要引入Microsoft.Web.Helpers(通過NuGet),使用該命名空間下的FileUpload幫我們生成上傳元素。
@using Microsoft.Web.Helpers
@model MvcApplication1.Models.ProfileViewModel


@{
    ViewBag.Title = "Index";
    Layout = "~/Views/Shared/_Layout.cshtml";
}

<h2>Index</h2>
@using (Html.BeginForm("Upload", "Home", FormMethod.Post, new {@encType = "multipart/form-data"}))
{
    @Html.DisplayFor(x => x.ImageUrl)<br/>
    @FileUpload.GetHtml(initialNumberOfFiles:1,includeFormTag:false, uploadText:"上傳圖片")<br/>
    <input type="submit" name="submit" text="上傳" />
}
在HomeController中:
action方法Upload用來接收來自主視圖的View Model,把圖片保存到臨時文件夾Upload中,並把主視圖的View Model賦值給編輯、裁剪視圖中View Model的屬性。
還需要引入System.Web.Helpers組件,該組件WebImage類,提供瞭針對上傳圖片處理的一些API。
action方Edit接收來自編輯、裁剪視圖中View Model,根據參數,使用WebImage類的API對圖片裁剪,保存到目標文件夾ProfileImages,並刪除臨時文件夾Upload中的相關圖片。
using System.Web.Mvc;
using MvcApplication1.Models;
using System.Web.Helpers;
using System.IO;

namespace MvcApplication1.Controllers
{
    public class HomeController : Controller
    {
        public ActionResult Index()
        {
            return View();
        }

        //如果圖片上傳成功就到裁剪頁、即編輯頁
        [HttpPost]
        public ActionResult Upload(ProfileViewModel model)
        {
            var image = WebImage.GetImageFromRequest(); //必須引用System.Web.Helpers程序集
            if (image != null)
            {
                //限制圖片的長度不能大於500像素
                if (image.Width > 500)
                {
                    image.Resize(500, ((500*image.Height)/image.Width));
                }

                //根據圖片的名稱獲取相對路徑
                var filename = Path.GetFileName(image.FileName);
                //保存圖片到指定文件夾
                image.Save(Path.Combine("~/Upload/", filename));

                //獲取圖片的絕對路徑
                filename = Path.Combine("../Upload/", filename);
                model.ImageUrl = Url.Content(filename);

                var editModel = new EditorInputModel()
                {
                    Profile = model,
                    Width = image.Width,
                    Height = image.Height,
                    Top = image.Height * 0.1,
                    Left = image.Width * 0.9,
                    Right = image.Width * 0.9,
                    Bottom = image.Height * 0.9
                };
                return View("Editor", editModel);
            }
            return View("Index", model);
        }

        //裁剪頁 編輯頁
        [HttpPost]
        public ActionResult Edit(EditorInputModel editor)
        {
            //var image = new WebImage("~/" + editor.Profile.ImageUrl);
            var image = new WebImage(editor.Profile.ImageUrl);
            var height = image.Height;
            var width = image.Width;

            image.Crop((int) editor.Top, (int) editor.Left, (int) (height - editor.Bottom), (int) (width - editor.Right));
            var originalFile = editor.Profile.ImageUrl;//圖片原路徑

            editor.Profile.ImageUrl = Url.Content("~/ProfileImages/" + Path.GetFileName(image.FileName));
            image.Resize(100, 100, true, false);
            image.Save(@"~" + editor.Profile.ImageUrl);

            System.IO.File.Delete(Server.MapPath(originalFile)); //把在Upload中的上傳圖片刪除掉
            return View("Index", editor.Profile);
        }

    }
}
在編輯、裁剪視圖頁,需要引用Jcrop對應的css和js文件。
@model MvcApplication1.Models.EditorInputModel

@{
    ViewBag.Title = "Editor";
    Layout = "~/Views/Shared/_Layout.cshtml";
}

<h2>Editor</h2>
<link href="~/Content/jquery.Jcrop.css" rel="external nofollow"  rel="stylesheet" />


<div id="mainform">
    @using (Html.BeginForm("Edit", "Home", FormMethod.Post))
    {
        @Html.EditorFor(x => x.Profile.ImageUrl)
        @Html.HiddenFor(x => x.Left)
        @Html.HiddenFor(x => x.Right)
        @Html.HiddenFor(x => x.Top)
        @Html.HiddenFor(x => x.Bottom)
        @Html.HiddenFor(x => x.Profile.ImageUrl)
        <input type="submit" name="action" value="裁剪"/>
    }
</div>

@section scripts
{
    <script src="~/Scripts/jquery.Jcrop.js"></script>
    <script type="text/javascript">
        $(function() {
            $('#profileImageEditor').Jcrop({
                onChange: showPreview,
                onSelect: showPreview,
                setSelect: [@Model.Top, @Model.Left, @Model.Right, @Model.Bottom],
                aspectRatio: 1
            });
        });

        function showPreview(coords) {
            if (parseInt(coords.w) > 0) {
                $('#Top').val(coords.y);
                $('#Left').val(coords.x);
                $('#Bottom').val(coords.y2);
                $('#Right').val(coords.x2);

                var width = @Model.Width;
                var height = @Model.Height;
                var rx = 100 / coords.w;
                var ry = 100 / coords.h;

                $('#preview').css({
                    width: Math.round(rx * width) + 'px',
                    height: Math.round(ry * height) + 'px',
                    marginLeft: '-' + Math.round(rx * coords.x) + 'px',
                    marginTop: '-' + Math.round(ry * coords.y) + 'px'
                });
            }

        }
    </script>
}
既然為主視圖View Model的ImageUrl打上瞭[UIHint("ProfileImage")]特性,這意味著必須有對應的自定義強類型視圖。
    public class ProfileViewModel
    {
        [UIHint("ProfileImage")]
        public string ImageUrl { get; set; }
    }
Views/Home/EditorTemplates/ProfileImage.cshtml,是針對ImageUrl屬性的自定義編輯模版:
@model System.String
<div id="cropContainer">
    <div id="cropPreview">
        <img src="@(String.IsNullOrEmpty(Model)%20?%20"" : Model)" id="preview" />
    </div>
    <div id="cropDisplay">
        <img src="@(String.IsNullOrEmpty(Model)%20?%20"" : Model)" id="profileImageEditor" />
    </div>
</div>
Views/Home/DisplayTemplates/ProfileImage.cshtml,是針對ImageUrl屬性的自定義顯示模版:
@model System.String

<img src="@(String.IsNullOrEmpty(Model)%20?%20"" : Model)" id="profileImage" />
到此這篇關於ASP.NET MVC使用JCrop上傳並裁剪圖片的文章就介紹到這瞭。希望對大傢的學習有所幫助,也希望大傢多多支持WalkonNet。