簡單談談Angular中的獨立組件的使用
前言
Angular 14一項令人興奮的特性就是Angular的獨立組件終於來瞭。
在Angular 14中, 開發者可以嘗試使用獨立組件開發各種組件,但是值得註意的是Angular獨立組件的API仍然沒有穩定下,將來可能存在一些破壞性更新,所以不推薦在生產環境中使用。
如何創建一個獨立組件
對於已有的組件,我們可以在@Component()中添加standalone: true的標識,然後我們可以在沒有@NgModule()的情況下直接使用imports導入其他模塊瞭。
如果是新建組件,可以使用ng generate component <name> --standalone的命令,直接創建一個獨立組件, 例如:
ng generate component button-list --standalone
@Component({
  selector: 'app-button-list',
  standalone: true,
  imports: [
    CommonModule,
  ],
  templateUrl: './button-list.component.html',
  styleUrls: ['./button-list.component.scss']
})
export class ButtonListComponent implements OnInit
在獨立組件中導入已有的模塊
我們可以在imports中添加已有的模塊,以MatButtonModule為例:
imports: [
    CommonModule,
    MatButtonModule,
],
這樣子我們就可以在ButtonListComponent中使用MatButtonModule的mat-button組件瞭:
<button mat-button>Basic</button>
<button mat-button color="primary">Primary</button>
<button mat-button color="accent">Accent</button>
<button mat-button color="warn">Warn</button>
<button mat-button disabled>Disabled</button>
<a mat-button href="https://damingerdai.github.io" rel="external nofollow"  target="_blank">Link</a>
效果圖:

使用獨立組件啟動Angular應用
第一步, 將AppComponent設置為獨立組件:
@Component({
  selector: 'app-root',
  templateUrl: './app.component.html',
  styleUrls: ['./app.component.scss'],
  standalone: true,
})
export class AppComponent {
    ...
}
第二步,將AppModule的imports中的導入的模塊加入到AppComponent的imports中,但是有兩個模塊例外: BrowserModule和BrowserAnimationsModule。
如果導入的話,可能會導致** BrowserModule have already been loaded. If you need access to common directives such as NgIf and NgFor, import the CommonModule instead.**的問題:

第三步,刪除app.module.ts文件
最後一步, 將main.ts中的:
import { platformBrowserDynamic } from '@angular/platform-browser-dynamic';
platformBrowserDynamic().bootstrapModule(AppModule)
  .catch(err => console.error(err));
改為:
bootstrapApplication(AppComponent).catch(err => console.error(err));
這樣子我們就實現瞭使用獨立組件啟動Angular組件瞭。
為獨立組件配置路由
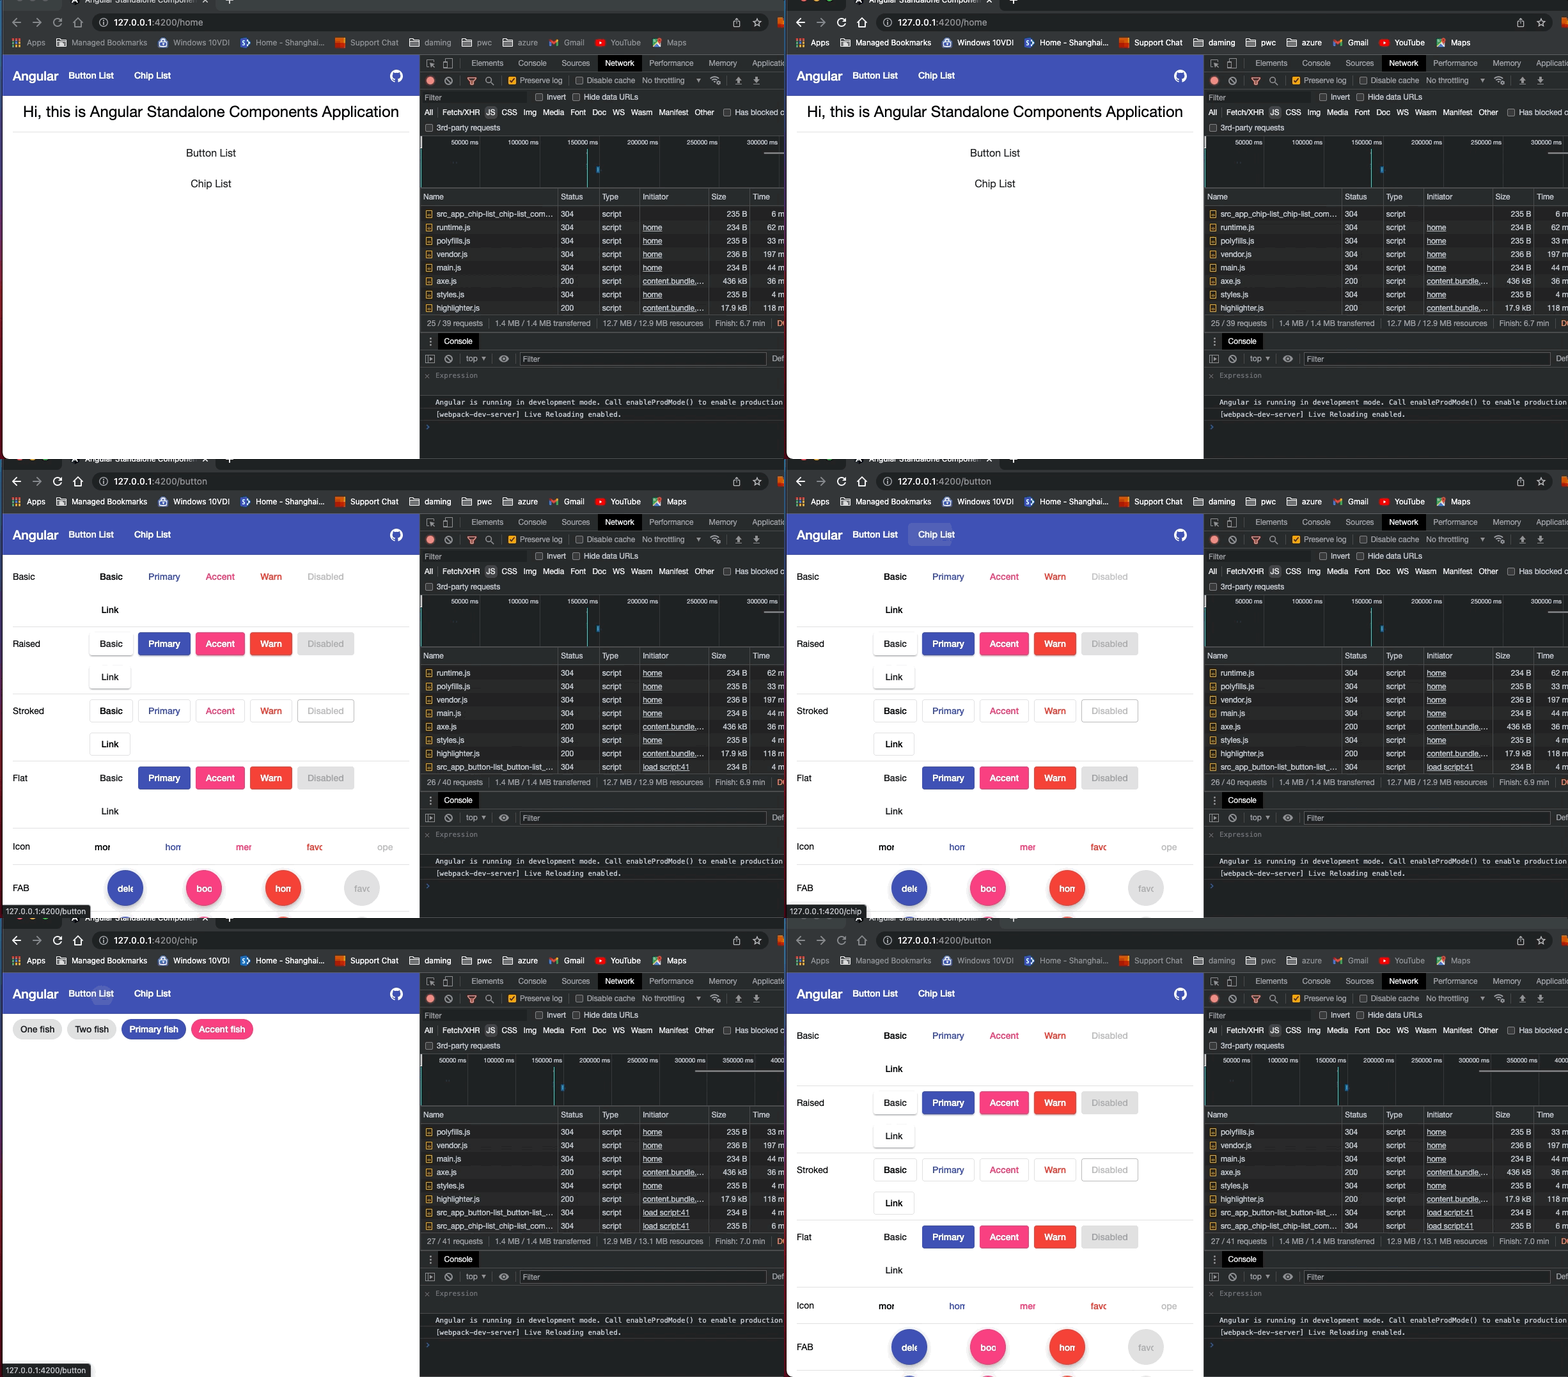
我這裡分別有三個獨立組件: HomeComponent, ButtonListComponent 和 ChipListComponent,
然後在main.ts中創建ROUTES對象
const ROUTES: Route[] = [
  {
    path: '',
    pathMatch: 'full',
    redirectTo: 'home'
  },
  {
    path: 'home',
    component: HomeComponent
  },
  {
    path: 'button',
    loadComponent: () =>
      import('./app/button-list/button-list.component').then(
        (mod) => mod.ButtonListComponent
      ),
  },
  {
    path: 'chip',
    loadComponent: () =>
      import('./app/chip-list/chip-list.component').then(
        (mod) => mod.ChipListComponent
      ),
  },
];
其中ButtonListComponent和ChipListComponent使用loadComponent去實現路由懶加載。
最後在bootstrapApplication的第二個參數中使用providers註冊RouterModule好瞭。
bootstrapApplication(AppComponent, {
  providers: [
    importProvidersFrom(RouterModule.forRoot([...ROUTES])),
  ],
}).catch(err => console.error(err));
效果圖:

配置依賴註入
當我們想要啟動Angular應用的時候,可能需要註入一些值或者服務。 在bootstrapApplication, 我們可以通過providers來註冊值或者服務。
比如,我有一個獲取圖片的url,需要註入到PhotoService中:
bootstrapApplication(AppComponent, {
  providers: [
    {
      provide: 'photoUrl',
      useValue: 'https://picsum.photos',
    },
    {provide: PhotosService, useClass: PhotosService },
    importProvidersFrom(RouterModule.forRoot([...ROUTES])),
    importProvidersFrom(HttpClientModule)
  ],
})
PhotoService代碼如下:
@Injectable()
export class PhotosService {

  constructor(
    @Inject('photoUrl') private photoUrl: string,
    private http: HttpClient
  ) { }

  public getPhotoUrl(i: number): string {
    return `${this.photoUrl}/200/300?random=${i}`;
  }
}
源代碼
本文所使用的源代碼
線上demo
推薦閱讀:
- 詳解Angular項目中共享模塊的實現
- 詳解Angular之路由基礎
- Vue.js React與Angular流行前端框架優勢對比
- 使用javascript解析二維碼的三種方式
- 使用Angular CDK實現一個Service彈出Toast組件功能