SpringBoot自定義啟動器Starter流程詳解
一、背景
雖然Spring官方給我們提供瞭很多的啟動器供我們使用
但有時候我們也會遇到某些特殊場景,這些啟動器滿足不瞭
這個時候就需要自定義一個啟動器供我們使用
二、自定義啟動器
在之前學習Spring Boot的過程中,我們已經對啟動器有瞭一個大致的瞭解
Spring Boot實現某個功能,一般是引入對應場景的啟動器(一般不寫代碼,隻是聲明這個啟動器需要引用哪些依賴),然後這個啟動器又有對應的自動配置包
1、創建一個啟動器的自動配置模塊
先寫和配置文件中配置項互相綁定的實體類
package com.decade.autoConfigure.pojo;
import org.springframework.boot.context.properties.ConfigurationProperties;
// 將這個類的屬性和系統配置文件中的屬性進行綁定
@ConfigurationProperties(prefix = "team")
public class TeamInfo {
    private String winnerName;
    private String loserName;
    public String getWinnerName() {
        return winnerName;
    }
    public void setWinnerName(String winnerName) {
        this.winnerName = winnerName;
    }
    public String getLoserName() {
        return loserName;
    }
    public void setLoserName(String loserName) {
        this.loserName = loserName;
    }
}
再寫自己要實現的業務邏輯
package com.decade.autoConfigure.service;
import com.decade.autofigure.pojo.TeamInfo;
import org.springframework.beans.factory.annotation.Autowired;
public class TestService {
	// 引入和yaml文件中配置項綁定的類
    @Autowired
    private TeamInfo teamInfo;
    public String testMethod() {
        return teamInfo.getWinnerName() + "今天早上,絕殺瞭" + teamInfo.getLoserName();
    }
}
接著,寫一個自動配置類,向容器中放入組件
package com.decade.autoConfigure.auto;
import com.decade.autofigure.pojo.TeamInfo;
import com.decade.autofigure.service.TestService;
import org.springframework.boot.autoconfigure.condition.ConditionalOnMissingBean;
import org.springframework.boot.context.properties.EnableConfigurationProperties;
import org.springframework.context.annotation.Bean;
import org.springframework.context.annotation.Configuration;
// 使得TeamInfo中的@ConfigurationProperties註解生效,將TeamInfo註冊到容器中
@EnableConfigurationProperties(TeamInfo.class)
@Configuration
public class AutoConfiguration {
    @Bean
    // 隻有容器中不存在TestService這個類型的bean時,才回去初始化這個bean
    @ConditionalOnMissingBean(TestService.class)
    public TestService testService() {
        TestService testService = new TestService();
        return testService;
    }
}
最後,在新版本的Spring Boot中為瞭確保框架啟動時加載該配置類
我們需要在這個模塊的resource文件下
新建/META-INF/spring/org.springframework.boot.autoconfigure.AutoConfiguration.imports文件
然後在裡面寫自己之前創建的自動配置類
註意:老版可能是放在META-INF/spring.factories文件中
com.decade.autoConfigure.auto.AutoConfiguration
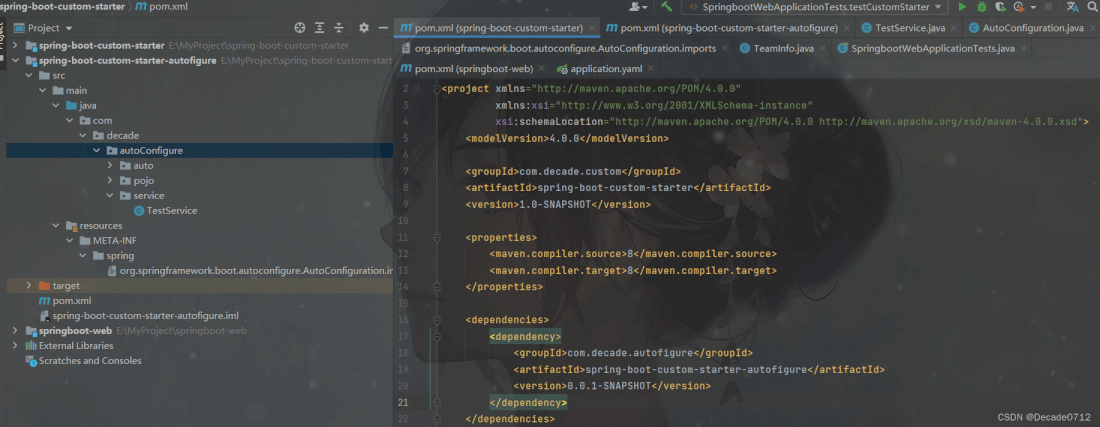
2、創建一個啟動器模塊
不用寫任何業務代碼,隻需要在pom文件中,引用之前的創建的自動配置模塊
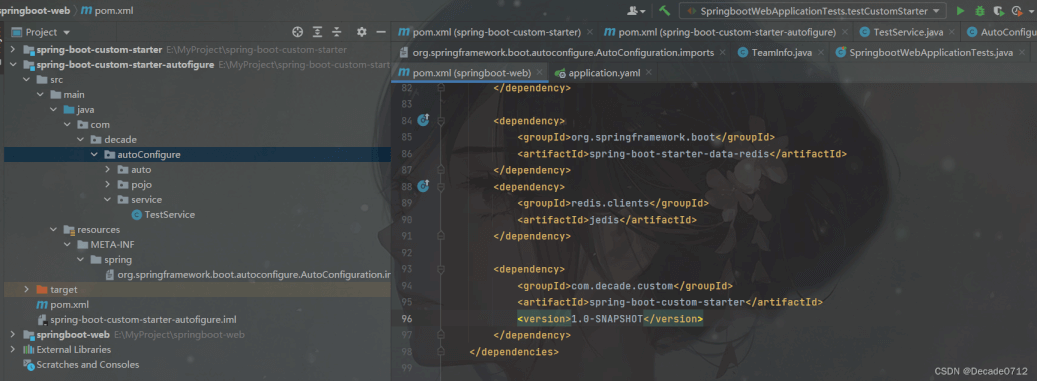
3、在業務模塊中引入啟動器
如圖,引入我們自己定義的啟動器
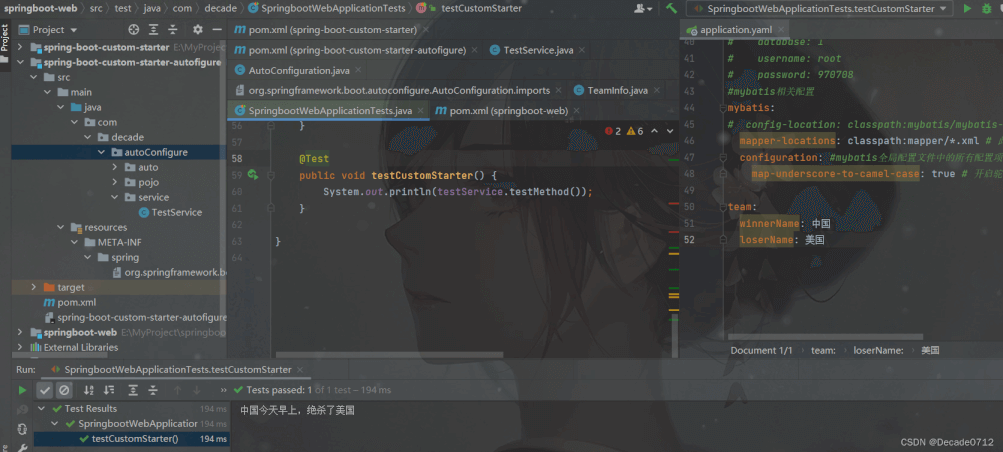
然後在yaml文件中設置好綁定的配置項
再寫一個測試方法進行測試即可
package com.decade;
import com.decade.autoConfigure.service.TestService;
import lombok.extern.slf4j.Slf4j;
import org.junit.jupiter.api.Test;
import org.springframework.beans.factory.annotation.Autowired;
import org.springframework.boot.test.context.SpringBootTest;
@SpringBootTest
@Slf4j
class SpringbootWebApplicationTests {
    @Autowired
    private TestService testService;
    @Test
    public void testCustomStarter() {
        System.out.println(testService.testMethod());
    }
}
測試方法結果如下圖
到此這篇關於SpringBoot自定義啟動器Starter流程詳解的文章就介紹到這瞭,更多相關SpringBoot自定義Starter內容請搜索WalkonNet以前的文章或繼續瀏覽下面的相關文章希望大傢以後多多支持WalkonNet!
推薦閱讀:
- spring中向一個單例bean中註入非單例bean的方法詳解
- @Autowired自動裝配,@Bean註入@Primary,@Qualifier優先級講解
- SpringBoot如何自定義starter啟動器的實現思路
- springboot自定義starter啟動器的具體使用實踐
- 一文搞懂Spring循環依賴的原理