springboot+VUE實現登錄註冊
本文實例為大傢分享瞭springboot+VUE實現登錄註冊的具體代碼,供大傢參考,具體內容如下
一、springBoot
創建springBoot項目
分為三個包,分別為controller,service, dao以及resource目錄下的xml文件。
UserController.java
package springbootmybatis.controller;

import org.springframework.web.bind.annotation.CrossOrigin;
import org.springframework.web.bind.annotation.PostMapping;
import org.springframework.web.bind.annotation.RequestBody;
import org.springframework.web.bind.annotation.RestController;
import springbootmybatis.pojo.User;
import springbootmybatis.service.UserService;

import javax.annotation.Resource;


@RestController
public class UserController {
    @Resource
    UserService userService;

    @PostMapping("/register/")
    @CrossOrigin("*")
    String register(@RequestBody User user) {
        System.out.println("有人請求註冊!");
        int res = userService.register(user.getAccount(), user.getPassword());
        if(res==1) {
            return "註冊成功";
        } else {
            return "註冊失敗";
        }
    }

    @PostMapping("/login/")
    @CrossOrigin("*")
    String login(@RequestBody User user) {
        int res = userService.login(user.getAccount(), user.getPassword());
        if(res==1) {
            return "登錄成功";
        } else {
            return "登錄失敗";
        }
    }
}
UserService.java
package springbootmybatis.service;

import org.springframework.stereotype.Service;
import springbootmybatis.dao.UserMapper;

import javax.annotation.Resource;

@Service
public class UserService {
    @Resource
    UserMapper userMapper;

    public int register(String account, String password) {
        return userMapper.register(account, password);
    }

    public int login(String account, String password) {
        return userMapper.login(account, password);
    }
}
User.java (我安裝瞭lombok插件)
package springbootmybatis.pojo;

import lombok.Data;

@Data
public class User {
    private String account;
    private String password;
}
UserMapper.java
package springbootmybatis.dao;

import org.apache.ibatis.annotations.Mapper;

@Mapper
public interface UserMapper {
    int register(String account, String password);

    int login(String account, String password);
}
UserMapper.xml
<?xml version="1.0" encoding="UTF-8" ?>
<!DOCTYPE mapper
        PUBLIC "-//mybatis.org//DTD Mapper 3.0//EN"
        "http://mybatis.org/dtd/mybatis-3-mapper.dtd">

<mapper namespace="springbootmybatis.dao.UserMapper">

    <insert id="register">
       insert into User (account, password) values (#{account}, #{password});
    </insert>

    <select id="login" resultType="Integer">
        select count(*) from User where account=#{account} and password=#{password};
    </select>
</mapper>
主幹配置
application.yaml
server.port: 8000
spring:
  datasource:
    username: root
    password: 123456
    url: jdbc:mysql://localhost:3306/community?serverTimezone=UTC&useUnicode=true&characterEncoding=utf-8
    driver-class-name: com.mysql.cj.jdbc.Driver
mybatis:
    type-aliases-package: springbootmybatis.pojo
    mapper-locations: classpath:mybatis/mapper/*.xml
    configuration:
      map-underscore-to-camel-case: true
數據庫需要建相應得到表
CREATE TABLE `user` (
  `account` varchar(255) COLLATE utf8_bin DEFAULT NULL,
  `password` varchar(255) COLLATE utf8_bin DEFAULT NULL
) ENGINE=InnoDB DEFAULT CHARSET=utf8 COLLATE=utf8_bin;
二、創建VUE項目
安裝node,npm,配置環境變量。
配置cnpm倉庫,下載的時候可以快一些。
npm i -g cnpm --registry=https://registry.npm.taobao.org
安裝VUE
npm i -g vue-cli
初始化包結構
vue init webpack project
啟動項目
# 進入項目目錄
cd vue-01
# 編譯
npm install
# 啟動
npm run dev
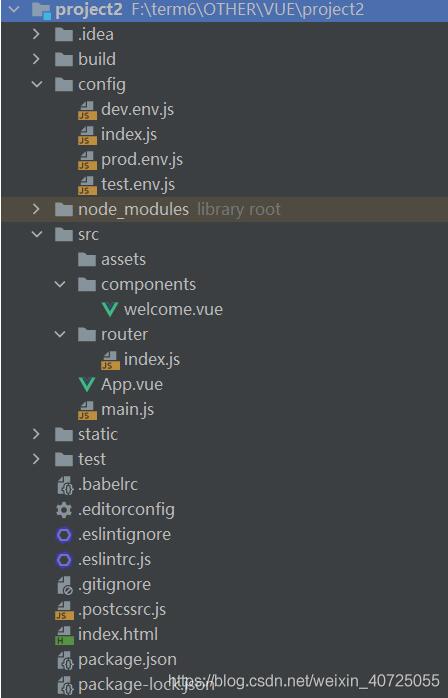
修改項目文件,按照如下結構
APP.vue
<template>
  <div id="app">
    <router-view/>
  </div>
</template>

<script>
export default {
  name: 'App'
}
</script>

<style>

</style>
welcome.vue
<template>
  <div>
    <el-input v-model="account" placeholder="請輸入帳號"></el-input>
    <el-input v-model="password" placeholder="請輸入密碼" show-password></el-input>
    <el-button type="primary" @click="login">登錄</el-button>
    <el-button type="primary" @click="register">註冊</el-button>
  </div>
</template>

<script>
export default {
  name: 'welcome',
  data () {
    return {
      account: '',
      password: ''
    }
  },
  methods: {
    register: function () {
      this.axios.post('/api/register/', {
        account: this.account,
        password: this.password
      }).then(function (response) {
        console.log(response);
      }).catch(function (error) {
        console.log(error);
      });
      // this.$router.push({path:'/registry'});
    },
    login: function () {
      this.axios.post('/api/login/', {
        account: this.account,
        password: this.password
      }).then(function () {
        alert('登錄成功');
      }).catch(function (e) {
        alert(e)
      })
      // this.$router.push({path: '/board'});
    }
  }
}
</script>

<style scoped>

</style>
main.js
// The Vue build version to load with the `import` command
// (runtime-only or standalone) has been set in webpack.base.conf with an alias.
import Vue from 'vue'
import App from './App'
import router from './router'
import ElementUI from 'element-ui'
import 'element-ui/lib/theme-chalk/index.css'
import axios from 'axios'
import VueAxios from 'vue-axios'

Vue.use(VueAxios, axios)
Vue.use(ElementUI)
Vue.config.productionTip = false

/* eslint-disable no-new */
new Vue({
  el: '#app',
  router,
  components: {App},
  template: '<App/>'
})
router/index.js
import Vue from 'vue'
import Router from 'vue-router'
import welcome from '@/components/welcome'

Vue.use(Router)

export default new Router({
  routes: [
    {
      path: '/',
      name: 'welcome',
      component: welcome
    }
  ]
})
config/index.js
'use strict'
// Template version: 1.3.1
// see http://vuejs-templates.github.io/webpack for documentation.

const path = require('path')

module.exports = {
  dev: {

    // Paths
    assetsSubDirectory: 'static',
    assetsPublicPath: '/',
    proxyTable: {
      '/api': {
        target: 'http://localhost:8000', // 後端接口的域名
        // secure: false,  // 如果是https接口,需要配置這個參數
        changeOrigin: true, // 如果接口跨域,需要進行這個參數配置
        pathRewrite: {
          '^/api': '' //路徑重寫,當你的url帶有api字段時如/api/v1/tenant,
          //可以將路徑重寫為與規則一樣的名稱,即你在開發時省去瞭再添加api的操作
        }
      }
    },

    // Various Dev Server settings
    host: 'localhost', // can be overwritten by process.env.HOST
    port: 8080, // can be overwritten by process.env.PORT, if port is in use, a free one will be determined
    autoOpenBrowser: false,
    errorOverlay: true,
    notifyOnErrors: true,
    poll: false, // https://webpack.js.org/configuration/dev-server/#devserver-watchoptions-

    // Use Eslint Loader?
    // If true, your code will be linted during bundling and
    // linting errors and warnings will be shown in the console.
    useEslint: true,
    // If true, eslint errors and warnings will also be shown in the error overlay
    // in the browser.
    showEslintErrorsInOverlay: false,

    /**
     * Source Maps
     */

    // https://webpack.js.org/configuration/devtool/#development
    devtool: 'cheap-module-eval-source-map',

    // If you have problems debugging vue-files in devtools,
    // set this to false - it *may* help
    // https://vue-loader.vuejs.org/en/options.html#cachebusting
    cacheBusting: true,

    cssSourceMap: true
  },

  build: {
    // Template for index.html
    index: path.resolve(__dirname, '../dist/index.html'),

    // Paths
    assetsRoot: path.resolve(__dirname, '../dist'),
    assetsSubDirectory: 'static',
    assetsPublicPath: '/',

    /**
     * Source Maps
     */

    productionSourceMap: true,
    // https://webpack.js.org/configuration/devtool/#production
    devtool: '#source-map',

    // Gzip off by default as many popular static hosts such as
    // Surge or Netlify already gzip all static assets for you.
    // Before setting to `true`, make sure to:
    // npm install --save-dev compression-webpack-plugin
    productionGzip: false,
    productionGzipExtensions: ['js', 'css'],

    // Run the build command with an extra argument to
    // View the bundle analyzer report after build finishes:
    // `npm run build --report`
    // Set to `true` or `false` to always turn it on or off
    bundleAnalyzerReport: process.env.npm_config_report
  }
}

輸入賬號密碼,實現簡單的註冊,登錄功能。
以上就是本文的全部內容,希望對大傢的學習有所幫助,也希望大傢多多支持WalkonNet。
推薦閱讀:
- SpringBoot MyBatis簡單快速入門例子
- spring boot寫java web和接口
- Vue註冊模塊與登錄狀態的持久化實現方法詳解
- Spring Dao層@Repository與@Mapper的使用
- 解讀Mapper與Mapper.xml文件之間匹配的問題