Spring中的事務控制知識總結
一、環境準備
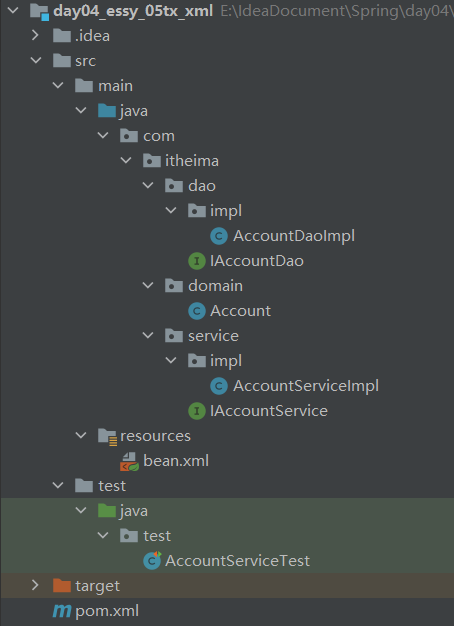
為瞭演示 Spring 中的事務控制,我們創建一個空項目,項目目錄如下:
導入依賴:
<dependencies>
	<dependency>
	    <groupId>org.springframework</groupId>
	    <artifactId>spring-context</artifactId>
	    <version>5.0.2.RELEASE</version>
	</dependency>
	<dependency>
	    <groupId>org.springframework</groupId>
	    <artifactId>spring-jdbc</artifactId>
	    <version>5.0.2.RELEASE</version>
	</dependency>
	<dependency>
	    <groupId>org.springframework</groupId>
	    <artifactId>spring-tx</artifactId>
	    <version>5.0.2.RELEASE</version>
	</dependency>
	<dependency>
	    <groupId>mysql</groupId>
	    <artifactId>mysql-connector-java</artifactId>
	    <version>5.1.6</version>
	</dependency>
	<dependency>
	    <groupId>org.aspectj</groupId>
	    <artifactId>aspectjweaver</artifactId>
	    <version>1.8.7</version>
	</dependency>
	<dependency>
	    <groupId>junit</groupId>
	    <artifactId>junit</artifactId>
	    <version>4.12</version>
	</dependency>
	<dependency>
	    <groupId>org.springframework</groupId>
	    <artifactId>spring-test</artifactId>
	    <version>5.0.2.RELEASE</version>
	</dependency>
</dependencies>
業務層及其實現類:
/**
 * 賬戶的業務層接口
 */
public interface IAccountService {

    void transfer(String sourceName, String targetName, Float money);
}
/**
 * 轉賬的業務層實現類
 */
public class AccountServiceImpl implements IAccountService {

    private IAccountDao accountDao;

    public void setAccountDao(IAccountDao accountDao) {
        this.accountDao = accountDao;
    }

    /**
     * 轉賬
     * @param sourceName    轉出賬戶名稱
     * @param targetName    轉入賬戶名稱
     * @param money         轉賬金額
     */
    public void transfer(String sourceName, String targetName, Float money) {
            //1. 根據名稱查詢轉出賬戶
            Account source = accountDao.findAccountByName(sourceName);//  1. 第一次事務,提交
            //2. 根據名稱查詢轉入賬戶
            Account target = accountDao.findAccountByName(targetName);//  2. 第二次事務提交
            //3. 轉出賬戶減錢
            source.setMoney(source.getMoney()-money);
            //4. 轉入賬戶加錢
            target.setMoney(target.getMoney()+money);
            //5. 更新轉出賬戶
            accountDao.updateAccount(source);  //  3. 第三次事務提交
            int i = 1/0;  					   //  4. 報異常
            //6. 更新轉入賬戶
            accountDao.updateAccount(target);  //  5. 事務不執行
    }
}
賬戶持久層及其接口:
/**
 * 賬戶的持久層接口
 */
public interface IAccountDao {

    /**
     * 根據Id查詢賬戶
     * @param accountId
     * @return
     */
    Account findAccountById(Integer accountId);

    /**
     * 根據名稱查詢賬戶
     * @param accountName
     * @return
     */
    Account findAccountByName(String accountName);

    /**
     * 更新賬戶
     * @param account
     */
    void updateAccount(Account account);
}
/**
 * 賬戶的持久層實現類
 */
public class AccountDaoImpl extends JdbcDaoSupport implements IAccountDao {

    public Account findAccountById(Integer accountId) {
        List<Account> accounts = super.getJdbcTemplate().query("select * from account where id = ?",new BeanPropertyRowMapper<Account>(Account.class),accountId);
        return accounts.isEmpty()?null:accounts.get(0);
    }


    public Account findAccountByName(String accountName) {
        List<Account> accounts = super.getJdbcTemplate().query("select * from account where name = ?",new BeanPropertyRowMapper<Account>(Account.class),accountName);
        if(accounts.isEmpty()){
            return null;
        }
        if(accounts.size()>1){
            throw new RuntimeException("結果集不唯一");
        }
        return accounts.get(0);
    }


    public void updateAccount(Account account) {
        super.getJdbcTemplate().update("update account set name=?,money=? where id=?",account.getName(),account.getMoney(),account.getId());
    }
}
這裡配置的是 Spring 內置數據源,當然也可以應用 JdbcTemplate。
bean.xml:
<?xml version="1.0" encoding="UTF-8"?>
<beans xmlns="http://www.springframework.org/schema/beans"
       xmlns:xsi="http://www.w3.org/2001/XMLSchema-instance"
       xmlns:aop="http://www.springframework.org/schema/aop"
       xmlns:tx="http://www.springframework.org/schema/tx"
       xsi:schemaLocation="
        http://www.springframework.org/schema/beans
        http://www.springframework.org/schema/beans/spring-beans.xsd
        http://www.springframework.org/schema/tx
        http://www.springframework.org/schema/tx/spring-tx.xsd
        http://www.springframework.org/schema/aop
        http://www.springframework.org/schema/aop/spring-aop.xsd">

    <!--配置業務層-->
    <bean id="accountService" class="com.itheima.service.impl.AccountServiceImpl">
        <property name="accountDao" ref="accountDao"></property>
    </bean>

    <!-- 配置賬戶的持久層-->
    <bean id="accountDao" class="com.itheima.dao.impl.AccountDaoImpl">
        <property name="dataSource" ref="dataSource"></property>
    </bean>

    <!-- 配置數據源-->
    <bean id="dataSource" class="org.springframework.jdbc.datasource.DriverManagerDataSource">
        <property name="driverClassName" value="com.mysql.jdbc.Driver"></property>
        <property name="url" value="jdbc:mysql://localhost:3306/springdb"></property>
        <property name="username" value="root"></property>
        <property name="password" value="000000"></property>
    </bean>

</beans>
二、基於 XML 的事務控制
Spring 中基於 xml 的聲明式事務控制配置步驟
1.配置事務管理器
<!--配置事務管理器-->
<bean id="transactionManager" class="org.springframework.jdbc.datasource.DataSourceTransactionManager"></bean>
2.配置事務的通知 (需要導入事務的約束 tx 和 aop 的名稱空間和約束)
使用 tx:advice 標簽配置事務通知
屬性:
id:給事務通知起一個唯一標識
transaction-manager:給事務通知提供一個事務管理器引用
<!--配置事務的通知-->
<tx:advice id="txAdvice" transaction-manager="transactionManager"></tx:advice>
3.配置AOP的通用切入點表達式
<!--配置AOP的通用切入點表達式-->
<aop:config>
	<aop:pointcut id="pt1" expression="execution(* com.itheima.service.*.*(..))"></aop:pointcut>
</aop:config>
4.建立事務通知 與 切入點表達式的對應關系
<!--配置AOP的通用切入點表達式-->
<aop:config>
	<aop:pointcut id="pt1" expression="execution(* com.itheima.service.*.*(..))"></aop:pointcut>
	<aop:advisor advice-ref="txAdvice" pointcut-ref="pt1"></aop:advisor>
</aop:config>
5.配置事務的屬性
在事務的通知 tx:advice 標簽的內部
- isolation: 用於指定事務的隔離級別。默認值是DEFAULT,表示使用數據庫的默認隔離級別。
- propagation: 用於指定事務的傳播行為。默認值是REQUIRED,表示一定會有事務,增刪改的選擇。查詢方法可以選擇SUPPORT。
- read-only: 用於指定事務是否隻讀。隻有查詢方法才能設置為true。默認值時false,表示讀寫。
- timeout: 用於指定事務的超時時間。默認值是-1,表示永不超時。如果指定瞭數值,則以秒為單位。
- rollback-for: 用於指定一個異常,當產生該異常時,事務不回滾,產生其他異常,事務不回滾。沒有默認值。表示任何異常都回滾。
- no-rollback-for: 用於指定一個異常,當產生該異常時,事務不回滾,產生其他異常時,事務回滾。沒有默認值。表示任何異常都回滾。
<!--配置事務的通知-->
<tx:advice id="txAdvice" transaction-manager="transactionManager">
    <tx:attributes>
        <tx:method name="*" propagation="REQUIRED" read-only="false"></tx:method>
        <tx:method name="find*" propagation="REQUIRED" read-only="false"></tx:method> <!--優先級高於通配符 * -->
    </tx:attributes>
</tx:advice>
最終 bean.xml:
<?xml version="1.0" encoding="UTF-8"?>
<beans xmlns="http://www.springframework.org/schema/beans"
       xmlns:xsi="http://www.w3.org/2001/XMLSchema-instance"
       xmlns:aop="http://www.springframework.org/schema/aop"
       xmlns:tx="http://www.springframework.org/schema/tx"
       xsi:schemaLocation="
        http://www.springframework.org/schema/beans
        http://www.springframework.org/schema/beans/spring-beans.xsd
        http://www.springframework.org/schema/tx
        http://www.springframework.org/schema/tx/spring-tx.xsd
        http://www.springframework.org/schema/aop
        http://www.springframework.org/schema/aop/spring-aop.xsd">
    <!--配置業務層-->
    <bean id="accountService" class="com.itheima.service.impl.AccountServiceImpl">
        <property name="accountDao" ref="accountDao"></property>
    </bean>

    <!--配置賬戶的持久層-->
    <bean id="accountDao" class="com.itheima.dao.impl.AccountDaoImpl">
        <property name="jdbcTemplate" ref="jdbcTemplate"></property>
    </bean>

    <!--配置jdbcTemplate-->
    <bean id="jdbcTemplate" class="org.springframework.jdbc.core.JdbcTemplate">
        <property name="dataSource" ref="dataSource"></property>
    </bean>

    <!-- 配置數據源-->
    <bean id="dataSource" class="org.springframework.jdbc.datasource.DriverManagerDataSource">
        <property name="driverClassName" value="com.mysql.jdbc.Driver"></property>
        <property name="url" value="jdbc:mysql://localhost:3306/springdb"></property>
        <property name="username" value="root"></property>
        <property name="password" value="000000"></property>
    </bean>

    <!--配置事務管理器-->
    <bean id="transactionManager" class="org.springframework.jdbc.datasource.DataSourceTransactionManager">
        <property name="dataSource" ref="dataSource"></property>
    </bean>

    <!--配置事務的通知-->
    <tx:advice id="txAdvice" transaction-manager="transactionManager">
        <tx:attributes>
            <tx:method name="*" propagation="REQUIRED" read-only="false"></tx:method>
            <tx:method name="find*" propagation="REQUIRED" read-only="false"></tx:method>
        </tx:attributes>
    </tx:advice>

    <!--配置AOP的通用切入點表達式-->
    <aop:config>
        <aop:pointcut id="pt1" expression="execution(* com.itheima.service.*.*(..))"></aop:pointcut>
        <aop:advisor advice-ref="txAdvice" pointcut-ref="pt1"></aop:advisor>
    </aop:config>

</beans>
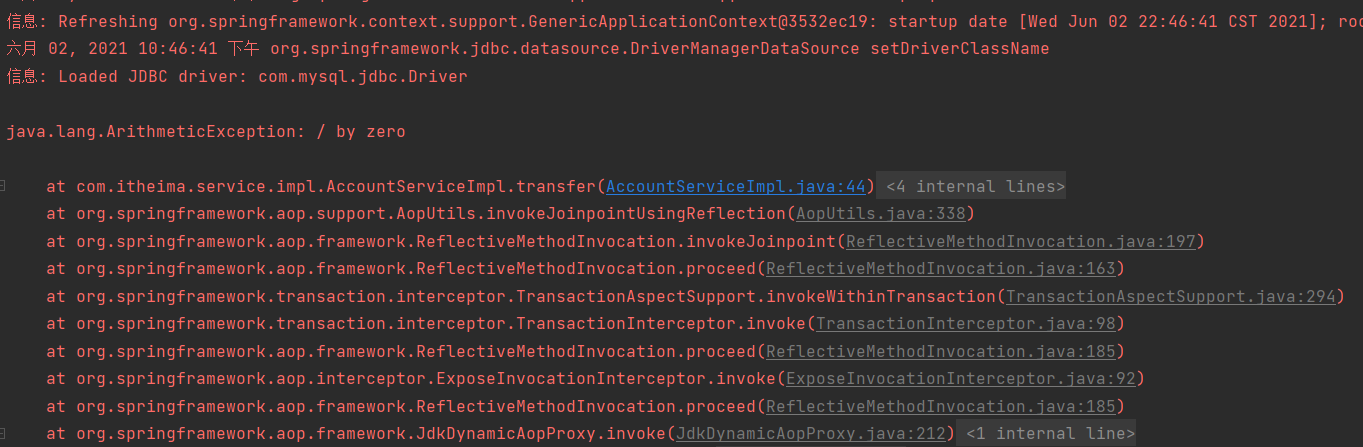
測試結果:
三、基於註解的事務控制
Spring 中基於 xml 的聲明式事務控制配置步驟
1.配置事務管理器
2.開啟 Spring 對註解事物的支持
3.在需要事務支持的地方使用 @Transactional 註解
bean.xml:
<?xml version="1.0" encoding="UTF-8"?>
<beans xmlns="http://www.springframework.org/schema/beans"
       xmlns:xsi="http://www.w3.org/2001/XMLSchema-instance"
       xmlns:aop="http://www.springframework.org/schema/aop"
       xmlns:tx="http://www.springframework.org/schema/tx"
       xmlns:context="http://www.springframework.org/schema/context"
       xsi:schemaLocation="
        http://www.springframework.org/schema/beans
        http://www.springframework.org/schema/beans/spring-beans.xsd
        http://www.springframework.org/schema/tx
        http://www.springframework.org/schema/tx/spring-tx.xsd
        http://www.springframework.org/schema/aop
        http://www.springframework.org/schema/aop/spring-aop.xsd
        http://www.springframework.org/schema/context
        http://www.springframework.org/schema/context/spring-context.xsd">

    <!--配置容器時要掃描的包-->
    <context:component-scan base-package="com.itheima"></context:component-scan>

    <!--配置JdbcTemplate-->
    <bean id="jdbcTemplate" class="org.springframework.jdbc.core.JdbcTemplate">
        <property name="dataSource" ref="dataSource"></property>
    </bean>

    <!-- 配置數據源-->
    <bean id="dataSource" class="org.springframework.jdbc.datasource.DriverManagerDataSource">
        <property name="driverClassName" value="com.mysql.jdbc.Driver"></property>
        <property name="url" value="jdbc:mysql://localhost:3306/springdb"></property>
        <property name="username" value="root"></property>
        <property name="password" value="000000"></property>
    </bean>

    <!--配置事務管理器-->
    <bean id="transactionManager" class="org.springframework.jdbc.datasource.DataSourceTransactionManager">
        <property name="dataSource" ref="dataSource"></property>
    </bean>

    <!--開啟spring對註解事物的支持-->
    <tx:annotation-driven transaction-manager="transactionManager"></tx:annotation-driven>

</beans>
賬戶業務層實現類:
/**
 * 轉賬的業務層實現類
 */
@Service("accountService")
@Transactional
public class AccountServiceImpl implements IAccountService {
	......
}
賬戶持久層實現類:
/**
 * 賬戶的持久層實現類
 */
@Repository("accountDao")
public class AccountDaoImpl implements IAccountDao {

    @Autowired
    private JdbcTemplate jdbcTemplate;

	......
}
測試結果如下:

到此這篇關於Spring中的事務控制知識總結的文章就介紹到這瞭,更多相關Spring事務控制內容請搜索WalkonNet以前的文章或繼續瀏覽下面的相關文章希望大傢以後多多支持WalkonNet!
推薦閱讀:
- 使用Spring掃描Mybatis的mapper接口的三種配置
- Java Spring JdbcTemplate基本使用詳解
- 一文詳解Spring加載properties文件的方式
- Java Spring 聲明式事務詳解
- AOP之事務管理<aop:advisor>的兩種配置方式