Unity Sockect實現畫面實時傳輸案例原理解析
前言
提示:這裡可以添加本文要記錄的大概內容:
例如:隨著人工智能的不斷發展,機器學習這門技術也越來越重要,很多人都開啟瞭學習機器學習,本文就介紹瞭機器學習的基礎內容。
提示:以下是本篇文章正文內容,下面案例可供參考
一、Socket通信原理
Socket是比較常用的一種通信方式。有關介紹可以點擊查看Socket通信原理
二、畫面傳輸設計
1.邏輯設計圖

2.Unity服務端
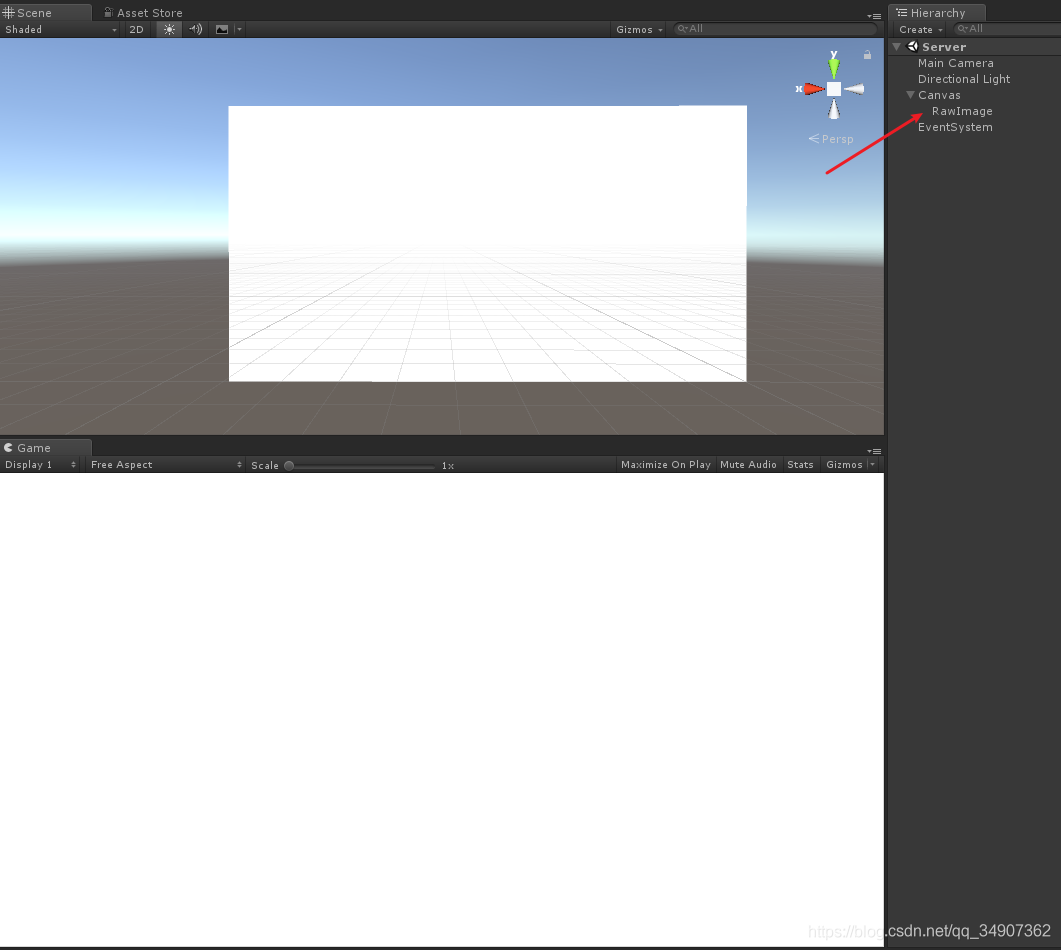
首先創建一個Unity工程,然後新建Server場景,用於接受數據,展示畫面。
然後再場景中創建一個RawImage並設置為全屏。
如圖:
然後創建一個腳本,命名為UnityServer,再創建一個UnityServer.cs
在Start函數中創建Socket服務器,並開啟一個線程用於接受數據。
這裡要註意一點,不能在接受數據線程中處理數據,需要在主線程中進行處理。
因為Unity主線程裡面的資源不允許其他線程進行訪問。
在Update函數中處理數據,並展示圖片。
UnityServer .cs代碼如下:
using System;
using System.Collections.Generic;
using System.IO;
using System.Net;
using System.Net.Sockets;
using System.Threading;
using UnityEngine;
using UnityEngine.UI;

public class UnityServer : MonoBehaviour {

	Socket socket = null;
	Thread thread = null;
	byte[] buffer = null;
	bool receState = true;

	int readTimes = 0;

    public RawImage rawImage;

    private Queue<byte[]> datas;

    void Start () {
		buffer = new byte[1024 * 1024 * 10];

        // 創建服務器, 以Tcp的方式
		socket = new Socket(AddressFamily.InterNetwork, SocketType.Stream, ProtocolType.Tcp);
		socket.Connect(IPAddress.Parse("192.168.1.87"), 10002);

        // 開啟一個線程, 用於接受數據
		thread = new Thread(new ThreadStart(Receive));
		thread.Start();

        datas = new Queue<byte[]>();
    }

    private void Receive()
    {
        while (thread.ThreadState == ThreadState.Running && socket.Connected)
        {
            // 接受數據Buffer count是數據的長度
			int count = socket.Receive(buffer);
            if (receState && count > 0)
            {
				receState = false;
                BytesToImage(count, buffer);
            }
        }
    }

	MemoryStream ms = null;
	public void BytesToImage(int count, byte[] bytes)
    {
        try
        {
            ms = new MemoryStream(bytes, 0, count);
            datas.Enqueue(ms.ToArray());    // 將數據存儲在一個隊列中,在主線程中解析數據。這是一個多線程的處理。

            readTimes++;

            if (readTimes > 5000)
            {
                readTimes = 0;
                GC.Collect(2);  // 達到一定次數的時候,開啟GC,釋放內存
            }
        }
        catch
        {

        }
        receState = true;
    }

    void Update()
    {
        if (datas.Count > 0)
        {
            // 處理紋理數據,並顯示
            Texture2D texture2D = new Texture2D(Screen.width, Screen.height);
            texture2D.LoadImage(datas.Dequeue());
            rawImage.texture = texture2D;
        }
    }

    void OnDestroy()
    {
        try
        {
            if (socket != null)
            {
                socket.Shutdown(SocketShutdown.Both);
            }
        }
        catch { }

        try
        {
            if (thread != null)
            {
                thread.Abort();
            }
        }
        catch { }

        datas.Clear();
    }
}
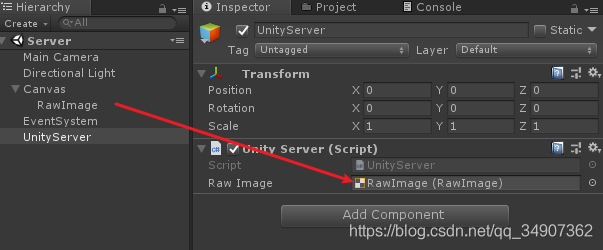
然後在場景中創建一個GameObject,將腳本掛載上,並將創建的RawImage拖拽到Inspector面板上對應的位置。
如圖:
3.Unity客戶端
然後我們創建一個客戶端工程,創建一個Client場景。
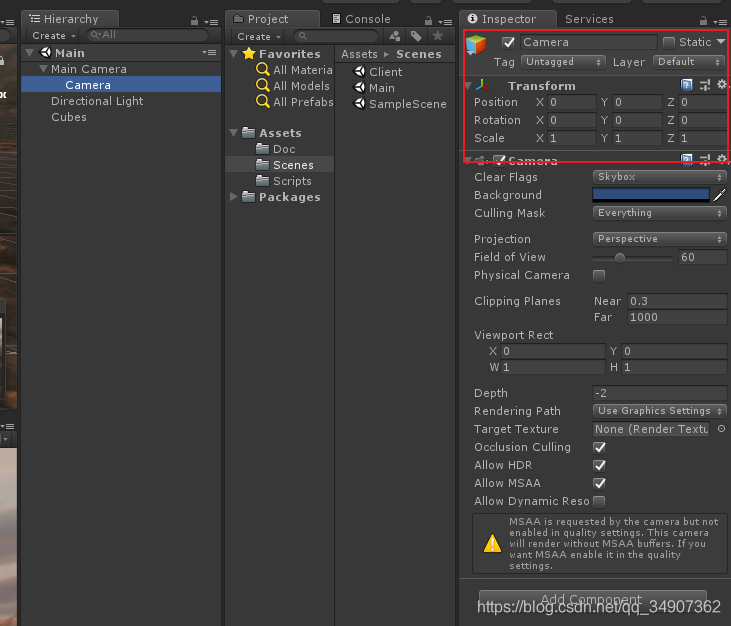
選中Main Camera,用Ctrl+D復制一個攝像機,放在Main Camera下面。
設置localPosition 和 localRotation為零。
這個相機的主要作用抓取屏幕渲染紋理。
如圖:
然後再創建一個腳本,命名為UnityClient.cs腳本。在Start中開啟Socket,然後開啟一個線程發送數據。
將其掛載在Main Camera上面,並將渲染攝像機拖拽到相應的位置。
UnityClient.cs代碼如下:
using System;
using System.Collections.Generic;
using System.Net;
using System.Net.Sockets;
using System.Threading;
using UnityEngine;

public class UnityClient : MonoBehaviour {

	public Camera cam;
	public int port = 10002;

	RenderTexture cameraView = null;

	Socket socket = null;

	Thread thread = null;

	bool success = true;

	Dictionary<string, Client> clients = new Dictionary<string, Client>();

	Vector3 old_position;   // 舊位置
	Quaternion old_rotation;	// 舊旋轉

	void Start () {
		cameraView = new RenderTexture(Screen.width, Screen.height, 24);
		cameraView.enableRandomWrite = true;

		cam.targetTexture = cameraView;
		old_position = transform.position;
		old_rotation = transform.rotation;

        // 開啟Socket
		socket = new Socket(AddressFamily.InterNetwork, SocketType.Stream, ProtocolType.Tcp);
		socket.Bind(new IPEndPoint(IPAddress.Parse("192.168.1.87"), port));
		socket.Listen(100);

        // 開啟一個線程發送渲染數據
		thread = new Thread(new ThreadStart(OnStart));
		thread.Start();
	}

	int isNewAdd = 0;

	void OnStart()
    {
        Debug.Log("Socket創建成功");
        while (thread.ThreadState == ThreadState.Running)
        {
			Socket _socket = socket.Accept();
            if (clients.ContainsKey(_socket.RemoteEndPoint.ToString()))
            {
                try
                {
					clients[_socket.RemoteEndPoint.ToString()].socket.Shutdown(SocketShutdown.Both);
                }
                catch
                {
                }
				clients.Remove(_socket.RemoteEndPoint.ToString());
            }

			Client client = new Client
			{
				socket = _socket
			};

			clients.Add(_socket.RemoteEndPoint.ToString(), client);

			isNewAdd = 1;
        }
    }

	void Update()
    {
        if (success && clients.Count > 0)
        {
			success = false;
            SendTexture();
        }

        if (isNewAdd > 0)
        {
            isNewAdd = 0;
            SendTexture(1);
        }
    }

	void OnGUI()
    {
		GUI.DrawTexture(new Rect(10, 10, 240, 135), cameraView, ScaleMode.StretchToFill);
    }

	void OnApplicationQuit()
    {
        try
        {
			socket.Shutdown(SocketShutdown.Both);
        }
        catch { }

        try
        {
			thread.Abort();
        }
        catch { }
    }

	Texture2D screenShot = null;
	int gc_count = 0;

	void SendTexture(int isInt = 0)
    {
        if ((!old_position.Equals(transform.position) || !old_rotation.Equals(transform.rotation)) || isInt == 1)
        {
            if (null == screenShot)
            {
				screenShot = new Texture2D(Screen.width, Screen.height, TextureFormat.RGB24, false);
            }

            // 讀取屏幕像素進行渲染
			RenderTexture.active = cameraView;
			screenShot.ReadPixels(new Rect(0, 0, cameraView.width, cameraView.height), 0, 0);
			RenderTexture.active = null;
			byte[] bytes = screenShot.EncodeToJPG(100);

            foreach (var val in clients.Values)
            {
                try
                {
					val.socket.Send(bytes);
                }
                catch
                {
                    if (!val.socket.Connected)
                    {
                        clients.Remove(val.socket.RemoteEndPoint.ToString());
                    }
                }
            }
            gc_count++;
            if (gc_count > 5000)
            {
                gc_count = 0;
                GC.Collect(2);
            }
            Debug.Log("發送數據:" + (float)bytes.Length / 1024f + "KB");

            old_position = cam.transform.position;
            old_rotation = cam.transform.rotation;
        }
        success = true;
    }

    void OnDestroy()
    {
        try
        {
            socket.Shutdown(SocketShutdown.Both);
        }
        catch { }

        try
        {
            thread.Abort();
        }
        catch { }
    }
}

class Client {
	public Socket socket = null;
}
4.最終效果
到此這篇關於Unity Sockect實現畫面實時傳輸的文章就介紹到這瞭,更多相關Unity Sockect畫面實時傳輸內容請搜索WalkonNet以前的文章或繼續瀏覽下面的相關文章希望大傢以後多多支持WalkonNet!