使用Springboot整合GridFS實現文件操作
GridFsOperations,實現GridFS文件上傳下載刪除
最近學習GridFS,想用它整合springboot弄個文件的上傳下載。
網上查到的很多資料都是使用GridFsTemplate,還有GridFSBucket來實現的,需要各種額外配置Bean。但是看瞭spring-data-mongodb的官方文檔,以及示例代碼,他們隻用到瞭GridFsOperations,無需其他任何配置。
然後就用GridFsOperations寫瞭個文件上傳下載的demo,用起來還是很方便的,給大傢個參考。
上傳下載刪除功能實現
pom.xml
<dependency>
    <groupId>org.springframework.boot</groupId>
    <artifactId>spring-boot-starter-data-mongodb</artifactId>
</dependency>
application.properties
#文件上傳下載配置
spring.servlet.multipart.max-file-size=1024MB
spring.servlet.multipart.max-request-size=1024MB
FileController
package com.example.tryRedis.controller;
import static org.springframework.data.mongodb.core.query.Query.*;
import static org.springframework.data.mongodb.gridfs.GridFsCriteria.*;
import com.mongodb.client.gridfs.model.GridFSFile;
import io.swagger.v3.oas.annotations.Parameter;
import org.bson.types.ObjectId;
import org.springframework.beans.factory.annotation.Autowired;
import org.springframework.data.mongodb.gridfs.GridFsOperations;
import org.springframework.data.mongodb.gridfs.GridFsResource;
import org.springframework.http.MediaType;
import org.springframework.web.bind.annotation.*;
import org.springframework.web.multipart.MultipartFile;
import javax.servlet.ServletOutputStream;
import javax.servlet.http.HttpServletResponse;
import java.io.*;
import java.util.HashMap;
import java.util.Map;
@RestController
@RequestMapping("/file")
public class FileController {
    @Autowired
    GridFsOperations gridFsOperations;
    //上傳文件
    @PostMapping(value = "/upload",consumes = MediaType.MULTIPART_FORM_DATA_VALUE)
    public Map<String , ObjectId> upload(@Parameter @RequestPart(value = "file") MultipartFile file){
        //開始時間
        long begin = System.nanoTime();
        Map<String,ObjectId> map = new HashMap<>();
        try{
            InputStream streamForUpload = file.getInputStream();
            ObjectId objectId = gridFsOperations.store(streamForUpload,file.getOriginalFilename(),file.getContentType());
            //上傳結束
            long end = System.nanoTime();
            long time = end-begin;
            System.out.println("本次上傳共耗時: "+ time);
            System.out.println("上傳成功!文件名: "+file.getOriginalFilename()+". 文件ID: "+objectId);
            map.put(file.getOriginalFilename(),objectId);
        }catch (Exception e){
            e.printStackTrace();
        }
        return map;
    }
    //查詢並下載文件
    @GetMapping("/download")
    public String download(String filename, HttpServletResponse response) throws IOException {
        //開始時間
        long begin = System.nanoTime();
        //查詢文件
        GridFSFile result  = gridFsOperations.findOne(query(whereFilename().is(filename)));
        GridFsResource gridFsResource= gridFsOperations.getResource(result);
        String contentType = gridFsResource.getContentType();
        System.out.println("contentType: "+contentType);
        System.out.println("filename: "+gridFsResource.getFilename());
        response.reset();
        response.setContentType(contentType);
        //註意: 如果沒有下面這行設置header, 結果會將文件的內容作為響應的 body 直接輸出在頁面上, 而不是下載文件
        response.setHeader("Content-Disposition","attachment;filename="+filename);  //指定下載文件名
        ServletOutputStream outputStream = response.getOutputStream();
        InputStream is = gridFsResource.getInputStream();
        byte[] bytes = new byte[1024];
        int len = 0;
        while ((len=is.read(bytes))!=-1){
            outputStream.write(bytes,0,len);
        }
        is.close();
        outputStream.close();
        //下載結束
        long end = System.nanoTime();
        long time = end-begin;
        System.out.println("本次下載共耗時: "+ time);
        return contentType;
    }
    @DeleteMapping("/delete")
    public String deleteFile(@Parameter @RequestParam("filename") String filename){
        gridFsOperations.delete(query(whereFilename().is(filename)));
        return "delete success";
    }
}
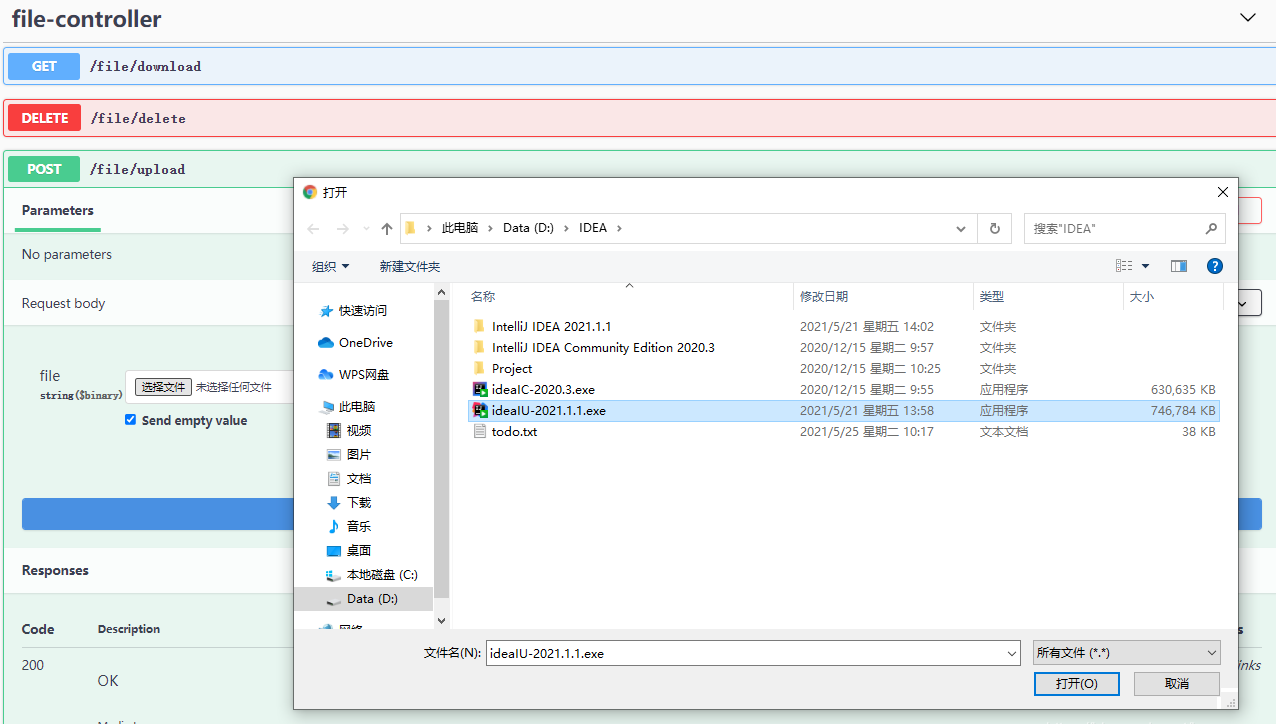
測試
上傳

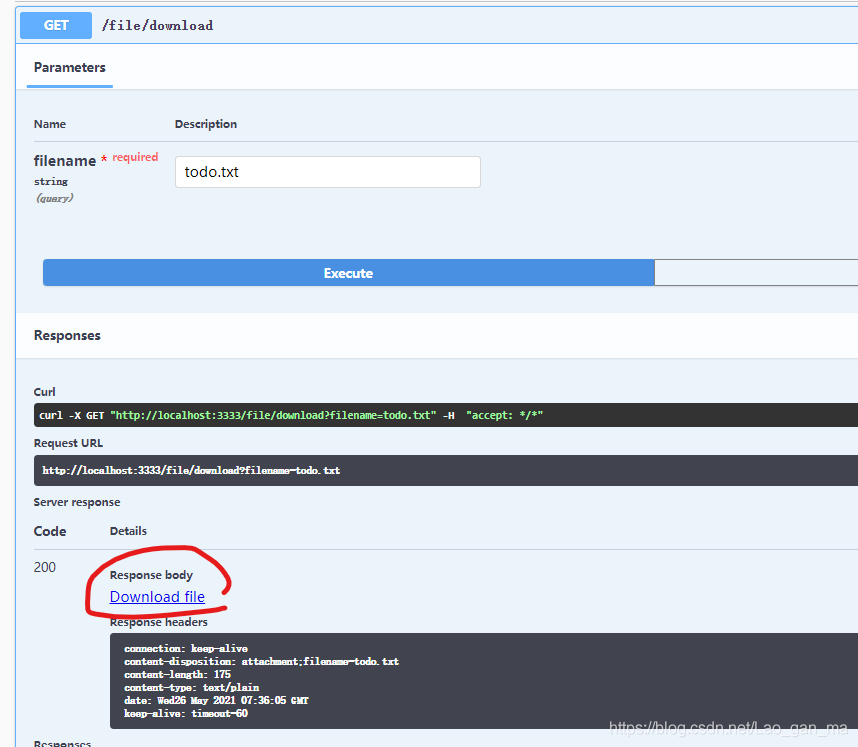
下載
紅色圈內點擊download就可以下載啦。或者在地址欄直接輸入localhost:8080/file/download?filename=todo.txt 也可以直接下載文件(這裡的todo.txt是我測試的文件,你們填自己上傳的文件名,不要忘瞭加上後綴名!)
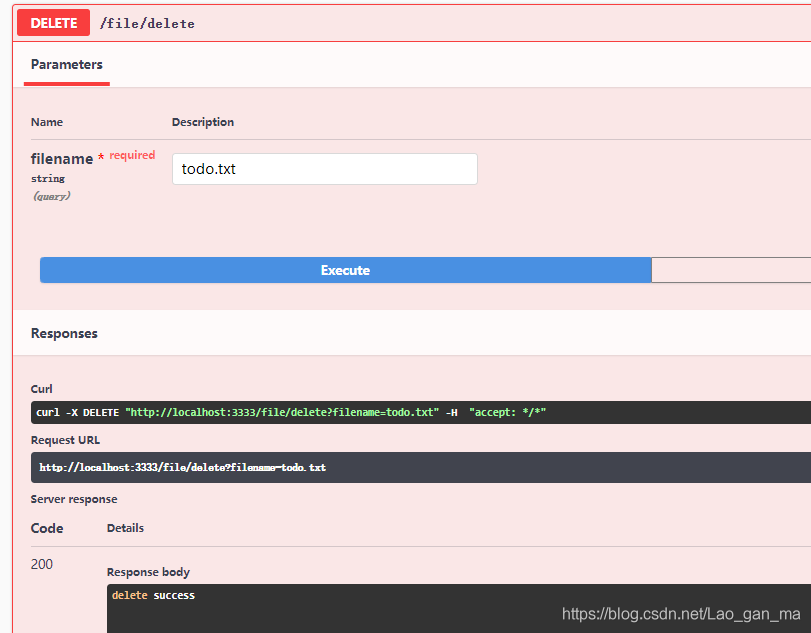
刪除
上面這些上傳刪除功能測試的時候,大傢也可以結合mongodb的數據庫去看看。
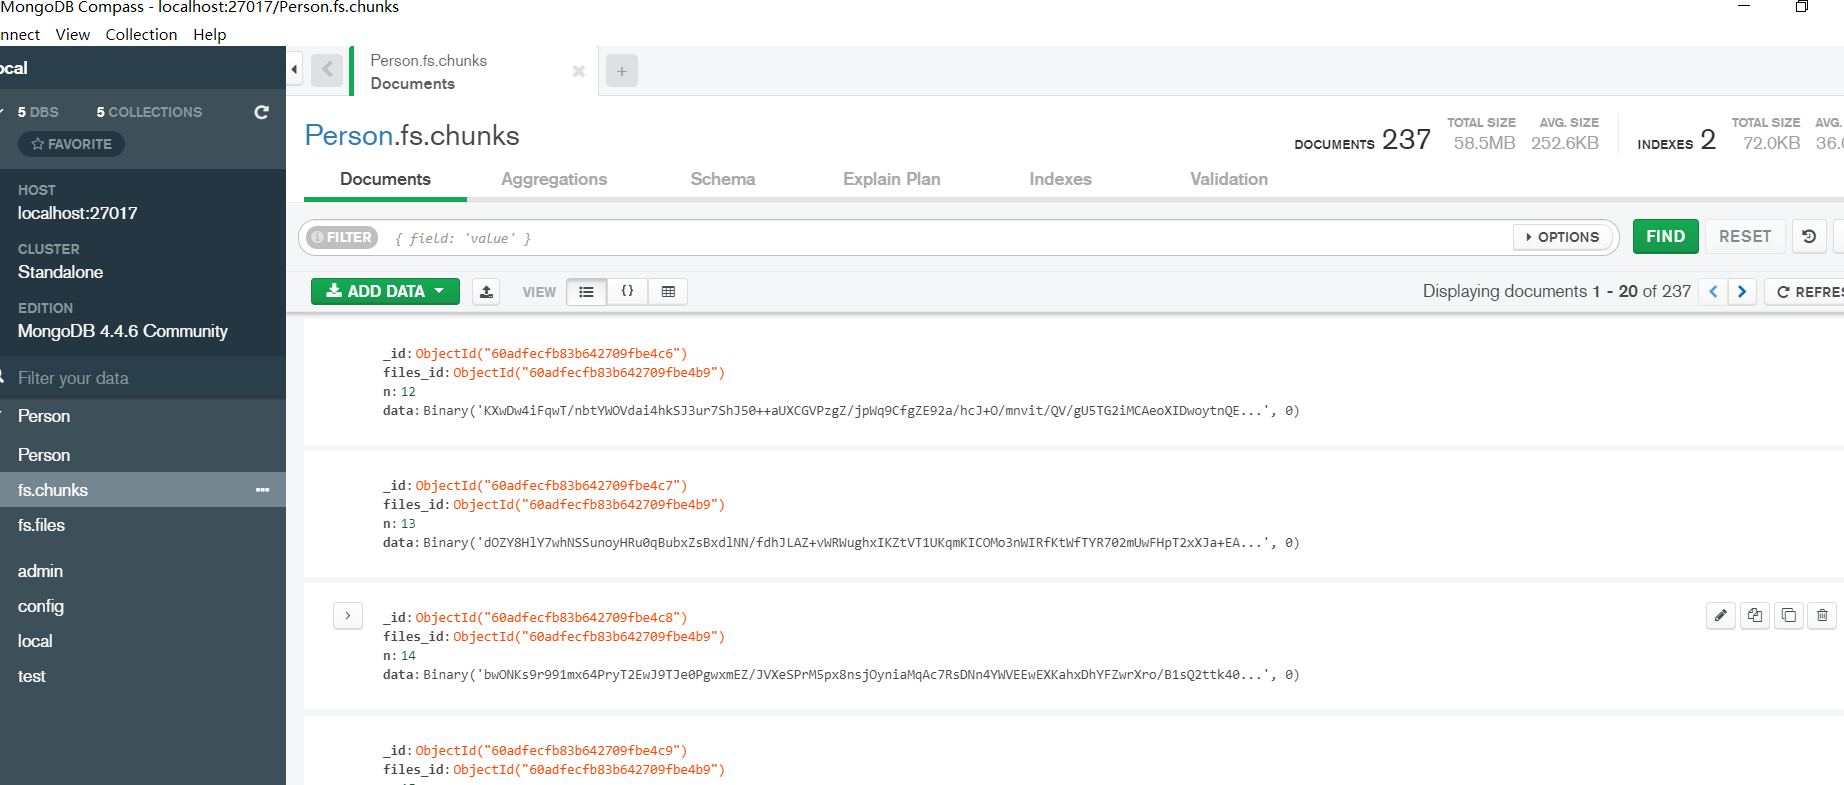
上傳的文件類型不限,大小嘛,看你properties文件裡設置的上限是多大瞭。我拿700MB的文件上傳瞭也ok,然後在數據庫中會被分成很多個塊進行存儲。具體存儲的細節和原理,網上文檔很多,這兒就不嘮叨嘞。
以上為個人經驗,希望能給大傢一個參考,也希望大傢多多支持WalkonNet。
推薦閱讀:
- Spring Boot使用GridFS實現文件的上傳和下載方式
- SpringBoot 使用Mongo的GridFs實現分佈式文件存儲操作
- SpringBoot下載文件的實現及速度對比
- Spring Boot中快速操作Mongodb數據庫指南
- centos離線安裝mongodb-database-tools方法詳解