Vue實現組件間通信的幾種方式(多種場景)
以下是我在開發中用到過的vue組件之間的通信方式,不同的場景使用不同的方式,基本滿足所有開發場景中的通信需求,從最簡單的事例著手,講述如何使用,話不多說直接開始,滿滿的幹貨,建議看完。
1、Props
父 >>> 子 (Props)
一個組件裡面引入另外一個組件,此時構成瞭一種“父子關系”,當前組件為“父”,引入的組件為“子”,如當前組件(父),在父組件中通過 “:message” 向子組件通信。
<template>
    <div class="parent-box">
        <div>
            <div>我是父頁面</div>
            <div>{{message}}</div>
        </div>
        <children :message="toChildrenMsg"></children>
    </div>
</template>

<script>
import Children from './Children.vue'  //當前頁引入子組件
export default {
    name:"Parent",
    components:{
        Children
    },
    data(){
        return {
            message:'我是父頁面的內容',
            toChildrenMsg:'從父頁面傳過到子頁面的內容'
        }
    }
}
</script>
在子組件通過props進行接收,註意子組件props裡面接收的對象名稱必須與父組件中在子組件綁定的名稱一致,當前例子為“message”,可以在組件return中this.的方式使用props裡面的值。
<template>
    <div class="children-box">
        <div>
            <div>我是子頁面</div>
            <div>{{message}}</div>
        </div>
    </div>
</template>

<script>
export default {
    name:"Children",
    props:{
        message:{
            type:String,  //類型判斷
            default:''    //默認值
        }
    }
}
</script>
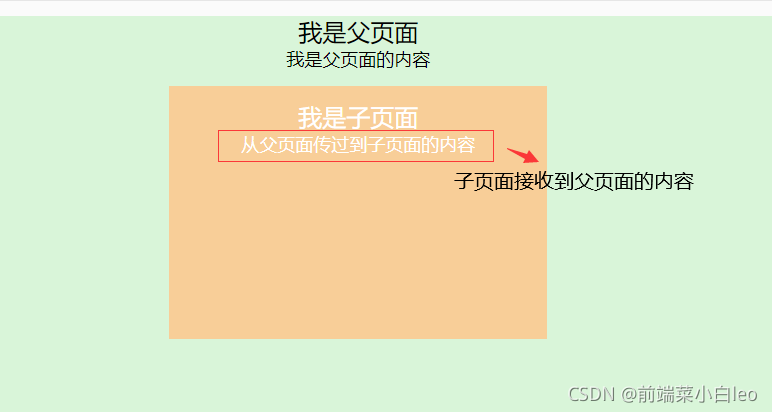
子組件接收到父組件傳過來的內容,實現效果如下圖所示:
子 >>> 父 ($emit)
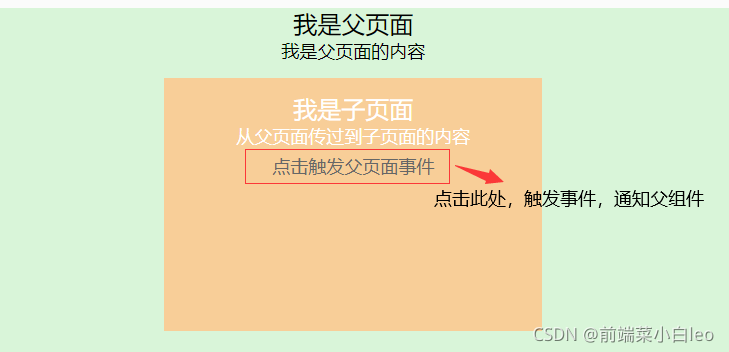
在子組件中通過this.$emit()方法向父組件通信,如下,點擊觸發事件,執行this.$emit(‘fromChildMethod’),觸發父組件的fromChildMethod方法。
<template>
    <div class="children-box">
        <div>
            <div>我是子頁面</div>
            <div>{{message}}</div>
            <div><span @click="toParentMethod">點擊觸發父頁面事件</span></div>
        </div>
    </div>
</template>

<script>
export default {
    name:"Children",
    props:{
        message:{
            type:String,
            default:''
        }
    },
    methods:{
        toParentMethod(){
            this.$emit('fromChildMethod')
        }
    }
}
</script>
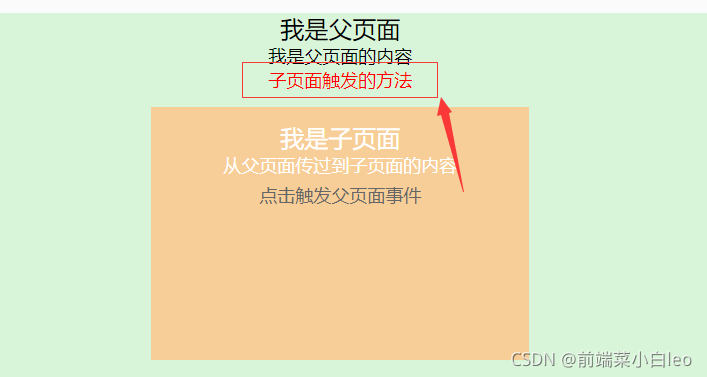
在父組件的子組件上綁定fromChildMethod方法,對該方法進行監聽,當該方法觸發時,執行父組件中相應的方法fromChild。
<template>
    <div class="parent-box">
        <div>
            <div>我是父頁面</div>
            <div style="font-size:12px;">{{message}}</div>
            <div style="font-size:12px;color:red">{{fromChildMsg}}</div>
        </div>
        <children :message="toChildrenMsg" @fromChildMethod="fromChild"></children>
    </div>
</template>

<script>
import Children from './Children.vue'
export default {
    name:"Parent",
    components:{
        Children
    },
    data(){
        return {
            message:'我是父頁面的內容',
            toChildrenMsg:'從父頁面傳過到子頁面的內容',
            fromChildMsg:''
        }
    },
    methods:{
        fromChild(){
            this.fromChildMsg = '子頁面觸發的方法' //監聽到子組件觸發的方法,顯示該內容
        }
    }
}
</script>
當點擊子組件的對應的span,觸發方法,向父組件進行通知。
小結:父傳子,props;子傳父,this.$emit();觸發、監聽名稱須一致。
2、Bus事件總線
真實的場景中,組件不僅僅是“父子”關系,還有“兄弟”關系跟跨層級組件等等。這時候props跟$emit可能就不太適用瞭,這時候它出現瞭,那就是Bus(事件總線),父子組件同樣適用。
Bus之觸發$emit、監聽$on、關閉$off,主要用到的就是$emit跟$on。
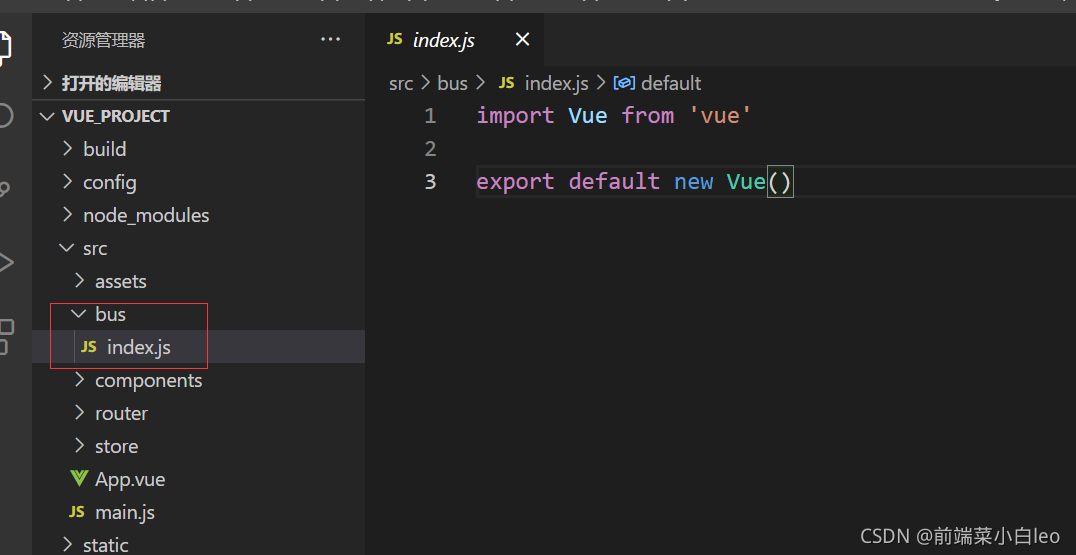
先在項目中新建一個文件夾bus,裡面有個index.js文件,創建一個新的Vue實例,然後導出模塊。
接下來import這個新的Vue實例,也就是bus,常用的兩種導入方式,一種是全局導入,另外一種是局部導入(需每個組件都導入一次)。以下為全局導入,在main.js裡面將該bus作為當前Vue實例的原型方法,能直接在各組件裡面通過this.bus的方式調用。
import Vue from 'vue'
import App from './App'
import bus from './bus/index'
Vue.prototype.bus = bus

new Vue({
  el: '#app',
  components: { App },
  template: '<App/>'
})
下面展示實現bus通信過程,場景為父子,同樣的,兄弟、跨層級用法與其類似:
Parent組件中向Children組件通信,通過this.bus.$emit()觸發
<template>
    <div class="parent-box">
        <div>
            <div>我是父頁面</div>
            <div @click="toChildBus"><span>向子組件通信</span></div>
        </div>
        <children></children>
    </div>
</template>

<script>
import Children from './Children.vue'
export default {
    name:"Parent",
    components:{
        Children
    },
    methods:{
        toChildBus(){
            let val = '父組件向子組件通信'
            this.bus.$emit('toChild',val) //val為傳過去的值,非必傳
        }
    }
}
</script>
Children組件監聽Parent組件觸發的事件(在mounted階段進行綁定監聽),註意事件名稱要一致,通過this.bus.$on()監聽,當總線中監聽到觸發該方法,拿到傳過來的值(也可以在裡面執行自定義方法)。
<template>
    <div class="children-box">
        <div>
            <div>我是子頁面</div>
            <div style="font-size:12px;color:blue;">{{fromParentMsg}}</div>
        </div>
    </div>
</template>

<script>
export default {
    name:"Children",
    data(){
        return {
            fromParentMsg:''
        }
    },
    mounted(){
        this.bus.$off('toChild')
        this.bus.$on('toChild',val=>{
            this.fromParentMsg = val    //此處為復制操作,也可在裡面執行相應的方法
        })
    }
}
</script>
效果圖:
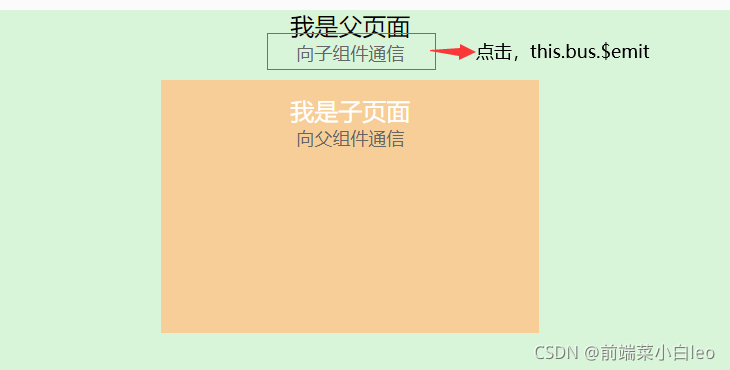
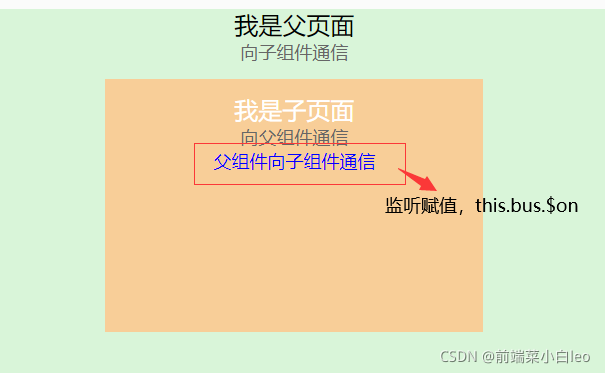
總結:父子,兄弟,跨級(祖孫等)通信寫法相同,就不一一舉例瞭,都是通過this.bus.$emit()觸發,通過this.bus.$on()監聽,執行相應的操作,切記:觸發、監聽名稱必須相同!
3、Vuex狀態管理庫
Vuex相當於一個倉庫,你可以往倉庫裡面放一些東西,保持存進去的時的狀態,可以修改,也可以在需要的時候取出,是一個全局狀態。本次隻講如何使用vuex進行通信,不深究其原理。
安裝vuex
npm install vuex --save
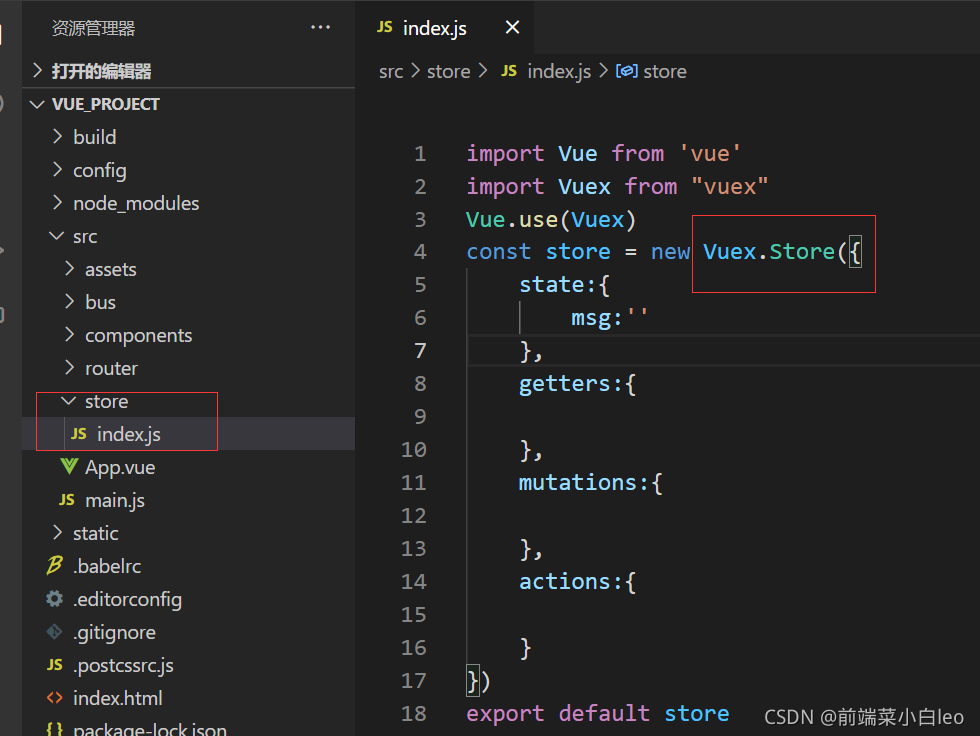
這裡我新建一個文件夾,名稱為store,裡面有一個index.js文件,創建一個Vuex.Store實例,然後導出這個實例,從圖中可以明確看出store的大致結構及其要素,具體不展開講,關於vuex的相關文章數不勝數,可以自行去瞭解,這裡主要講大致用法。
在mian.js全局引入,之後就可以直接使用瞭。
import Vue from 'vue'
import App from './App'
import router from './router'
import bus from './bus/index'
import store from './store/index'

Vue.config.productionTip = false
Vue.prototype.bus = bus
new Vue({
  el: '#app',
  router,
  store,
  components: { App },
  template: '<App/>'
})
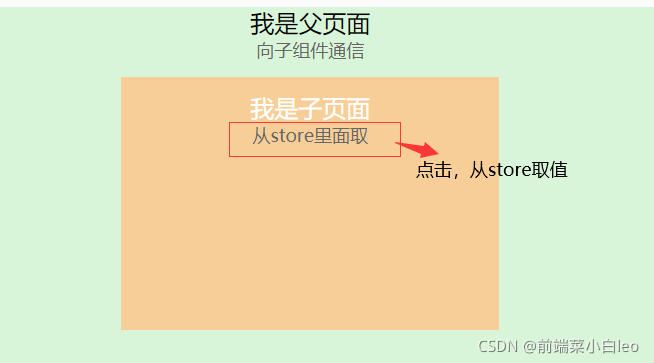
方式一,this.$store.state.xxx,直接對state進行操作,在一個組件mounted階段將值存如store中,當然也可在你想在的方法中進行操作。
<template>
    <div class="parent-box">
        <div>
            <div>我是父頁面</div>
        </div>
        <children></children>
    </div>
</template>

<script>
import Children from './Children.vue'
export default {
    name:"Parent",
    components:{
        Children
    },
    data(){
        return {
            fromChildMsg:''
        }
    }
    mounted(){
        this.$store.state.msg = '父組件存入'    //在此處通過方式一存起來
    }
}
</script>
其他組件從store中取出,當然同樣也可以進行修改。
<template>
    <div class="children-box">
        <div>
            <div>我是子頁面</div>
            <div @click="fromStore"><span>從store裡面取</span></div>
            <div>{{fromStoreMsg}}</div>
        </div>
    </div>
</template>

<script>
export default {
    name:"Children",
    data(){
        return {
            fromStoreMsg:''
        }
    },
    methods:{
        fromStore(){
            this.fromStoreMsg = this.$store.state.msg
        }
    }
}
</script>
效果圖:

方式二,通過this.$store.getters.xxx、mapGetters進行取出。
// store/index.js
getters:{
    getMsg:state=>{
    return state.msg
  }
},


//組件中取
this.$store.getters.getMsg

//也可以用mapGetters的方式
import { mapGetters } from 'vuex'
computed: {
 ...mapGetters(['getMsg'])
},
對store存入數據該可以用mutations、actions(可異步)進行存入,具體就不展開瞭,有興趣可以自己去深究。
4、Router
可以通過動態路由、路由跳轉方式進行傳值,如this.$router.push({path:’xxx’,query:{value:’xxx’}}),在跳轉的時候順便傳值,通過this.$route.params.value和this.$route.query.value獲取到傳過來的參數。該方式有局限性,隻能在相互跳轉的組件通信取值,且直接在跳轉之後的頁面進行刷新取不到值,視情況而用。
5、緩存
sessionStorage、localStorage、cookie
多個組件之間的通信除瞭可以用bus、store之外,還比較一種常用的方式–緩存,在同一個窗口不關閉的情況下,該窗口下的其他組件都可以取到緩存中已經存好的值,利用sessionStorage.setItem(key,value)、localStorage.setItem(key,value)等將值存起來,其他組件可以通過sessionStorage.getItem(key)、localStorage.getItem(key)等方式拿到,多個頁面共享緩存數據,刷新頁面數據不會銷毀,可以用sessionStorage.removeItem(key)、localStorage.removeItem(key)的方式將緩存移除,可用場景還是比較多的。
總結:大致介紹vue組件中幾種常用的通信、傳值方式,考慮不同的場景使用不同的方式,提高開發效率,減少bug的產生。
到此這篇關於Vue實現組件間通信的幾種方式(多種場景)的文章就介紹到這瞭,更多相關Vue 組件通信內容請搜索WalkonNet以前的文章或繼續瀏覽下面的相關文章希望大傢以後多多支持WalkonNet!