python中Tkinter實現分頁標簽的示例代碼
Tkinter實現UI分頁標簽顯示:
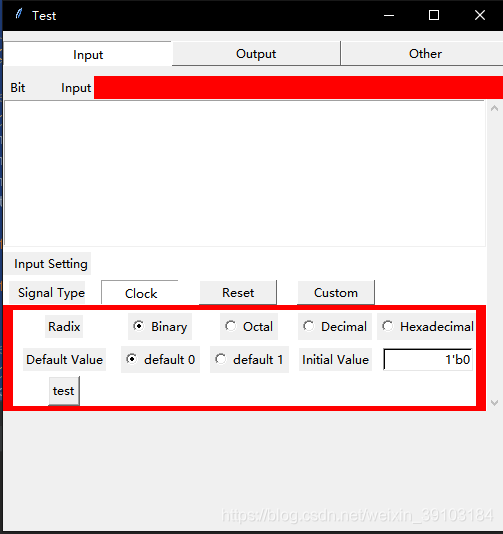
Input頁,紅色部分為當前Frame的位置,下半部分為第一頁的子標簽;三頁標簽的顯示內容各不相同。實現分頁顯示的核心組件為Radiobutton,Radiobutton隻有一個選項能夠生效,使用參數indicatoron=0能夠將Radiobutton顯示為Button的形狀,通過選定的Radiobutton將原有的Frame forget掉,同時,將預定的Frame pack,實現分頁的效果。使用時要將更換的組件放入一個Frame中,定義一個函數進行選定Radiobutton的參數傳遞,實現切換。如果對Radiobutton使用bind的話,當前選定的Radiobutton隻能在下次事件觸發時生效,始終慢著一拍,所以使用command選項賦值標簽切換函數。
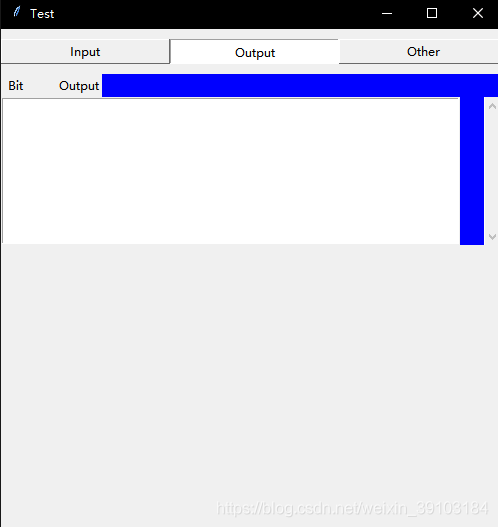
第二頁Output
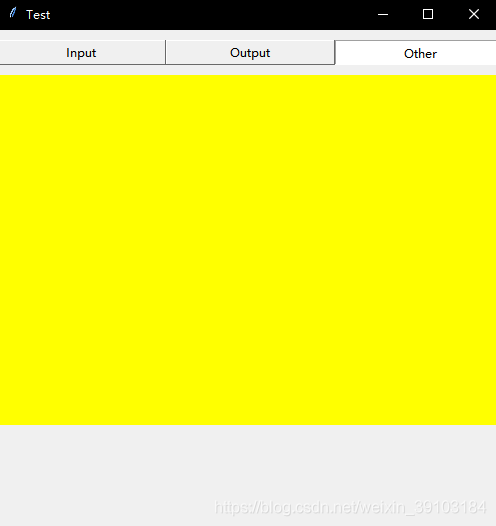
第三頁Ohter
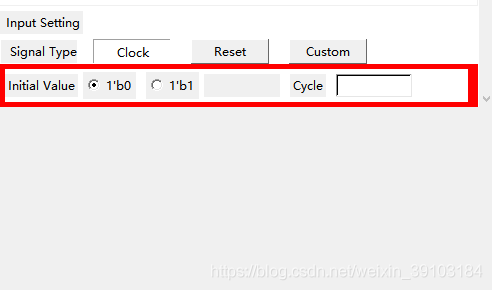
第一頁的子標簽,分為三部分,每頁的內容獨立

源碼如下:
import tkinter as tk

class TestBenchMaker:

    def __init__(self):
        self.TITLE = "Test"
        self.WIDTH = 500
        self.HEIGHT = 500
        self.parseDic = {}

    # Initial GUI
    def initialGUI(self):

        # Change tag
        def changeTag(tag):
            frame3.pack_forget()
            frame4.pack_forget()
            frame5.pack_forget()
            if tag == 0:
                frame3.pack(fill=tk.X)
            elif tag == 1:
                frame4.pack(fill=tk.X)
            elif tag == 2:
                frame5.pack(fill=tk.X)

        # Change type
        def changeType(tag):
            clockSet.pack_forget()
            resetSet.pack_forget()
            customSet.pack_forget()
            if tag == 0:
                clockSet.pack(side=tk.TOP, fill=tk.BOTH, expand=tk.YES, pady=5, padx=10)
            elif tag == 1:
                resetSet.pack(side=tk.TOP, fill=tk.BOTH, expand=tk.YES, pady=5, padx=10)
            elif tag == 2:
                customSet.pack(side=tk.TOP, fill=tk.BOTH, expand=tk.YES, pady=5, padx=10)


        window = tk.Tk()
        window.title(self.TITLE)

        # Place GUI on the center of screen
        self.ws = window.winfo_screenwidth()
        self.hs = window.winfo_screenheight()
        x = (self.ws / 2) - (self.WIDTH / 2)
        y = (self.hs / 2) - (self.HEIGHT / 2)
        window.geometry('%dx%d+%d+%d' % (self.WIDTH, self.HEIGHT, x, y))


        # Tag: 0 --> input; 1 --> output; 2 --> other
        frame2 = tk.Frame(window)
        frame2.pack(fill=tk.Y, pady=10)
        tag = tk.IntVar()
        tagWidth = 23
        tk.Radiobutton(frame2, text="Input", command=lambda: changeTag(0), width=tagWidth, variable=tag, value=0, bd=1, indicatoron=0).grid(column=0, row=1)
        tk.Radiobutton(frame2, text="Output", command=lambda: changeTag(1), variable=tag, width=tagWidth, value=1, bd=1, indicatoron=0).grid(column=1, row=1)
        tk.Radiobutton(frame2, text="Other", command=lambda: changeTag(2), variable=tag, width=tagWidth, value=2, bd=1, indicatoron=0).grid(column=2, row=1)

        # frame3 --> Input
        # Signal info
        frame3 = tk.Frame(window, height=300, bg="red")
        frame3.pack(side=tk.TOP, fill=tk.X)
        tk.Label(frame3, text=" Bit         Input").pack(side=tk.TOP, anchor=tk.W)
        scroll = tk.Scrollbar(frame3)
        scroll.pack(side=tk.RIGHT, fill=tk.Y)
        self.inputBox = tk.Listbox(frame3, bd=1, selectmode=tk.SINGLE, yscrollcommand=scroll.set, height=8)
        self.inputBox.pack(side=tk.TOP, anchor=tk.NW, fill=tk.X, expand=tk.YES)
        scroll.config(command=self.inputBox.yview)

        # Input setting
        width = 10
        frameInputSet = tk.Frame(frame3, bg="white")
        frameInputSet.pack(side=tk.TOP, fill=tk.BOTH, expand=tk.YES)
        tk.Label(frameInputSet, text="  Input Setting").grid(row=0, column=0, pady=5)
        tk.Label(frameInputSet, text="  Signal Type", width=width).grid(row=1, column=0)
        # Tpye: 0 --> clock; 1 --> reset; 2 --> custom
        type = tk.IntVar()
        tk.Radiobutton(frameInputSet, text="Clock", variable=type, value=0, command=lambda:changeType(0), bd=1, indicatoron=0, width=width).grid(row=1, column=1, padx=10)
        tk.Radiobutton(frameInputSet, text="Reset", variable=type, value=1, command=lambda:changeType(1), bd=1, indicatoron=0, width=width).grid(row=1, column=2, padx=10)
        tk.Radiobutton(frameInputSet, text="Custom", variable=type, value=2, command=lambda:changeType(2), bd=1, indicatoron=0, width=width).grid(row=1, column=3, padx=10)
        # Clock setting
        initalValue = tk.StringVar()
        initalValue.set("1'b0")
        cycle = tk.StringVar()
        converse = tk.StringVar()
        clockSet = tk.Frame(frame3, bg="white")
        #clockSet.pack(side=tk.TOP, fill=tk.BOTH, expand=tk.YES, pady=5, padx=10)
        tk.Label(clockSet, text="Initial Value").grid(row=0, column=0, pady=5)
        tk.Radiobutton(clockSet, text="1'b0", variable=initalValue, value="1'b0").grid(row=0, column=1, padx=5)
        tk.Radiobutton(clockSet, text="1'b1", variable=initalValue, value="1'b1").grid(row=0, column=2, padx=5)
        tk.Label(clockSet, text="", width=10).grid(row=0, column=3)
        tk.Label(clockSet, text="Cycle").grid(row=0, column=4, pady=5, padx=10)
        tk.Entry(clockSet, textvariable=cycle, width=10, bd=2, bg="white").grid(row=0, column=5)
        # Reset setting
        resetSet = tk.Frame(frame3, bg="white")
        tk.Label(resetSet, text="Initial Value").grid(row=0, column=0, pady=5)
        tk.Radiobutton(resetSet, text="1'b0", variable=initalValue, value="1'b0").grid(row=0, column=1, padx=5)
        tk.Radiobutton(resetSet, text="1'b1", variable=initalValue, value="1'b1").grid(row=0, column=2, padx=5)
        tk.Label(resetSet, text="", width=10).grid(row=0, column=3)
        tk.Label(resetSet, text="Converse").grid(row=0, column=4, pady=5, padx=10)
        tk.Entry(resetSet, textvariable=converse, width=10, bd=2, bg="white").grid(row=0, column=5)
        # Custom setting
        defaultValue = tk.IntVar()
        radixValue = tk.IntVar()
        radixValue.set(0)
        customSet = tk.Frame(frame3, bg="white")
        customSet.pack(side=tk.TOP, fill=tk.BOTH, expand=tk.YES, pady=5, padx=10)
        # Radix 0 --> b, 1 --> o, 2 --> d, 3 --> h
        tk.Label(customSet, text="Radix").grid(row=0, column=0, pady=5, padx=1)
        tk.Radiobutton(customSet, text="Binary", variable=radixValue, value=0).grid(row=0, column=1)
        tk.Radiobutton(customSet, text="Octal", variable=radixValue, value=1).grid(row=0, column=2)
        tk.Radiobutton(customSet, text="Decimal", variable=radixValue, value=2).grid(row=0, column=3)
        tk.Radiobutton(customSet, text="Hexadecimal", variable=radixValue, value=3).grid(row=0, column=4)
        # Initial value
        tk.Label(customSet, text="Default Value").grid(row=1, column=0, pady=5, padx=10)
        tk.Radiobutton(customSet, text="default 0", variable=defaultValue, value=0).grid(row=1, column=1, padx=5)
        tk.Radiobutton(customSet, text="default 1", variable=defaultValue, value=1).grid(row=1, column=2, padx=5)
        tk.Label(customSet, text="Initial Value").grid(row=1, column=3, pady=5, padx=5)
        tk.Entry(customSet, textvariable=initalValue, width=12, bd=2, bg="white", justify=tk.RIGHT).grid(row=1, column=4)
        tk.Button(customSet, text="test", command=lambda :print(initalValue.get())).grid()

        # frame4 --> Output
        frame4 = tk.Frame(window, height=350, bg="blue")
        tk.Label(frame4, text=" Bit         Output").pack(anchor=tk.NW)
        scroll2 = tk.Scrollbar(frame4)
        scroll2.pack(side=tk.RIGHT, fill=tk.Y)

        self.outputBox = tk.Listbox(frame4, bd=1, selectmode=tk.SINGLE, yscrollcommand=scroll2.set, height=8, width=65)
        self.outputBox.pack(side=tk.LEFT)
        scroll2.config(command=self.outputBox.yview)

        # frame5 --> Other
        frame5 = tk.Frame(window, height=350, bg="yellow")

        window.mainloop()

if __name__ == "__main__":
    tbm = TestBenchMaker()
    tbm.initialGUI()
到此這篇關於python中Tkinter實現分頁標簽的示例代碼的文章就介紹到這瞭,更多相關python Tkinter分頁標簽內容請搜索WalkonNet以前的文章或繼續瀏覽下面的相關文章希望大傢以後多多支持WalkonNet!
推薦閱讀:
- None Found