Vue實現tab導航欄並支持左右滑動功能
本文主要介紹:利用Vue實現tab導航欄,並且通過flex佈局實現左右滑動,計算按鈕的位置,當點擊第一屏展示的最後一個且還有元素未展示時,自動滑動顯示出未顯示的元素。
tab導航欄佈局:
<section class="theme-list">
  <div class="fixed-nav" ref="fixednav">
    <div class="fixed-nav-content">
      <p
        v-for="(item, index) in theme"
        :key="index"
        :class="['tab-title', activeId === index && 'select-tab']"
        @click="changeTab(index, $event)"
      >
        {{ item }}
      </p>
    </div>
  </div>
</section>
theme: ['CSDN博客', '博客園', '高考加油', '中考加油', '小歡喜', '七十周年'],
activeId: 0
導航欄樣式代碼:
.theme-list {
  margin-top: 12px;
}
.fixed-nav {
  overflow-x: scroll;
  -webkit-overflow-scrolling: touch;
}
.fixed-nav-content {
  display: flex;
}
.tab-title {
  padding: 0 13px;
  margin-right: 12px;
  color: #141414;
  border-radius: 13px;
  font-size: 12px;
  flex-shrink: 0;
  height: 0.52rem;
  line-height: 0.52rem;
}
此時我們可以實現下面的樣式,並且可以左右滑動tab:
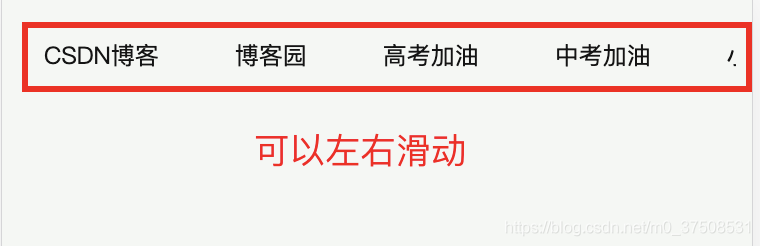
需要註意的是,在樣式代碼中需要添加flex-shrink : 0,這樣才會當tab寬度大於外部容器寬度時不會收縮。
這樣,我們基本的tab導航欄已經實現瞭,現在我們來實現:點擊“中考加油”時,整個tab向左滑動,顯示出剩下的tab元素。
changeTab(id, event) {
  // 如果選擇的和當前激活的不同
  if (id !== this.activeId) {
    this.activeId = id;
    // 計算當前按鈕的位置,看是否需要移動
    const spanLeft = event.clientX; // 當前點擊的元素左邊距離
    const divBox = document.querySelector(".select-tab").clientWidth / 2; // 點擊的元素一半寬度
    const totalWidths = document.body.clientWidth; // 屏幕總寬度
    const widths = totalWidths / 2; // 一半的屏幕寬度
    const spanRight = totalWidths - spanLeft; // 元素的右邊距離
    const scrollBox = document.querySelector(".fixed-nav"); // 獲取最外層的元素
    const scrollL = scrollBox.scrollLeft; // 滾動條滾動的距離
    // 當元素左邊距離 或者 右邊距離小於100時進行滑動
    if (spanRight < 100 || spanLeft < 100) {
      scrollBox.scrollLeft = scrollL + (spanLeft - widths) + divBox;
    }
  }
}
通過這個方法可以實現tab的自動滾動瞭,但是此時還有一個問題是:在滑動的時候會顯示出滾動條,顯然是不太美觀的。
/*定義滾動條高寬及背景 高寬分別對應橫豎滾動條的尺寸*/
::-webkit-scrollbar {
  width: 0.01rem;
  opacity: 0;
  display: none;
}
/*定義滾動條軌道 內陰影+圓角*/
::-webkit-scrollbar-track {
  background-color: #fff;
  opacity: 0;
}
/*定義滑塊 內陰影+圓角*/
::-webkit-scrollbar-thumb {
  width: 0.01rem;
  border-radius: 0.01rem;
  opacity: 0;
}
這樣,一個導航條就實現瞭,可以在結合公司的業務修改一下導航條的樣式就可以啦!
到此這篇關於Vue實現tab導航欄,支持左右滑動的文章就介紹到這瞭,更多相關Vue左右滑動導航欄內容請搜索WalkonNet以前的文章或繼續瀏覽下面的相關文章希望大傢以後多多支持WalkonNet!
推薦閱讀:
- HTML+JavaScript模擬實現簡單的時鐘效果
- vue實現水波漣漪效果的點擊反饋指令
- 原生JS封裝vue Tab切換效果
- 詳解CSS不受控制的position fixed
- html+css+js實現簡易版ChatGPT聊天機器人