python單測框架之pytest常見用法
單測框架的作用
- 測試發現:從多個文件中尋找測試用例。
- 測試執行:按照一定順序去執行並且生成結果。
- 測試斷言:判斷最終結果與實際結果的差異。
- 測試報告:統計測試進度、耗時、通過率,生成測試報告。
pytest簡介
pytest是python的單測框架,使用靈活,插件豐富,以下是pytest常用的插件
- pytest
- pytest-html:生成html測試報告插件
- pytest-xdist:多線程執行用例插件
- pytest-ordering:自定義用例順序插件
- pytest-rerunfailures:失敗重跑插件
- allure-pytest:生成allure美觀測試報告插件
pip install 就行,隻有有這些插件,下面的某些命令行才生效
pytest默認規則
- 模塊名必須以test_開頭或者_test結尾
- 類名必須以Test開頭
- 測試方法必須以test開頭
- pytest用例運行順序默認從上到下(代碼中可以使用裝飾器@pytest.mark.run(order=1)來指定執行順序)
使用pytest.ini文件可以修改默認規則
pytest的運行方式
主函數模式
import pytest

if __name__ == '__main__':
    pytest.main(["-vs", "./test_demo/test_demo1.py"])
這樣就可以運行所有用例
命令行模式
pytest -vs ./test_demo/test_demo1.py
參數詳解
- -s:輸出調試的信息
- -v:表示詳細的方式輸出
- ./test_demo/test_demo1.py表示運行指定模塊,相對路徑表示
- ./test_demo/test_demo1.py::TestCase1::test_case1 nodeid表示,代表運行./test_demo/test_demo1.py模塊下的TestCase1類的test_case1 方法
- -n分佈式運行測試用例,-n num,參數num代表幾個線程運行用例
- –reruns=2表示用例失敗重跑2次,常用於一些不穩定的用例,如web自動化
- -x隻要有一個用例報錯,那麼就會停止
- –maxfail=2,有2個用例失敗就會停止
- -k根據測試用例部分字符串指定測試用例,如 -k “ao”,代表會執行帶有ao名稱的字符串
讀取pytest.ini配置文件運行
不論是主函數模式還是命令行模式都會讀取這個配置文件,該文件需要使用gbk編碼,下面是這個配置文件的例子
[pytest]
# 命令行參數,用空格分隔
addopts = -vs
# 測試用例文件夾,可以自己配置
testpaths = ./test_demo
# 配置測試搜索的模塊文件名稱
python_files = test*.py
# 配置測試搜索的類名
python_classes = Test*
# 配置搜索的函數名
python_functions = test
分組執行
定義三個組,冒煙:smoke,用戶管理:user_manager,作業管理:worker_manager
目前有幾個用例給加個分組的裝飾器
import pytest


class TestDemo:

    @pytest.mark.somke
    def test_case1(self):
        print("1")

    @pytest.mark.user_manage
    def test_case2(self):
        print("2")

    @pytest.mark.worker_manage
    def test_case3(self):
        print("3")
配置文件中加入分組信息
markers =
    smoke:冒煙測試
    user_manage:用戶管理
    worker_manage:作業管理
運行
運行多組
import pytest

if __name__ == '__main__':
    pytest.main(["-vs", "-m smoke or usermanage"])
運行單組
import pytest

if __name__ == '__main__':
    pytest.main(["-vs", "-m smoke"])
忽略執行
無條件忽略
直接使用裝飾器@pytest.mark.skip(reason=“原因填寫”)
有條件忽略
使用裝飾器@pytest.mark.skipif(條件, 原因)
例子:
import pytest


class TestDemo:
    age = 18

    @pytest.mark.smoke
    def test_case1(self):
        print("1")

    @pytest.mark.usermanage
    @pytest.mark.skipif(age < 18, "未成年")
    def test_case2(self):
        print("2")

    @pytest.mark.workermanage
    @pytest.mark.skip(reason="原因填寫")
    def test_case3(self):
        print("3")
pytest中的前後置處理
為什麼需要前後置?比如執行用例前需要做一些準備工作,比如打開瀏覽器,在執行用例後需要一些後置工作,比如關閉瀏覽器
模塊級別
在每個模塊執行前會調用setup_module方法,在每個模塊執行後會使用teardown_module方法。
例子:
import pytest


def setup_module():
    print("模塊用例前執行")


def teardown_module():
    print("模塊用例後執行")


class TestDemo:
    def test_case1(self):
        print("1")

    def test_case2(self):
        print("2")

    def test_case3(self):
        print("3")


class TestDemo2:
    def test_case4(self):
        print("4")
結果:
test_demo/test_demo2.py::TestDemo::test_case1 模塊用例前執行
1
PASSED
test_demo/test_demo2.py::TestDemo::test_case2 2
PASSED
test_demo/test_demo2.py::TestDemo::test_case3 3
PASSED
test_demo/test_demo2.py::TestDemo2::test_case4 4
PASSED模塊用例後執行
類級別
類級別函數 setup_class/teardown_class 對類有效,位於類中,在測試類中前後調用一次。
class TestDemo:
    def setup_class(self):
        print("類級別前置")

    def test_case1(self):
        print("1")

    def test_case2(self):
        print("2")

    def test_case3(self):
        print("3")

    def teardown_class(self):
        print("類級別後置")
test_demo/test_demo2.py::TestDemo::test_case1 模塊用例前執行
類級別前置
1
PASSED
test_demo/test_demo2.py::TestDemo::test_case2 2
PASSED
test_demo/test_demo2.py::TestDemo::test_case3 3
PASSED類級別後置
模塊用例後執行
方法級別
方法級別函數 setup_method/teardown_method和setup/teardown對類有效,也位於類中,這兩個效果一樣,在測試類中每個測試方法前後調用一次。
class TestDemo:
    def setup_method(self):
        print("方法級別前置")

    def test_case1(self):
        print("1")

    def test_case2(self):
        print("2")

    def test_case3(self):
        print("3")

    def teardown_method(self):
        print("方法級別後置")
test_demo/test_demo3.py::TestDemo::test_case1 方法級別前置

PASSED方法級別後置

test_demo/test_demo3.py::TestDemo::test_case2 方法級別前置

PASSED方法級別後置

test_demo/test_demo3.py::TestDemo::test_case3 方法級別前置

PASSED方法級別後置
部分用例的前後置 pytest.fixture裝飾器
import pytest

@pytest.fixture(scope="function", params=["1", "2", "3"], autouse=False, ids=None, name="new_name")
def my_feature(request):
    i = request.param
    print("前置")
    yield i
    print("後置")

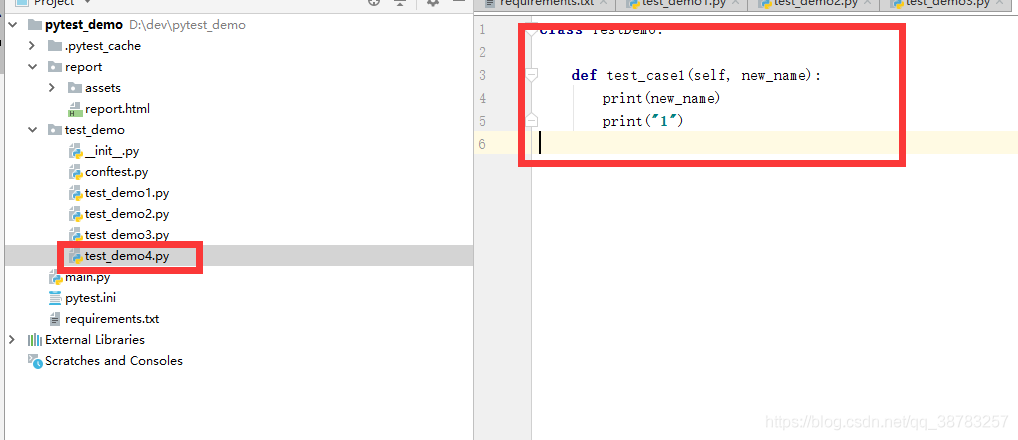
class TestDemo:

    def test_case1(self, new_name):
        print(new_name)
        print("1")
結果
test_demo/test_demo4.py::TestDemo::test_case1[1] 前置
1
1
PASSED後置test_demo/test_demo4.py::TestDemo::test_case1[2] 前置
2
1
PASSED後置test_demo/test_demo4.py::TestDemo::test_case1[3] 前置
3
1
PASSED後置
- scope:表示作用域
- params:表示參數化,與yield使用會調用len(params)次用例,如例子所示,一般用於數據驅動
- autouse:默認使用,一般設置為false
- ids:params參數化時,給每個參數起名字
- name:給該方法取別名
pytest.fixture+conftest
fixture為session級別是可以跨.py模塊調用的,也就是當我們有多個.py文件的用例的時候,如果多個用例隻需調用一次fixture,那就可以設置為scope=“session”,並且寫到conftest.py文件裡。
conftest.py文件名稱時固定的,pytest會自動識別該文件。放到項目的根目錄下就可以全局調用瞭,如果放到某個package下,那就在改package內有效。
例子:
在包下創建conftest.py,註意,該配置隻在本包生效

和之前一樣使用

結果還是和之前一樣。
pytest生成測試報告
pytest-html插件生成報告
pytest -vs --html ./report/report.html
參數化與數據驅動
主要用的裝飾器是@pytest.mark.parametrize(argnames, argvalues)
不帶名字數據驅動
import pytest

class TestDemo:
    @pytest.mark.parametrize("args",[(4399, 'AAAA'), (2012, 'BBBB')])
    def test_case1(self, args):
        print(args)
結果:
test_demo/test_demo4.py::TestDemo::test_case1[args0] (4399, ‘AAAA’)
PASSED
test_demo/test_demo4.py::TestDemo::test_case1[args1] (2012, ‘BBBB’)
PASSED 帶名字的數據驅動
import pytest

class TestDemo:
    @pytest.mark.parametrize("arg1,arg2", [(4399, 'AAAA'), (2012, 'BBBB')])
    def test_case1(self, arg1, arg2):
        print(arg1, arg2)
結果:
test_demo/test_demo4.py::TestDemo::test_case1[4399-AAAA] 4399 AAAA
PASSED
test_demo/test_demo4.py::TestDemo::test_case1[2012-BBBB] 2012 BBBB
PASSED
到此這篇關於python單測框架之pytest慣用法的文章就介紹到這瞭,更多相關python單測框架pytest內容請搜索WalkonNet以前的文章或繼續瀏覽下面的相關文章希望大傢以後多多支持WalkonNet!
推薦閱讀:
- Pytest框架 conftest.py文件的使用詳解
- pytest使用parametrize將參數化變量傳遞到fixture
- Python自動化測試pytest中fixtureAPI簡單說明
- Pytest中conftest.py的用法
- Python測試框架pytest高階用法全面詳解