基於python使用OpenCV進行物體輪廓排序
1 引言
在進行圖像處理過程中,我們經常會遇到一些和物體輪廓相關的操作,比如求目標輪廓的周長面積等,我們直接使用Opencv的findContours函數可以很容易的得到每個目標的輪廓,但是可視化後, 這個次序是無序的,如下圖左側所示:
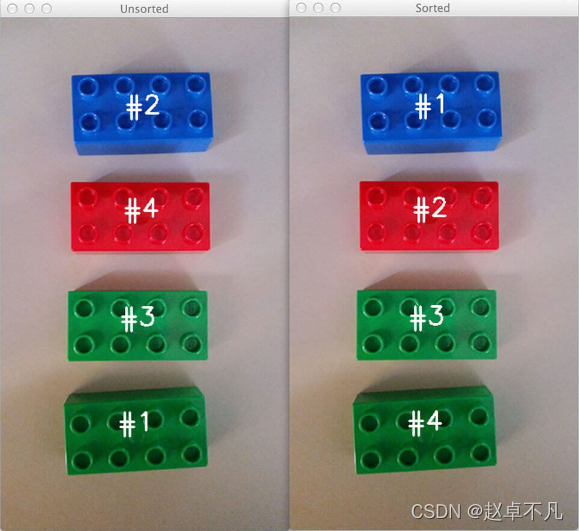
本節打算實現對物體輪廓進行排序,可以實現從上到下排序或者從左倒右排序,達到上圖右側的可視化結果.
2 栗子
2.1 讀取圖像
首先,我們來讀取圖像,並得到其邊緣檢測圖,代碼如下:
image = cv2.imread(args['image'])
accumEdged = np.zeros(image.shape[:2], dtype='uint8')
for chan in cv2.split(image):
    chan = cv2.medianBlur(chan, 11)
    edged = cv2.Canny(chan, 50, 200)
    accumEdged = cv2.bitwise_or(accumEdged, edged)
cv2.imshow('edge map', accumEdged)
運行結果如下:
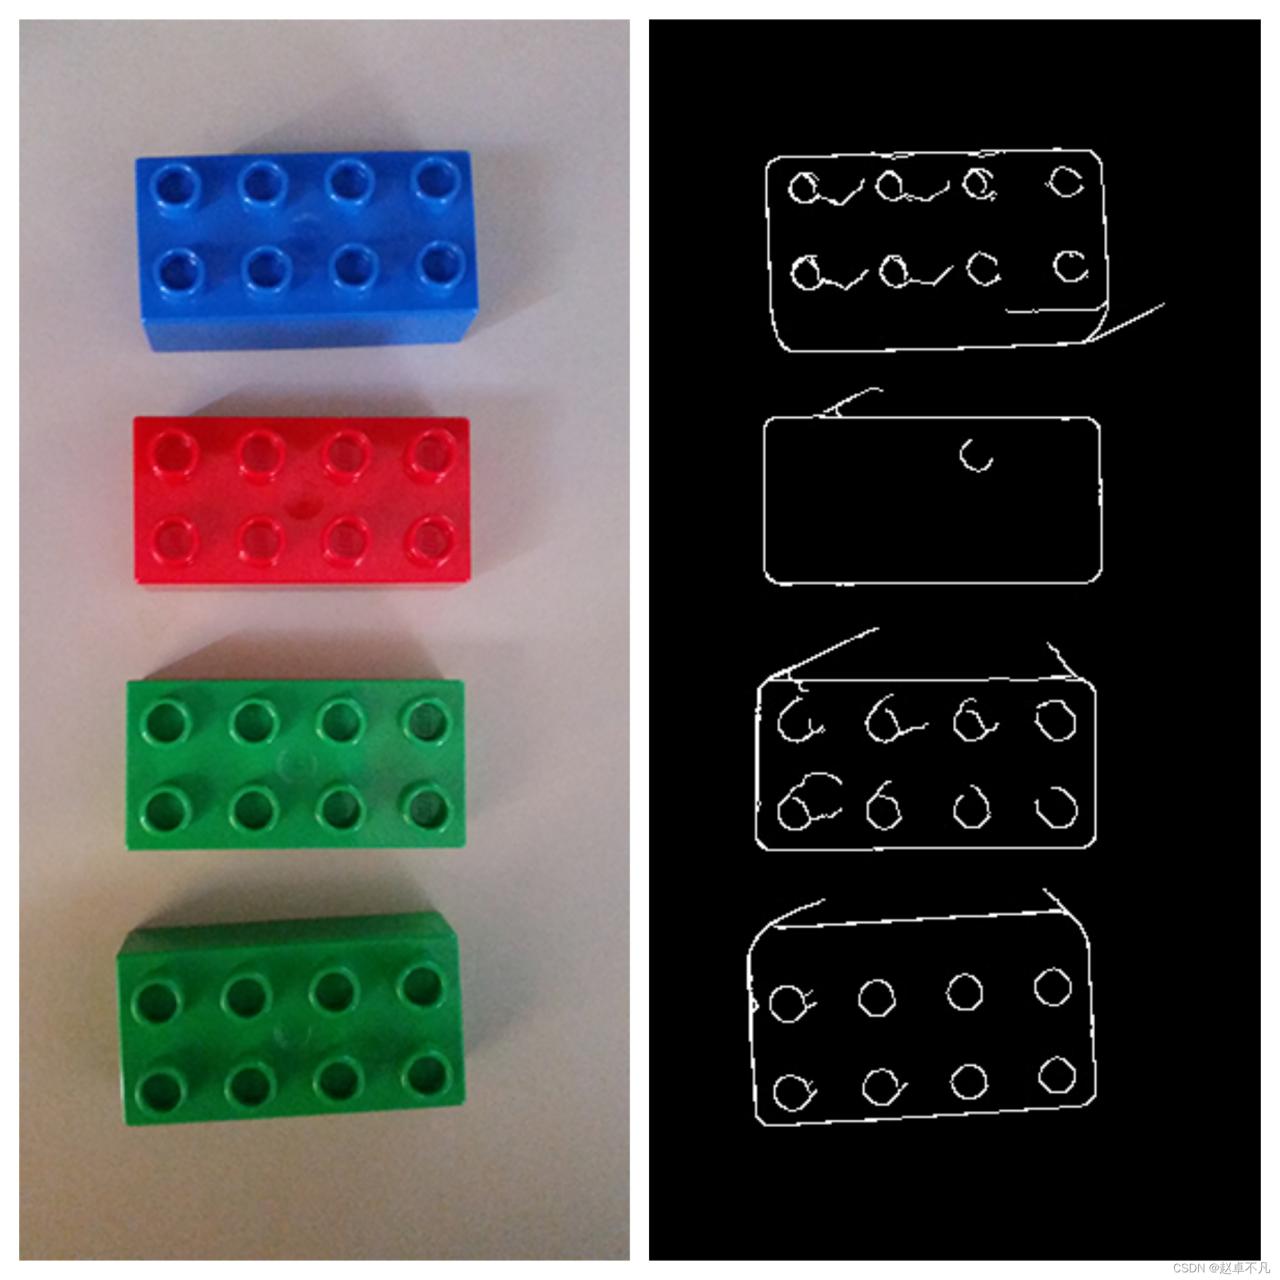
左側為原圖,右側為邊緣檢測圖.
2.2 獲取輪廓
opencv-python中查找圖像輪廓的API為:findContours 函數,該函數接收二值圖像作為輸入,可輸出物體外輪廓、內外輪廓等等.
代碼如下:
cnts = cv2.findContours(accumEdged.copy(), cv2.RETR_EXTERNAL,  cv2.CHAIN_APPROX_SIMPLE)
cnts = grab_contours(cnts)
cnts = sorted(cnts, key=cv2.contourArea, reverse=True)[:5]
orig = image.copy()
# unsorted
for (i, c) in enumerate(cnts):
    orig = draw_contour(orig, c, i)
cv2.imshow('Unsorted', orig)
cv2.imwrite("./Unsorted.jpg", orig)
運行結果如下:
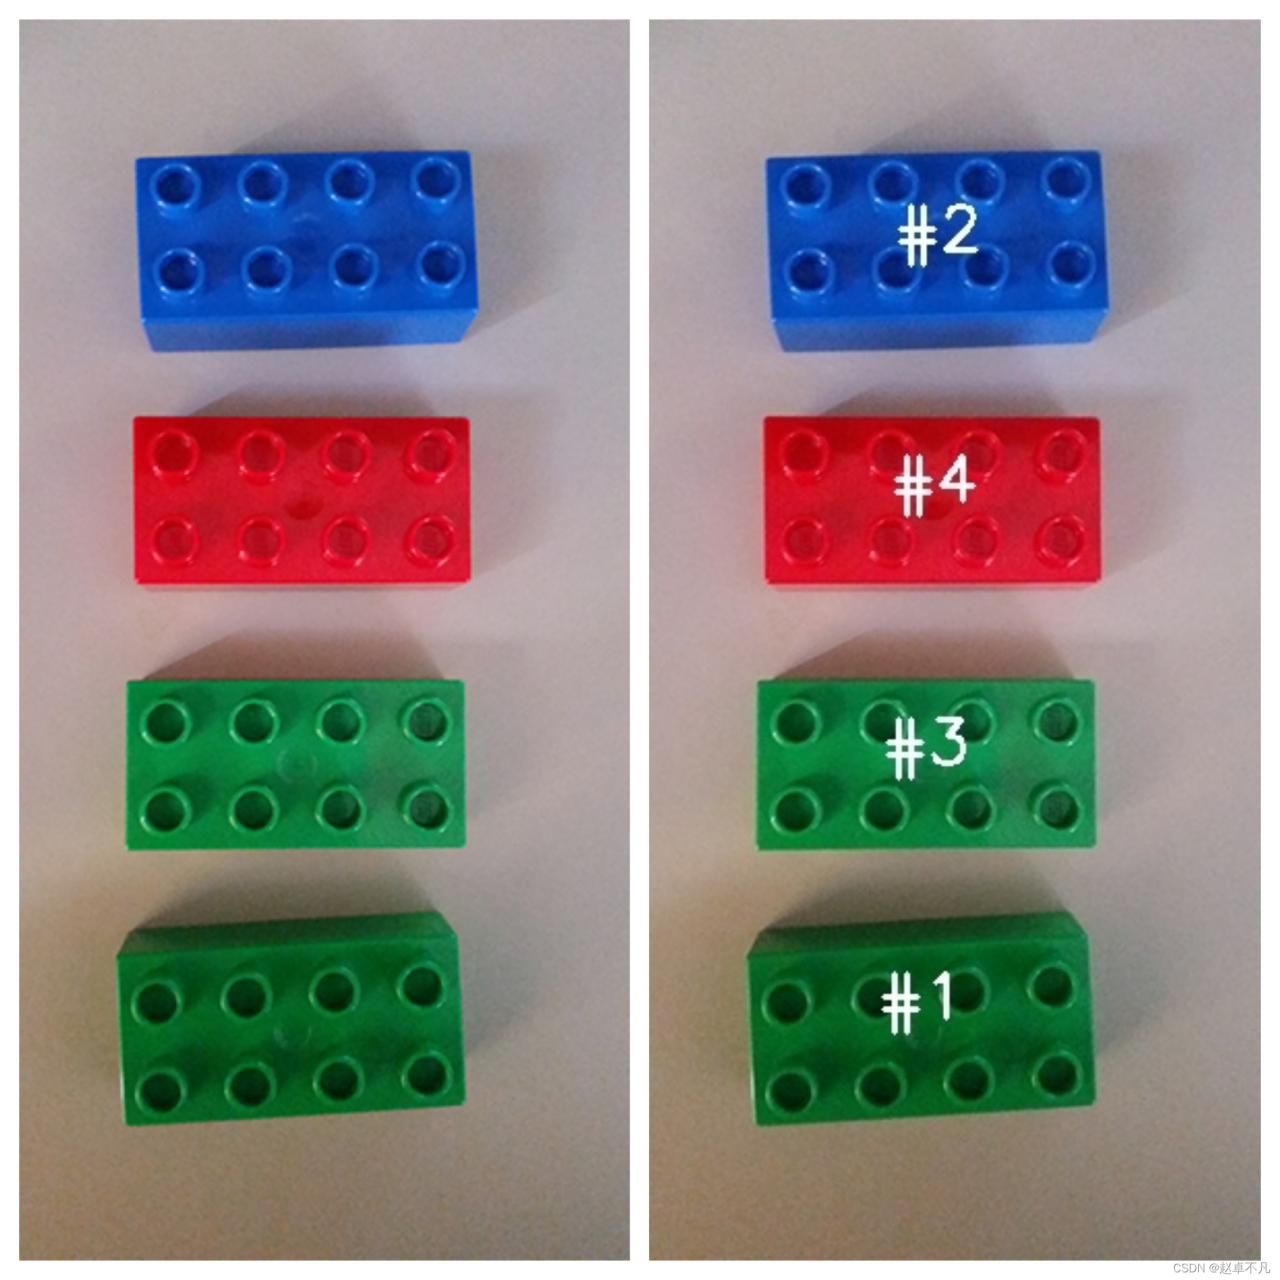
需要註意的是,在OpenCV2.X版本,函數findContours返回兩個值,
函數聲明如下:
contours, hierarchy = cv2.findContours(binary,cv2.RETR_TREE,cv2.CHAIN_APPROX_SIMPLE)
但是在OpenCV3以上版本,該函數的聲明形式如下:
image, contours, hierarchy = cv2.findContours(binary, cv2.RETR_TREE, cv2.CHAIN_APPROX_SIMPLE)
所以為瞭適配兩種模式,我們實現函數grab_contours 來根據不同的版本,選擇對應的返回輪廓的下標位置,
代碼如下:
def grab_contours(cnts):
    # if the length the contours tuple returned by cv2.findContours
    # is '2' then we are using either OpenCV v2.4, v4-beta, or
    # v4-official
    if len(cnts) == 2:
        cnts = cnts[0]

    # if the length of the contours tuple is '3' then we are using
    # either OpenCV v3, v4-pre, or v4-alpha
    elif len(cnts) == 3:
        cnts = cnts[1]

    return cnts
2.3 輪廓排序
通過上述步驟,我們得到瞭圖像中的所有物體的輪廓,接下來我們定義函數sort_contours函數來實現對輪廓進行排序操作,該函數接受method參數來實現按照不同的次序對輪廓進行排序,比如從左往右,或者從右往左.
代碼如下:
def sort_contours(cnts, method='left-to-right'):
    # initialize the reverse flag and sort index
    reverse = False
    i = 0
    # handle if sort in reverse
    if method == 'right-to-left' or method == 'bottom-to-top':
        reverse = True
    # handle if sort against y rather than x of the bounding box
    if method == 'bottom-to-top' or method == 'top-to-bottom':
        i = 1

    boundingBoxes = [cv2.boundingRect(c) for c in cnts]
    (cnts, boundingBoxes) = zip(*sorted(zip(cnts, boundingBoxes), key=lambda b: b[1][i], reverse=reverse))
    return (cnts, boundingBoxes)
上述代碼的核心思想為先求出每個輪廓的外接矩形框,然後通過對外接框按照x或y坐標排序進而來實現對輪廓的排序.
調用代碼如下:
# sorted
(cnts, boundingboxes) = sort_contours(cnts, method=args['method'])
for (i, c) in enumerate(cnts):
    image = draw_contour(image, c, i)
cv2.imshow('Sorted', image)
cv2.waitKey(0)
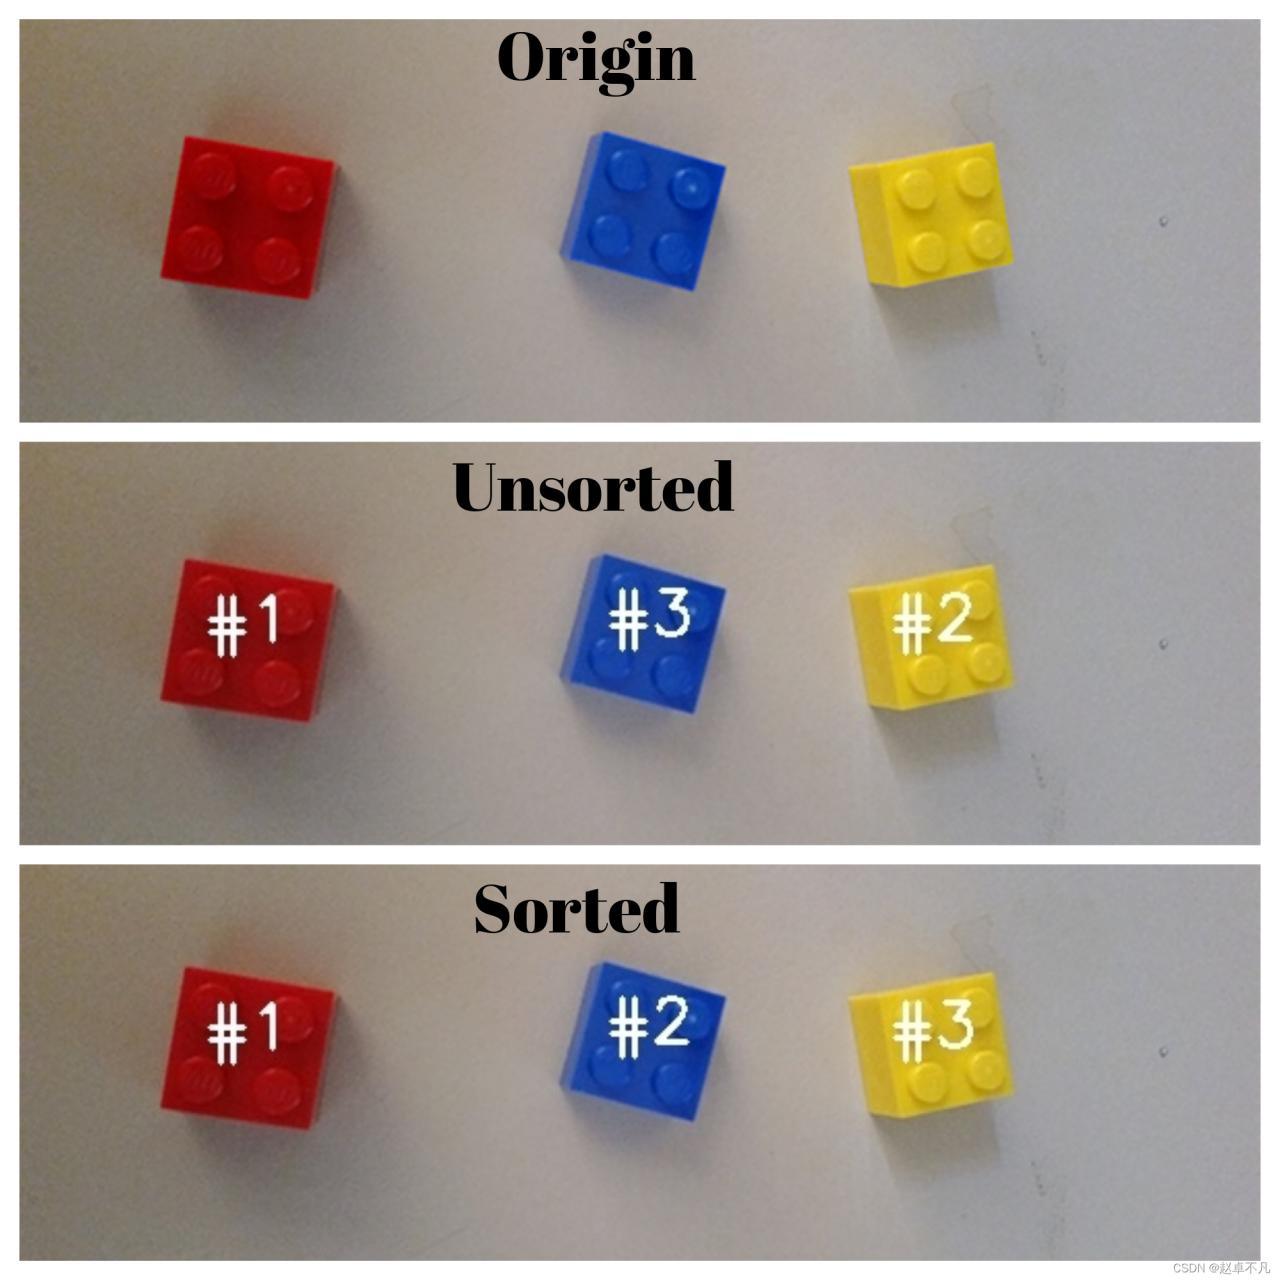
運行結果如下:
2.4 其他結果
利用上述代碼,我們也可以實現從左往右的排序,如下所示:
3 總結
本文利用OpenCV實現瞭對物體輪廓按指定順序進行排序的功能,並給出瞭完整的代碼示例.
到此這篇關於基於python使用OpenCV進行物體輪廓排序的文章就介紹到這瞭,更多相關OpenCV進行物體輪廓排序內容請搜索WalkonNet以前的文章或繼續瀏覽下面的相關文章希望大傢以後多多支持WalkonNet!
推薦閱讀:
- 基於Opencv圖像識別實現答題卡識別示例詳解
- python OpenCV實現答題卡識別判卷
- Python OpenCV 基於圖像邊緣提取的輪廓發現函數
- python opencv 畫外接矩形框的完整代碼
- 使用 OpenCV-Python 識別答題卡判卷功能